Cherry Crumb Bars: A Sweet Slice of Summer You Can Bake Anytime
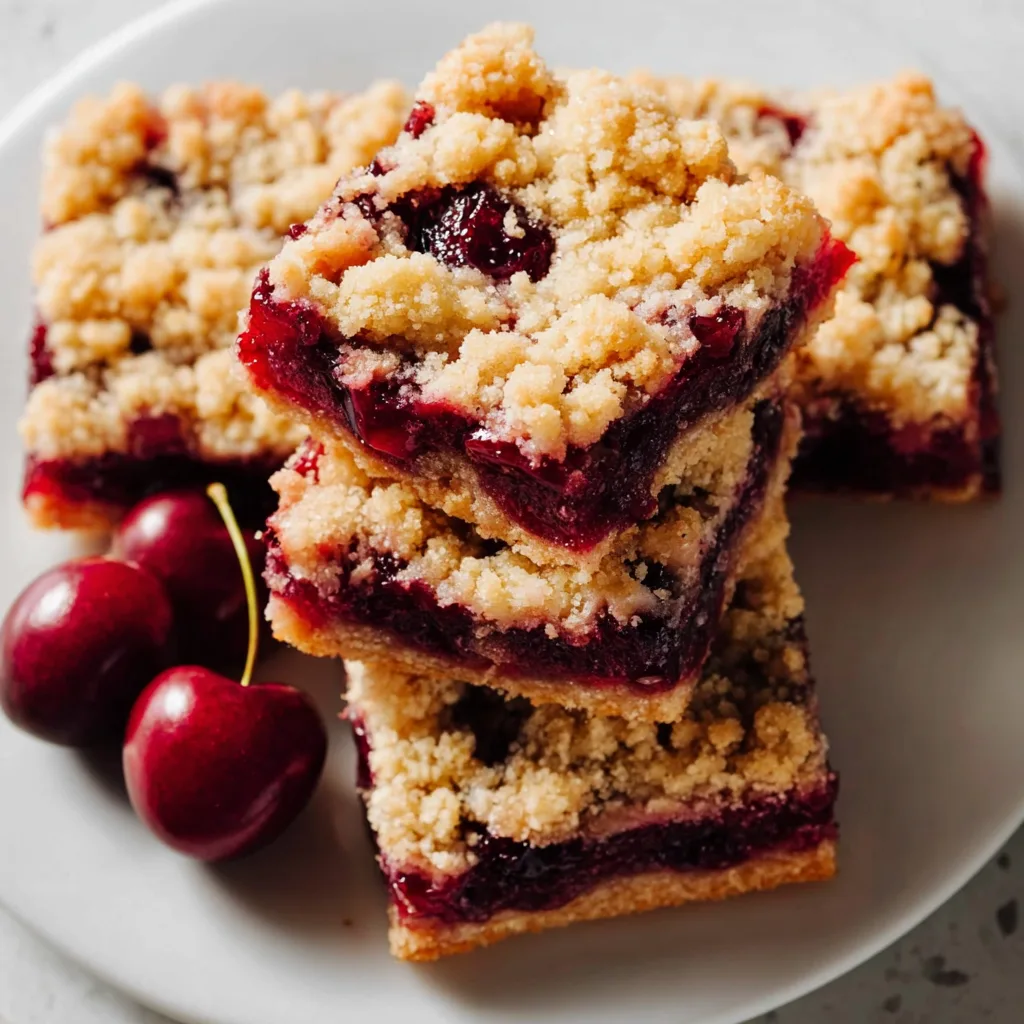
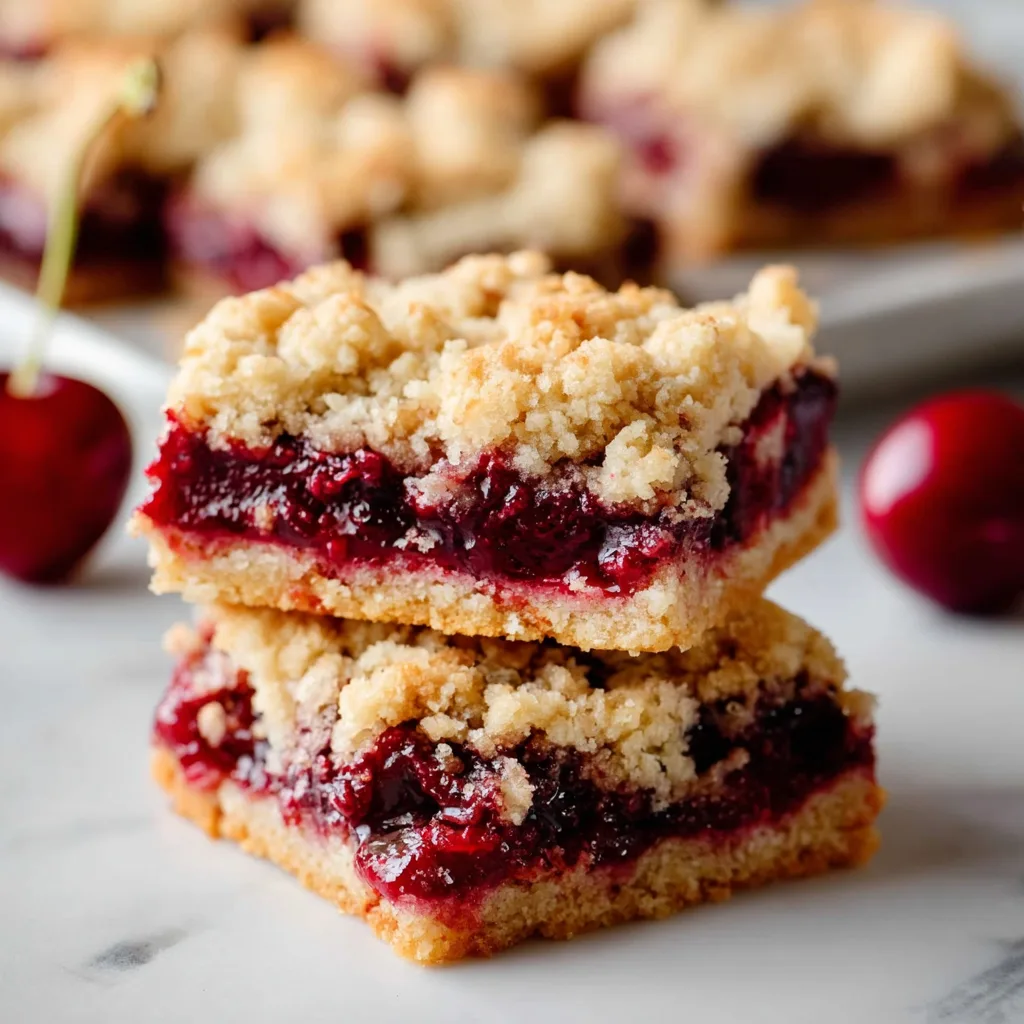
There’s something timeless about a dessert that perfectly balances sweet, tart, buttery, and crumbly textures all in one bite. Cherry Crumb Bars do exactly that — a delightful layered treat featuring a buttery oat crust, a juicy cherry filling, and a golden crumb topping that crackles lightly when you take your first bite.
Whether you’re craving a nostalgic summer dessert, planning a festive potluck contribution, or simply in the mood for a fruity indulgence, these cherry crumb bars promise homemade charm and irresistible flavor. They’re easy to make, transport beautifully, and taste like they came straight out of a cozy farmhouse kitchen.
Let’s dive into how to create these golden, ruby-filled beauties from scratch.
🍒 Why You’ll Love These Cherry Crumb Bars
- Bursting with real fruit flavor: Fresh or frozen cherries both work beautifully here, giving you flexibility no matter the season.
- Soft yet crumbly texture: The buttery oat crust doubles as the base and topping — simple, rustic, and delicious.
- Perfect make-ahead dessert: These bars keep well for days, making them ideal for gatherings or meal prep.
- Freezer-friendly: You can freeze them for up to three months, ready for a quick dessert fix anytime.
🌟 Ingredients
Here’s everything you’ll need to make a batch of Cherry Crumb Bars. Simple pantry staples and fresh cherries come together to create something magical.
For the Crust & Crumb Topping:
- 2 cups all-purpose flour
- 1 ½ cups old-fashioned oats
- 1 cup brown sugar (packed)
- ¾ cup unsalted butter (melted and cooled)
- 1 tsp baking powder
- ½ tsp salt
- 1 tsp vanilla extract
- Zest of 1 lemon (optional but highly recommended)

For the Cherry Filling:
- 3 cups cherries (fresh or frozen, pitted)
- ½ cup granulated sugar
- 2 tbsp cornstarch
- 1 tbsp lemon juice
- 1 tsp almond extract (optional, enhances the cherry flavor)
🥣 Instructions
Step 1: Prepare the filling.
In a medium saucepan, combine cherries, sugar, lemon juice, and cornstarch. Stir over medium heat until the cherries release their juices and the mixture thickens (about 5–7 minutes). Remove from heat, stir in the almond extract if using, and let cool slightly.
Step 2: Make the crumb mixture.
In a large mixing bowl, stir together flour, oats, brown sugar, baking powder, salt, and lemon zest. Pour in melted butter and vanilla extract, then mix with a fork or your hands until crumbly. The texture should resemble moist sand with some small clumps.
Step 3: Build the base.
Preheat your oven to 350°F (175°C). Line a 9×13-inch baking pan with parchment paper, leaving some overhang for easy lifting later. Press about two-thirds of the crumb mixture firmly into the bottom of the pan to form an even crust.
Step 4: Add the filling.
Spread the cooled cherry mixture evenly over the crust. Make sure to distribute the fruit filling to the edges for even flavor in every bite.
Step 5: Add the topping.
Sprinkle the remaining crumb mixture over the cherries. Don’t press it down too much — you want those beautiful golden crumbles on top.
Step 6: Bake to perfection.
Bake for 35–40 minutes, or until the top is golden brown and the filling is bubbly around the edges.
Step 7: Cool and slice.
Allow the bars to cool completely in the pan before cutting them into squares. For clean cuts, refrigerate for at least 1 hour before slicing.
Cherry Crumb Bars
Ingredients
Equipment
Method
- Preheat oven to 350°F (175°C). Line a 9×13-inch baking pan with parchment paper.
- Combine flour, oats, brown sugar, baking powder, salt, vanilla, and lemon zest in a large bowl. Stir in melted butter until crumbly.
- Press two-thirds of the crumb mixture into the prepared pan to form the crust.
- In a saucepan, cook cherries, sugar, cornstarch, and lemon juice over medium heat until thickened. Remove from heat and stir in almond extract.
- Spread cherry mixture evenly over crust. Sprinkle remaining crumb mixture on top.
- Bake for 35–40 minutes until golden brown. Cool completely before slicing.
Notes
🍰 Tips for the Best Cherry Crumb Bars
- Use frozen cherries: No need to thaw! Just cook them a few extra minutes while preparing the filling.
- Try with other fruits: Swap cherries for blueberries, raspberries, or mixed berries — the recipe stays just as delicious.
- Add nuts for crunch: Sprinkle chopped pecans, almonds, or walnuts on top before baking for an added layer of texture.
- Serve warm with ice cream: A scoop of vanilla or almond ice cream turns this humble dessert into a restaurant-worthy treat.
🍒 Variations
1. Cherry Almond Bars:
Add ½ cup sliced almonds into the crumb mixture and a touch more almond extract to the filling for a nutty twist.
2. Chocolate Cherry Bars:
Stir in ½ cup mini chocolate chips into the top layer before baking. The melted chocolate pairs beautifully with tart cherries.
3. Vegan Cherry Crumb Bars:
Replace butter with coconut oil or vegan butter, and ensure the sugar is vegan-certified. The flavor stays wonderfully rich.
4. Gluten-Free Version:
Use certified gluten-free oats and substitute the flour with a 1:1 gluten-free baking blend.
🍋 Serving Suggestions
Cherry Crumb Bars are versatile — they work as both dessert and snack. Here are some fun serving ideas:
- At brunch: Serve smaller squares alongside coffee, fruit, and yogurt.
- As a picnic treat: Pack them in wax paper for easy grab-and-go bites.
- For holiday tables: Dust lightly with powdered sugar and serve on a platter garnished with fresh cherries and mint.
- As a frozen summer dessert: Chill them in the freezer for a few minutes before serving for a refreshing twist.
🏡 Storing and Freezing
Once cooled, store the bars in an airtight container at room temperature for up to 3 days. For longer storage, refrigerate for up to a week or freeze for up to 3 months. To thaw, simply leave them at room temperature for about an hour or microwave individual bars for 15–20 seconds.
🌸 Fun Fact
Cherries have been cherished for centuries — ancient Romans celebrated the fruit’s harvest season with festivals. In the U.S., cherries gained dessert fame in pies and preserves, later inspiring treats like Cherry Crumb Bars. Today, they remain a beloved ingredient symbolizing comfort and home-baked happiness.
💡 Why This Recipe Works
This recipe uses a simple “two-in-one” crumb mixture for both the crust and topping, cutting down on prep time without sacrificing texture. The cherry filling’s tangy sweetness is perfectly balanced by the buttery crumble, while oats add a rustic heartiness. It’s an easy, foolproof method that yields consistent, bakery-quality results every time.
⭐ Final Thoughts
If you’re looking for a dessert that’s easy to make, bursting with flavor, and guaranteed to impress, Cherry Crumb Bars are the perfect pick. They bridge the gap between comfort food and elegance, equally at home on a picnic blanket or a holiday dessert table.
Every bite offers a blend of juicy cherries, buttery crumb layers, and a nostalgic homemade touch. So grab those cherries and your mixing bowl — your next favorite dessert is just a bake away!