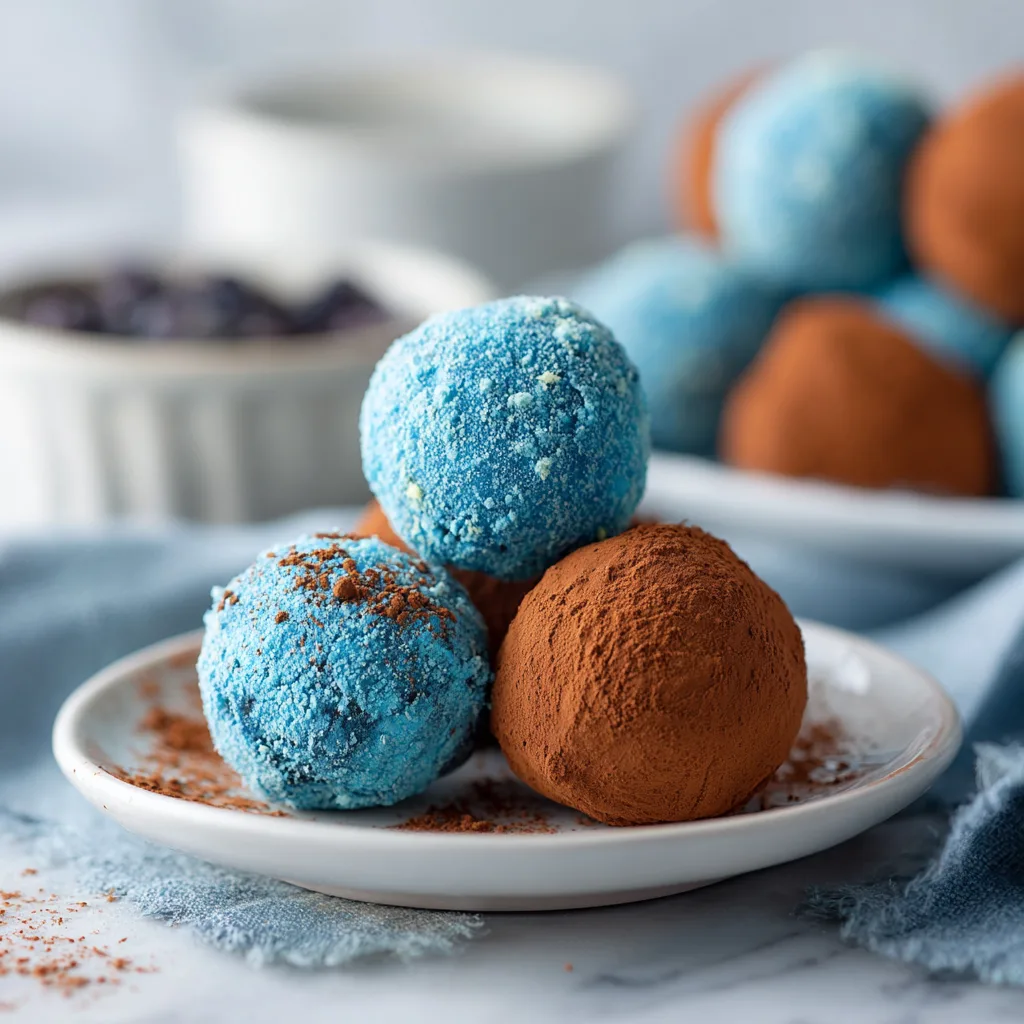
Easy Blue Christmas Truffles: A Festive No-Bake Treat Everyone Will Love
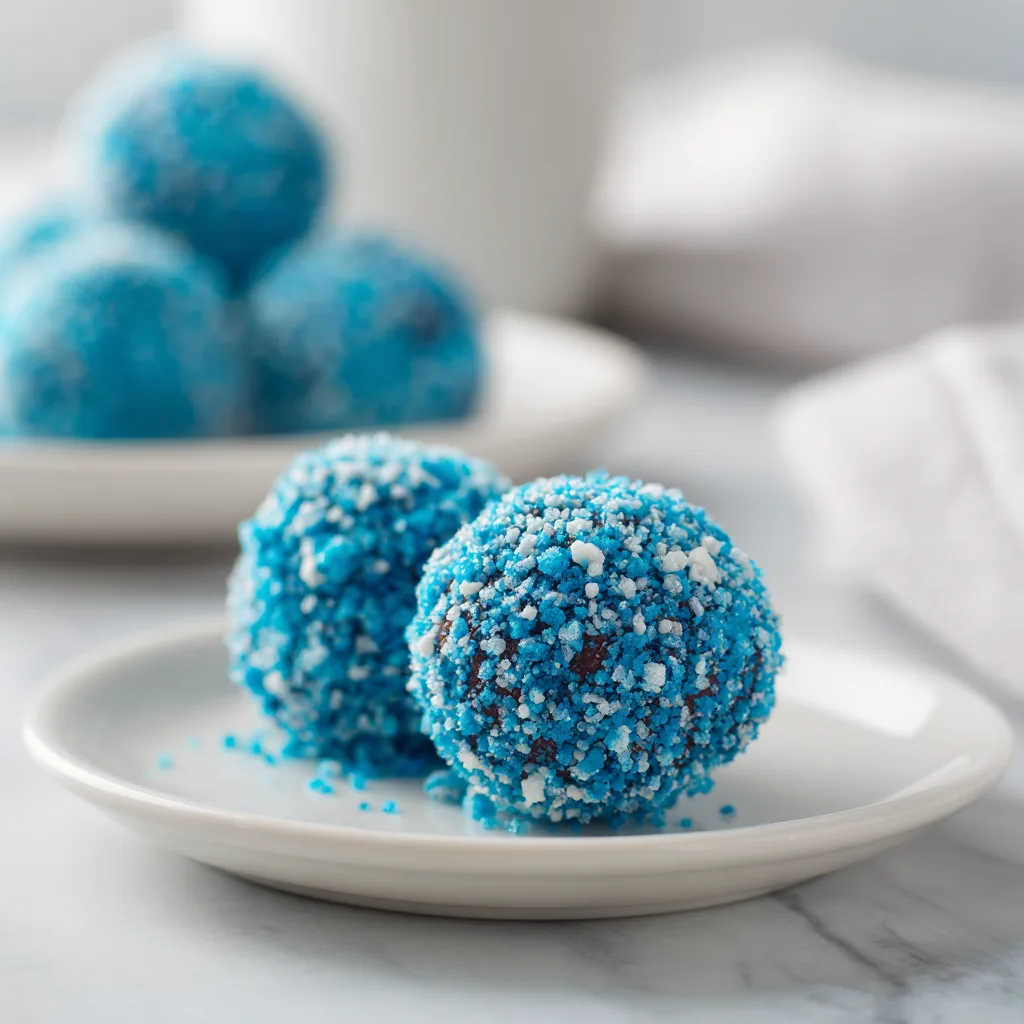
When the holiday season arrives, most of us are looking for treats that are fun, beautiful, and easy to make. Enter the Easy Blue Christmas Truffles—a gorgeous winter-themed dessert that feels like it came straight from the North Pole. With their icy blue color, rich creamy flavor, and no-bake convenience, these truffles effortlessly steal the show at cookie exchanges, Christmas parties, winter birthdays, and holiday dessert tables.
Unlike many seasonal desserts that require precise baking temperatures or long chill times, these truffles come together in minutes. They rely on a simple mixture of crushed cookies, cream cheese, vanilla, and white chocolate, transformed into velvety bites coated in blue-tinted chocolate. They taste like a decadent blend of cheesecake and candy—irresistibly smooth with a melt-in-your-mouth texture.
In this long-form guide, you’ll learn how to make perfect Easy Blue Christmas Truffles, how to style and serve them like a professional food blogger, and how to adapt the recipe for dietary needs, different holidays, or other flavor profiles. By the end, you’ll be fully equipped to create a dessert that’s as stunning as it is delicious.

Why These Easy Blue Christmas Truffles Are a Holiday Must-Make
They Are Incredibly Simple
No baking. No chilling overnight. No complicated tools.
Even beginner cooks can create impressive results with minimal effort.
They’re Eye-Catching
The beautiful icy aesthetic of blue and white perfectly matches winter celebrations, Frozen-themed parties, Hanukkah dessert tables, and Christmas gatherings.
They’re Adaptable
Switch flavors, decorations, coatings, or fillings, and you’ll have endless variations ready for any celebration.
They Make Perfect Gifts
Package them in small tins or boxes lined with parchment, sprinkle a little edible glitter, and you’ve got a bakery-quality gift ready in minutes.
Ingredients
Below is the ingredient list for the article version of the recipe. (The JSON recipe uses its own required format separately.)
- 1 package (about 36) vanilla sandwich cookies, crushed into fine crumbs
- 8 oz cream cheese, softened
- 1 tsp vanilla extract
- 2 cups white chocolate or white candy melts
- Blue gel food coloring
- Edible glitter, blue sugar crystals, or white sprinkles
- Optional: a few drops of peppermint extract for a minty version
Instructions
- In a large mixing bowl, combine crushed vanilla cookies and softened cream cheese. Mix until fully combined and smooth.
- Add vanilla extract and stir to incorporate evenly.
- Roll the mixture into small 1-inch truffle balls and place them on a parchment-lined baking sheet.
- Freeze the truffle balls for 10–15 minutes until firm enough to dip.
- Melt the white chocolate or candy melts in a microwave-safe bowl in 20–30 second increments, stirring until smooth.
- Tint the melted chocolate with blue gel food coloring until the desired shade is reached.
- Dip each chilled truffle ball into the melted blue coating, using a fork to allow excess to drip off.
- Immediately add sprinkles, edible glitter, or a drizzle of white chocolate before the coating sets.
- Chill for an additional 10 minutes to fully set.
- Serve cold or at room temperature.
Tips for Success
1. Use Gel Food Coloring, Not Liquid
Liquid coloring can cause chocolate to seize. Gel maintains its smooth consistency and vibrant color.
2. Freeze the Truffles Before Coating
This helps them keep their shape and ensures the coating hardens quickly without cracking.
3. Use High-Quality White Chocolate
Better chocolate means smoother melting, a cleaner flavor, and a satin-like finish on the truffles.
4. Add Flavor Variations
A few drops of peppermint or almond extract transform the truffles instantly.
Fun Variations
Snowflake White & Blue Swirl Truffles
Swirl white and blue chocolate together for a marbled winter wonderland effect.
“Frozen” Party Truffles
Add sparkle dust or silver sugar pearls for a princess-themed dessert.
Cookies & Cream Version
Use chocolate sandwich cookies instead of vanilla for a darker center.
Peppermint Snowball Version
Roll freshly dipped truffles in crushed peppermints.
Serving Suggestions
- Add them to a Christmas cookie platter for a pop of color.
- Serve them on a tiered tray for a winter brunch.
- Place them in individual wrappers for buffet-style parties.
- Pair with hot chocolate, peppermint mocha, or holiday cocktails.
- Gift them in decorative tins with a winter ribbon.
Storage & Make-Ahead Tips
- Refrigerate in an airtight container for up to 1 week.
- Freeze for up to 3 months, undipped or dipped.
- Let thaw in the refrigerator to prevent sweating.
These truffles hold their shape well, making them ideal for prepping ahead for busy holiday weeks.
Why Blue? (A Fun Seasonal Note)
Blue isn’t typically the first color associated with Christmas, but it has become a beloved winter theme—symbolizing icy landscapes, starry nights, and snow-covered forests. It also pairs beautifully with silver, white, and gold, making these truffles a trendy, modern alternative to traditional red-and-green desserts.
Easy Blue Christmas Truffles
Ingredients
Equipment
Method
- Preheat oven to 350°F (175°C). Line baking sheets with parchment paper.
- In a medium bowl, whisk together flour, baking powder, baking soda, salt, cinnamon, nutmeg, and cloves.
- In another bowl, cream butter and brown sugar until light and fluffy. Add egg and vanilla extract, mixing well.
- Gradually mix in dry ingredients, alternating with apple cider, until a soft batter forms.
- Drop batter onto baking sheets using a scoop, spacing 2 inches apart. Flatten slightly.
- Bake 12–15 minutes until set and lightly golden. Cool completely on wire racks.
- Beat softened butter with powdered sugar and vanilla. Add cream to reach desired filling consistency.
- Sandwich cookies with filling, serve immediately or store in airtight container.