Easy Pine Cone Brownies: A Festive, Fudgy Dessert for Holiday Baking
If there’s one dessert that instantly brings warmth and comfort to your holiday baking lineup, it’s brownies—rich, fudgy, indulgent, and beloved by nearly every sweet-toothed human on the planet. But what if you could elevate the classic brownie into something even more whimsical and perfectly seasonal? Easy Pine Cone Brownies do exactly that. Crafted with a holiday twist and decorated to resemble charming woodland pine cones, these brownies combine classic chocolate goodness with playful styling that makes them irresistible for Christmas parties, winter gatherings, school events, and cozy nights in by the fireplace.
This recipe transforms a wonderfully moist brownie base into a festive creation using simple techniques and ingredients you likely already have in your pantry. Even better, these Pine Cone Brownies look impressively ornate without requiring advanced decorating skills—making them perfect for beginner bakers, busy parents, and anyone wanting a crowd-pleasing seasonal dessert without the stress.
Whether you’re hosting a holiday cookie exchange, prepping treats for a winter-themed party, or simply craving a recipe that marries comfort and creativity, Easy Pine Cone Brownies are destined to become your go-to winter baking favorite.
Why You’ll Love These Easy Pine Cone Brownies
There are countless brownie recipes out there, but here’s what makes these stand out:
✔ Perfect for Holiday Presentation
These brownies aren’t just delicious—they’re visually stunning. Styled to mimic rustic pine cones, they’re as decorative as they are tasty.
✔ Beginner-Friendly
You don’t need frosting bags, piping skills, or fancy equipment. A simple mold-and-decorate approach creates a polished, professional result.
✔ Fudgy, Rich, and Ultra-Chocolatey
This recipe yields moist, dense brownies with a satisfying chew, thanks to the perfect balance of cocoa, butter, and sugar.
✔ Loved by All Ages
Kids are enchanted by the pine cone shapes. Adults love the deep chocolate flavor. Everyone wins.
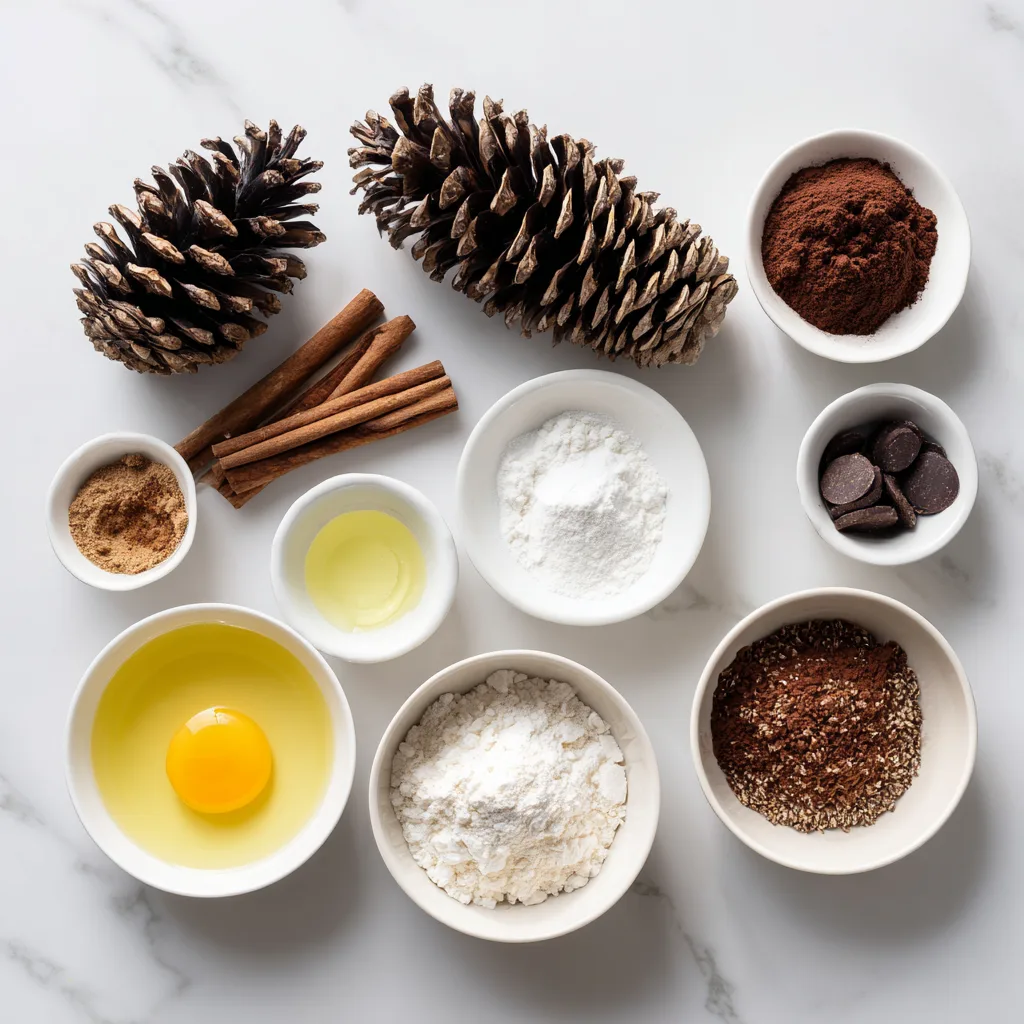
Ingredients (Brownie Batter)
- 1 cup unsalted butter (melted and slightly cooled)
- 1 ½ cups granulated sugar
- 1 cup brown sugar (packed)
- 4 large eggs
- 2 tsp vanilla extract
- 1 cup unsweetened cocoa powder
- 1 cup all-purpose flour
- ½ tsp baking powder
- ½ tsp salt
- 1 cup chocolate chips or chunks
- Powdered sugar (for dusting)
Ingredients (Decorating the Pine Cones)
- 1 cup chocolate frosting (store-bought or homemade)
- 2 cups almond slices (or cornflakes for a nut-free version)
- Extra cocoa or powdered sugar for dusting
Instructions
Making the Brownies
- Prepare the Pan
Preheat your oven to 350°F (175°C). Line an 8×8 or 9×9 inch baking pan with parchment paper, ensuring the edges hang over for easy removal. - Mix the Wet Ingredients
In a large bowl, whisk together melted butter, granulated sugar, and brown sugar. Mix until thick and glossy. Add eggs one at a time, whisking well after each addition. Stir in vanilla. - Combine Dry Ingredients
In a separate bowl, whisk cocoa powder, flour, baking powder, and salt until evenly combined. - Create the Brownie Batter
Gradually fold the dry ingredients into the wet mixture. Add chocolate chips and stir until the batter is smooth and cohesive. Do not overmix. - Bake
Spread the batter evenly into the prepared pan. Bake for 30–35 minutes or until edges are set and a toothpick inserted in the center comes out with a few moist crumbs. - Cool Completely
Allow brownies to fully cool on a rack. Once cooled, lift them out using the parchment handles.
Decorating the Pine Cone Brownies
- Shape the Brownies
Cut the brownie slab into rectangular sections, then trim and mold each one into a rounded, elongated pine-cone shape. You can gently compress the edges with your hands to form a tapered end. - Add the Frosting Layer
Spread chocolate frosting over each brownie shape, creating a sticky surface for the next step. - Attach the “Pine Cone Scales”
One by one, press almond slices (or cereal flakes) outward-facing into the frosting. Start from the base and layer upward to create the pine cone appearance. - Finishing Touches
Dust lightly with cocoa powder for a natural, earthy look or powdered sugar for a snow-kissed holiday feel. - Serve and Enjoy
These brownies are best served fresh but can be stored in an airtight container for up to 3 days.
Tips for Success
For Ultra-Fudgy Brownies
- Do not overbake. Pull them when the center is slightly underdone.
- Use high-quality cocoa powder for deeper chocolate flavor.
- A mix of brown and white sugar helps retain moisture.
Nut-Free Version
Swap almond slices for cornflakes. The result is equally beautiful and allergen-friendly.
Easy Party Presentation
Arrange the finished Pine Cone Brownies on a platter with rosemary sprigs, cranberries, or cinnamon sticks for a woodland winter display.
Make Ahead Tips
- Bake brownies up to 2 days in advance.
- Decorate the pine cone details the day of serving to maintain crisp texture.
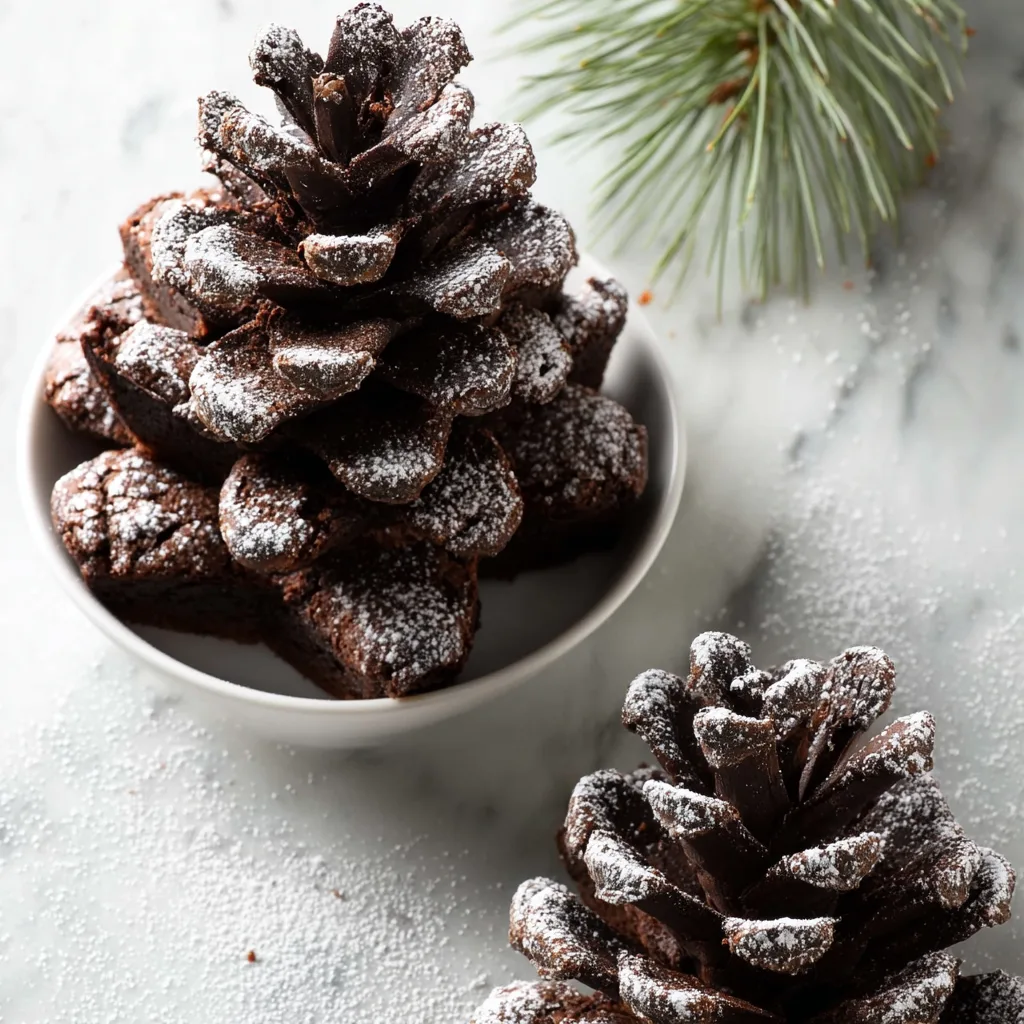
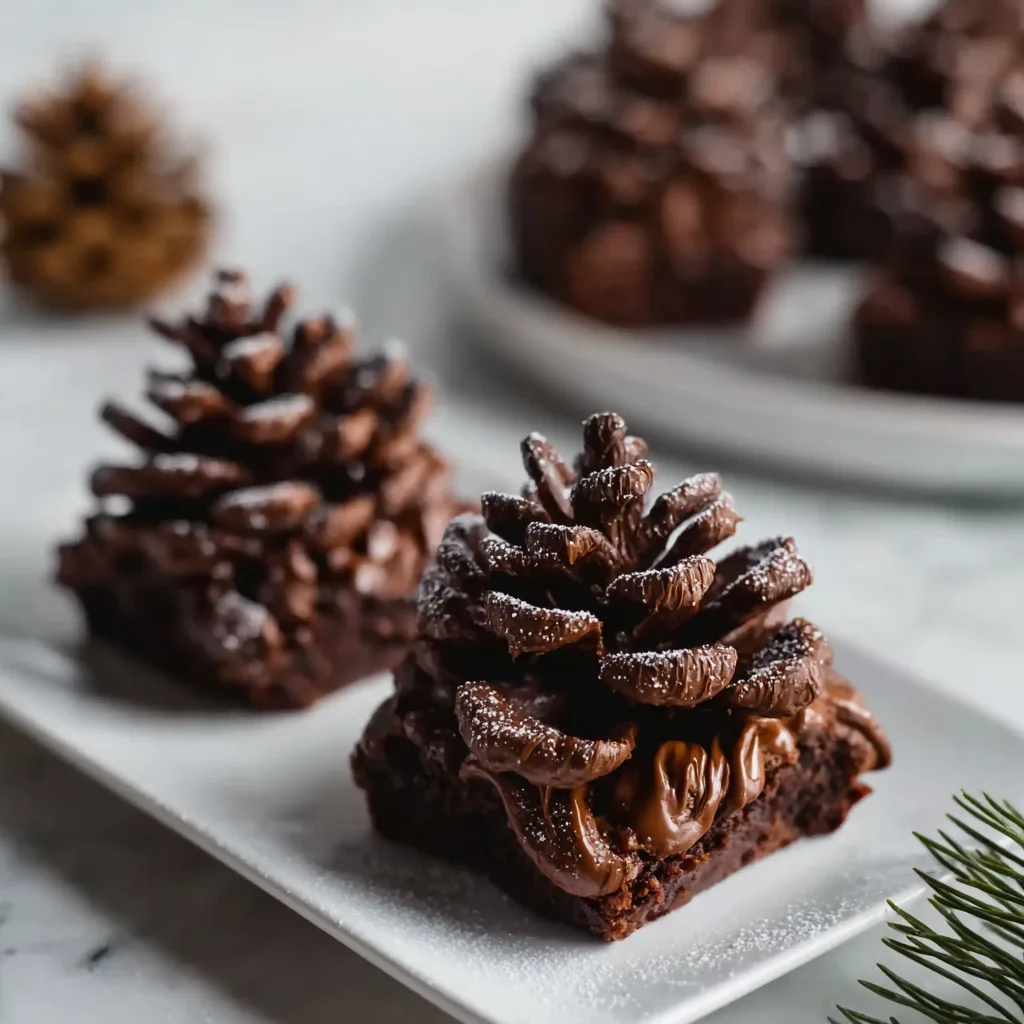
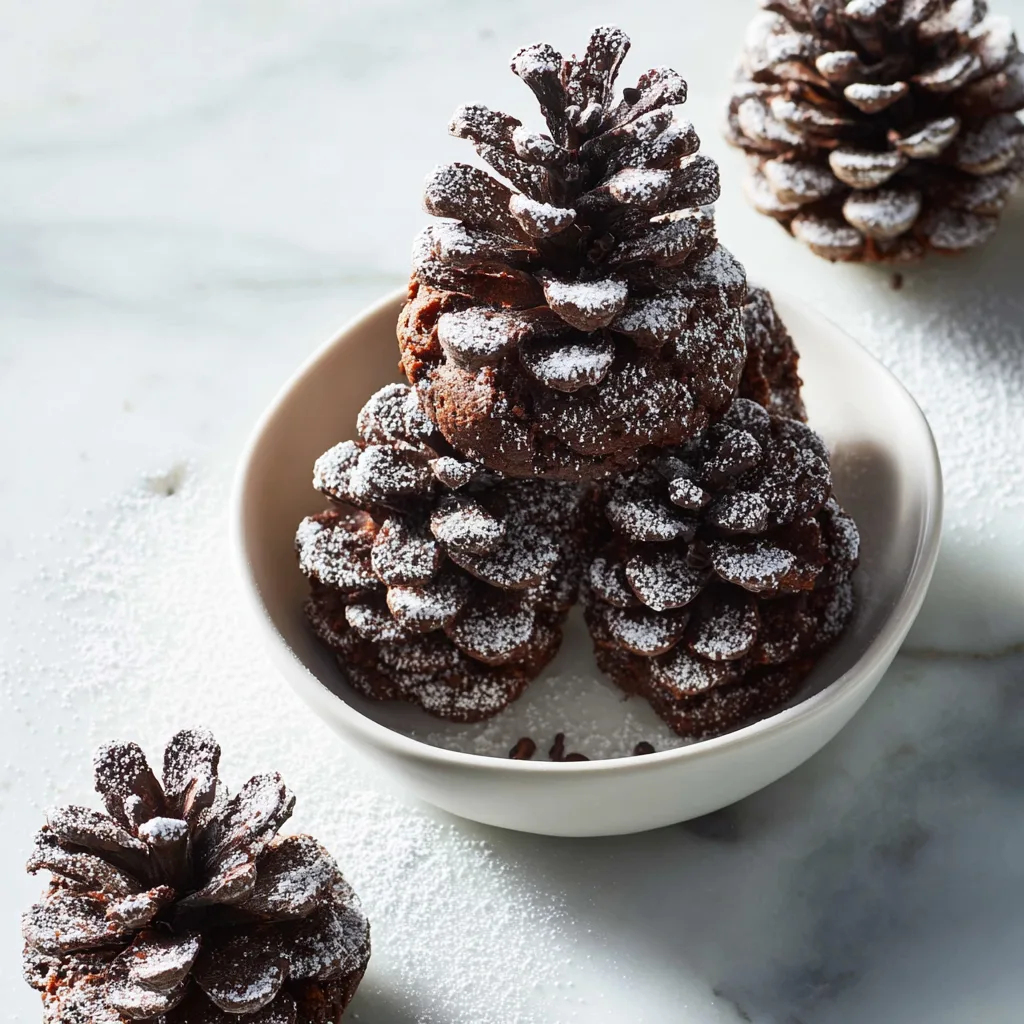
A beautifully styled plate of Easy Pine Cone Brownies dusted with powdered sugar on a white marble surface.
Serving Suggestions
These Pine Cone Brownies pair wonderfully with:
- Hot cocoa or peppermint lattes
- Vanilla bean ice cream
- Warm spiced cider
- A platter of holiday cookies
They also make adorable edible gifts. Pack them individually in clear cellophane treat bags tied with rustic twine and a sprig of pine for charm.
Fun Facts & Festive Inspiration
The pine cone motif has deep winter symbolism, representing warmth, harvest, and the evergreen forests traditionally associated with holiday folklore. In Scandinavian and Alpine winter festivals, pine cones are used as decorations to symbolize endurance through the cold months. These brownies pay homage to that rustic charm while adding the indulgent touch of chocolate.
Easy Pine Cone Brownies
Ingredients
Equipment
Method
- Preheat oven to 350°F (175°C). Line baking sheets with parchment paper.
- In a medium bowl, whisk together flour, baking powder, baking soda, salt, cinnamon, nutmeg, and cloves.
- In another bowl, cream butter and brown sugar until light and fluffy. Add egg and vanilla extract, mixing well.
- Gradually mix in dry ingredients, alternating with apple cider, until a soft batter forms.
- Drop batter onto baking sheets using a scoop, spacing 2 inches apart. Flatten slightly.
- Bake 12–15 minutes until set and lightly golden. Cool completely on wire racks.
- Beat softened butter with powdered sugar and vanilla. Add cream to reach desired filling consistency.
- Sandwich cookies with filling, serve immediately or store in airtight container.