
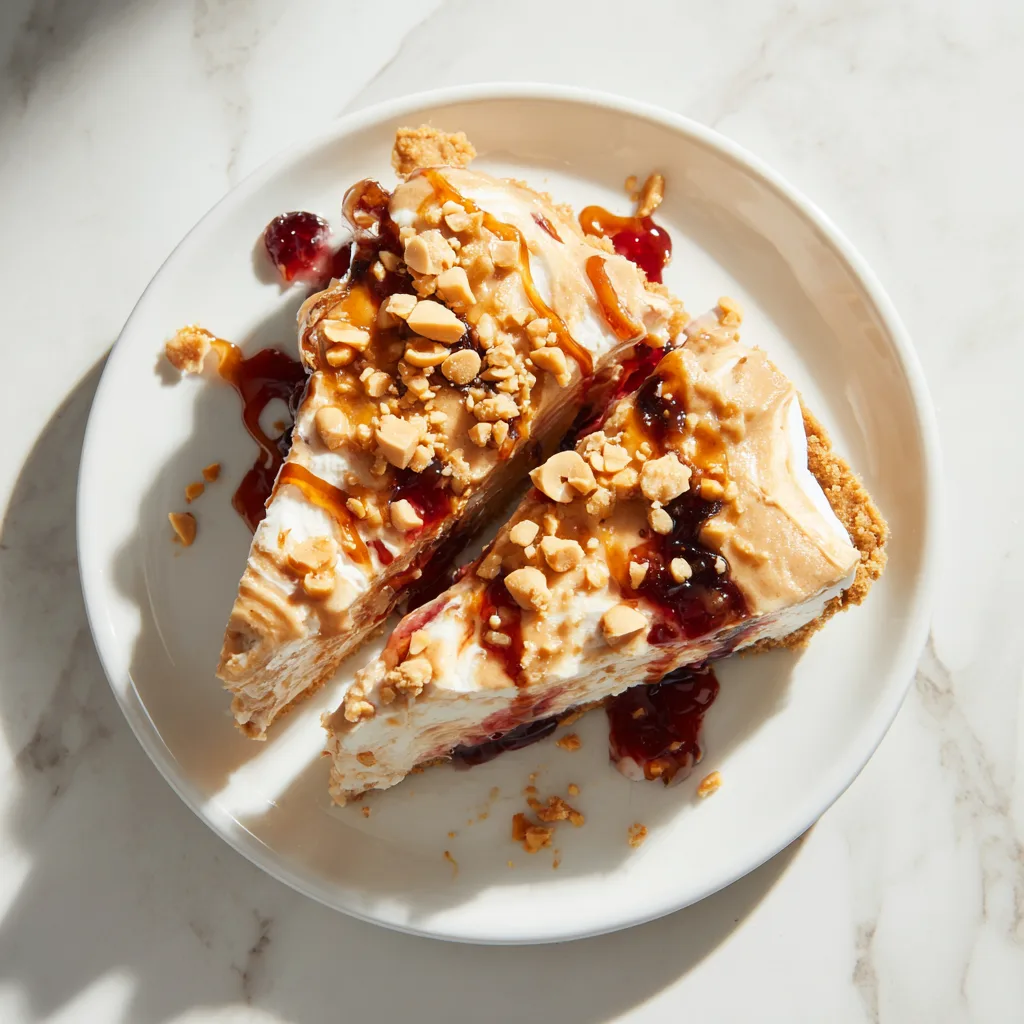
Peanut Butter and Jelly Pie: A No-Bake Treat That Steals Hearts
There are few desserts as nostalgic, fun, and indulgent as Peanut Butter and Jelly Pie. Inspired by the classic childhood sandwich, this pie transforms creamy peanut butter and sweet jelly into a luscious, no-bake dessert that is perfect for any occasion—from summer picnics to cozy nights at home. With a buttery graham cracker crust, smooth peanut butter filling, and vibrant jelly swirls, every slice is a combination of creamy, crunchy, and fruity goodness.
Whether you’re a dessert novice or a seasoned baker, this pie is incredibly approachable. In this guide, we’ll walk through ingredients, step-by-step instructions, pro tips, variations, and serving suggestions to make sure your pie comes out picture-perfect every time.
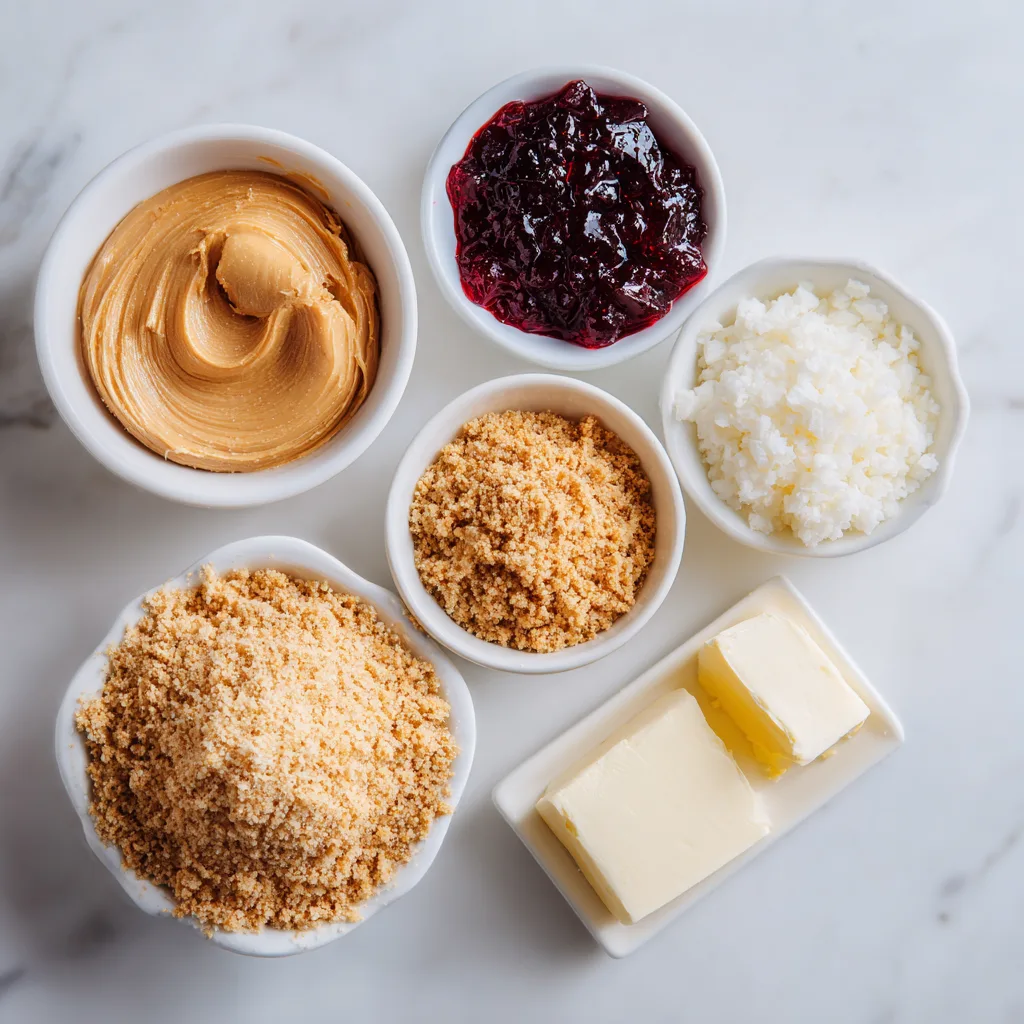
Ingredients
- For the Crust:
- 1 ½ cups graham cracker crumbs
- ¼ cup granulated sugar
- 6 tablespoons unsalted butter, melted
- For the Peanut Butter Filling:
- 1 cup creamy peanut butter
- 8 oz cream cheese, softened
- ½ cup powdered sugar
- 1 teaspoon vanilla extract
- 1 cup heavy cream, whipped
- For the Jelly Swirl:
- ½ cup strawberry or raspberry jelly
- 2 tablespoons water (optional, for thinning jelly)
- Optional Toppings:
- Crushed peanuts
- Drizzle of jelly
- Whipped cream
Instructions
- Prepare the Crust:
In a medium bowl, combine graham cracker crumbs, sugar, and melted butter. Mix until all crumbs are evenly coated and the mixture holds together when pressed. - Press the Crust:
Transfer the crumb mixture into a 9-inch pie pan. Press firmly into the bottom and up the sides using the back of a spoon or a flat-bottomed cup. Chill in the refrigerator for 15–20 minutes to set. - Make the Peanut Butter Filling:
In a large mixing bowl, beat the softened cream cheese and peanut butter until smooth and creamy. Add powdered sugar and vanilla extract, mixing until fully incorporated. - Whip the Cream:
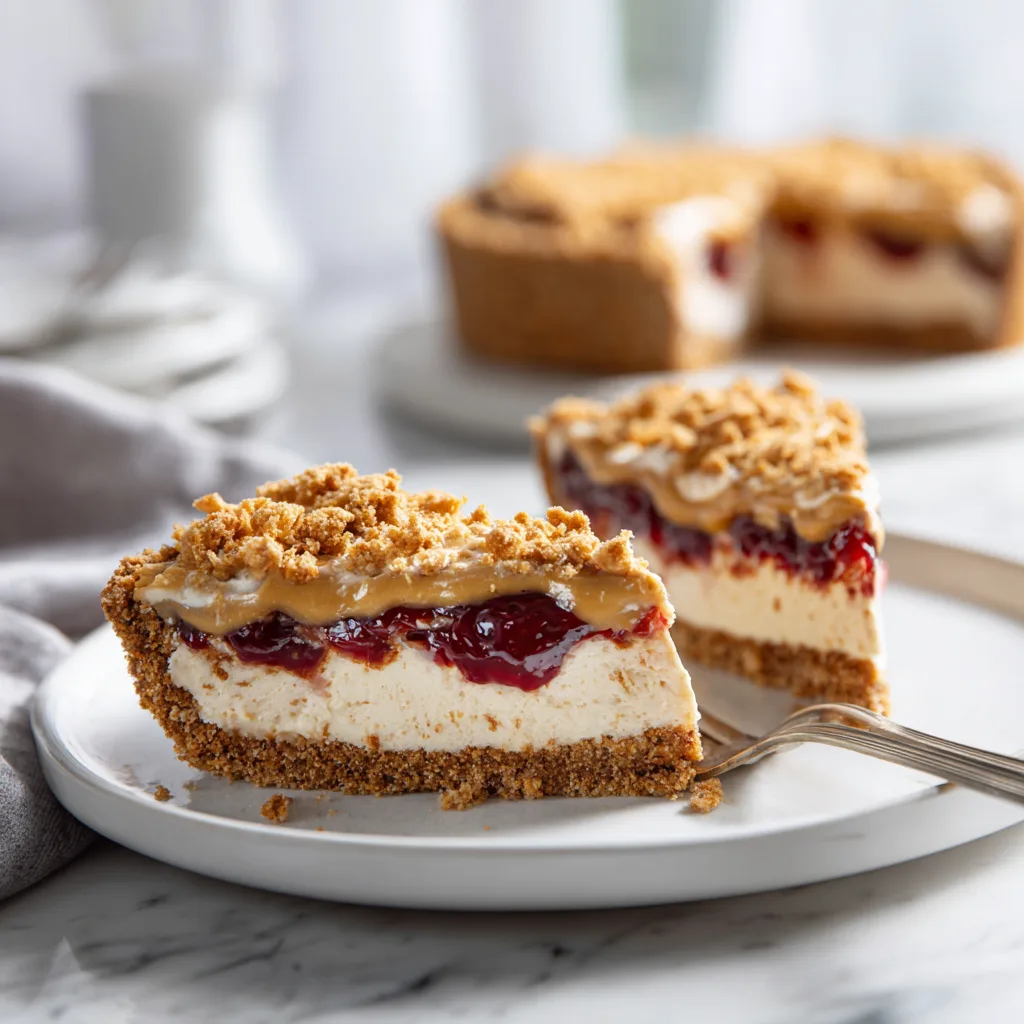
In a separate bowl, whip the heavy cream until stiff peaks form. Gently fold the whipped cream into the peanut butter mixture, creating a light and fluffy filling. - Assemble the Pie:
Spoon the peanut butter filling into the chilled crust, smoothing the top evenly. - Add the Jelly Swirl:
If jelly is thick, thin it slightly with water to make it easier to drizzle. Drop spoonfuls of jelly over the peanut butter layer and use a toothpick or skewer to create swirls throughout the filling. - Chill and Set:
Refrigerate the pie for at least 3–4 hours, or overnight for best results. The pie should be firm enough to slice cleanly. - Serve and Garnish:
Before serving, optionally sprinkle crushed peanuts on top and drizzle a bit of extra jelly. Slice carefully and serve chilled.
Tips for Perfect Peanut Butter and Jelly Pie
- Softened Ingredients: Always ensure cream cheese and peanut butter are softened to avoid lumps in the filling.
- Whipping Cream: For maximum fluffiness, chill your mixing bowl and beaters before whipping the cream.
- Swirling Technique: For an elegant look, use a toothpick to create gentle, flowing patterns rather than overmixing.
- Make Ahead: This pie keeps well in the fridge for 3–4 days, making it perfect for parties.
Peanut Butter and Jelly Pie
Ingredients
Equipment
Method
- In a medium bowl, combine graham cracker crumbs, sugar, and melted butter.
- Press the mixture into a 9-inch pie pan, forming the crust. Chill for 15–20 minutes.
- Beat cream cheese and peanut butter until smooth. Add powdered sugar and vanilla.
- Whip heavy cream until stiff peaks form and fold gently into the peanut butter mixture.
- Spoon filling into chilled crust and smooth the top.
- Drop spoonfuls of jelly on top and swirl with a toothpick.
- Chill the pie for 3–4 hours or overnight until firm.
- Optional: garnish with crushed peanuts and extra jelly before serving.
Notes
Variations to Try
- Nut-Free Version: Use sunflower seed butter instead of peanut butter for a nut-free alternative.
- Chocolate Lovers: Add a layer of chocolate ganache between the crust and peanut butter filling for a chocolate PB&J twist.
- Fruit Medley: Swap jelly for mixed berry compote or fresh fruit for a fresher, fruity flavor.
- Mini Pies: Make individual pies using muffin tins for a fun, party-friendly presentation.
Serving Suggestions
- Serve with a dollop of whipped cream and a fresh strawberry on top for a visually stunning dessert.
- Pair with a cold glass of milk or a cup of coffee for a classic, comforting combination.
- Perfect for birthdays, potlucks, or as a fun summer treat.
Fun Facts & Cultural Context
- The peanut butter and jelly sandwich originated in the United States in the early 1900s and quickly became a staple of American childhood lunches.
- Transforming this sandwich into a pie adds a gourmet twist while keeping the nostalgic flavors intact.
- This no-bake version is especially popular in warm months when an oven-free dessert is appreciated.
Why You’ll Love This Recipe
- Quick and easy to assemble
- No baking required
- Kid-friendly and party-ready
- Highly customizable with different nut butters, jellies, and toppings
From the buttery crust to the creamy peanut butter filling and the vibrant jelly swirl, this pie is a celebration of flavor and texture. Whether you’re making it for a special occasion or a weeknight treat, it’s guaranteed to impress.


