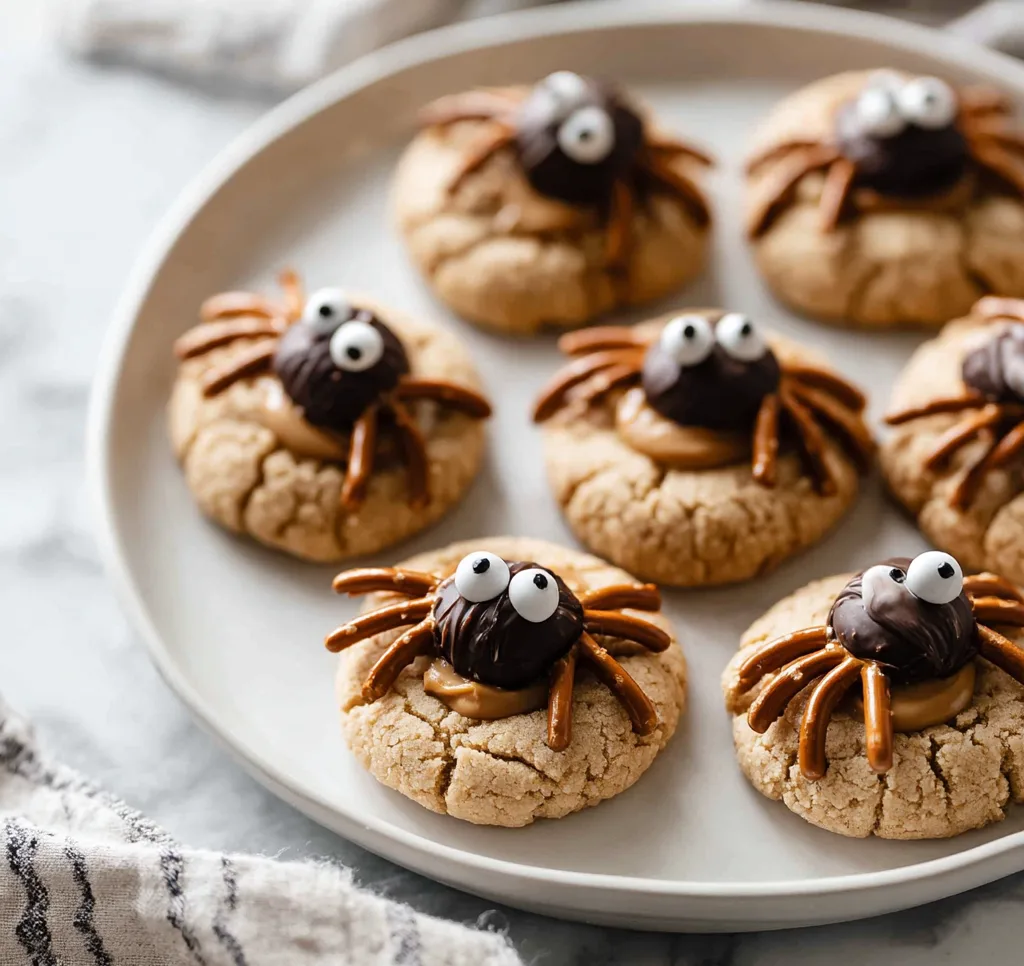
Spooktacular Halloween Peanut Butter Spider Cookies: The Perfect Creepy-Crawly Treat
Halloween brings out the creative baker in all of us, and few treats capture the spooky spirit quite like these adorable yet eerie Peanut Butter Spider Cookies. These delightfully frightful confections combine the beloved comfort of classic peanut butter cookies with the playful Halloween tradition of creating edible creatures that look almost too real to eat – almost being the key word, because these cookies are absolutely irresistible.
The genius of this recipe lies in its perfect balance of familiar flavors and creative presentation. At their core, these are rich, chewy peanut butter cookies with that signature dense texture and nutty sweetness that makes peanut butter cookies a perennial favorite. The magical transformation happens during the decorating phase, where simple ingredients like chocolate chips and pretzel sticks are strategically placed to create convincing spider bodies and legs that will have both children and adults delighted by their realistic appearance.
What makes these cookies particularly special for Halloween celebrations is their dual appeal – they satisfy both the desire for delicious homemade treats and the need for themed decorations that enhance the spooky atmosphere. Unlike many Halloween cookies that rely heavily on artificial colors or complicated techniques, these spider cookies achieve their dramatic effect through clever use of everyday ingredients, making them accessible to bakers of all skill levels.
Nutritional Considerations and Dietary Adaptations
While these cookies are certainly a treat to be enjoyed in moderation, the peanut butter base does provide protein and healthy fats that make them somewhat more substantial than many Halloween candies. For those with peanut allergies, the recipe can be successfully adapted using sunflower seed butter or another nut-free alternative, though the flavor profile will change slightly.
The recipe can also be modified to accommodate other dietary restrictions. For gluten-free versions, substitute the all-purpose flour with a 1:1 gluten-free baking blend. Sugar-conscious bakers can experiment with reducing the sugar content by up to 25% or using alternative sweeteners, though this may affect the texture and browning of the finished cookies.
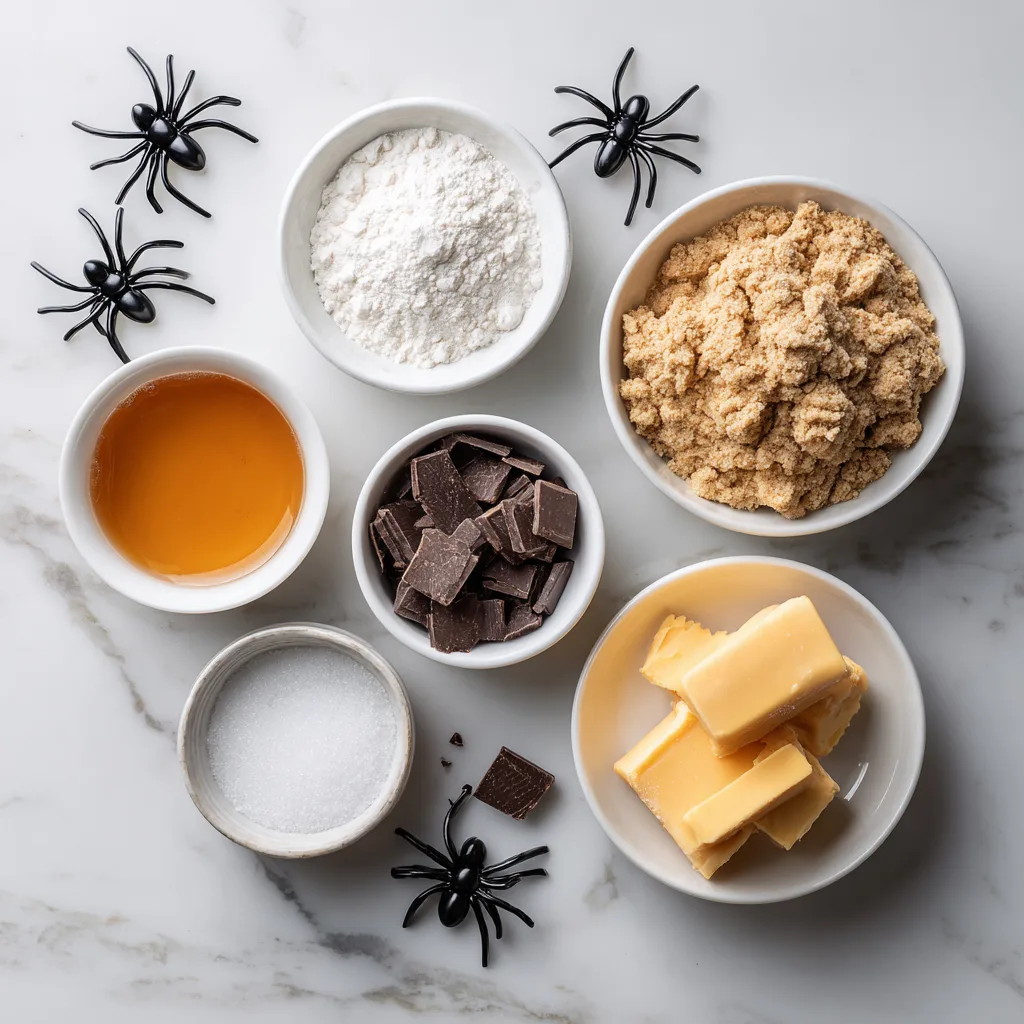
Ingredients
- 1 cup creamy peanut butter
- 1/2 cup granulated sugar
- 1/2 cup packed brown sugar
- 1 large egg
- 1 teaspoon vanilla extract
- 1 1/4 cups all-purpose flour
- 1/2 teaspoon baking soda
- 1/2 teaspoon salt
- 1/4 teaspoon cinnamon
- 2 tablespoons milk
- 1 1/2 cups semi-sweet chocolate chips
- 1 cup thin pretzel sticks
- 1/4 cup mini chocolate chips (for eyes)
- 2 tablespoons white chocolate chips (for eye highlights)
Instructions
- Preheat your oven to 350°F (175°C) and line two large baking sheets with parchment paper. This prevents sticking and ensures easy removal of the finished cookies.
- Prepare the cookie dough by creaming together the peanut butter, granulated sugar, and brown sugar in a large mixing bowl until light and fluffy, approximately 3-4 minutes with an electric mixer.
- Add wet ingredients by beating in the egg and vanilla extract until fully incorporated, scraping down the sides of the bowl as needed to ensure even mixing.
- Combine dry ingredients in a separate bowl by whisking together flour, baking soda, salt, and cinnamon until evenly distributed.
- Form the dough by gradually adding the dry ingredients to the wet ingredients, mixing on low speed until just combined. Add milk if the dough seems too stiff.
- Shape the cookies by rolling the dough into 1.5-inch balls and placing them 2 inches apart on the prepared baking sheets. Gently flatten each ball with a fork in a crisscross pattern.
- Bake the cookies for 10-12 minutes, or until the edges are lightly golden but centers still appear slightly soft. Do not overbake as cookies will continue cooking on the hot pan.
- Cool completely on the baking sheets for 5 minutes before transferring to wire racks. This prevents breaking and allows cookies to set properly.
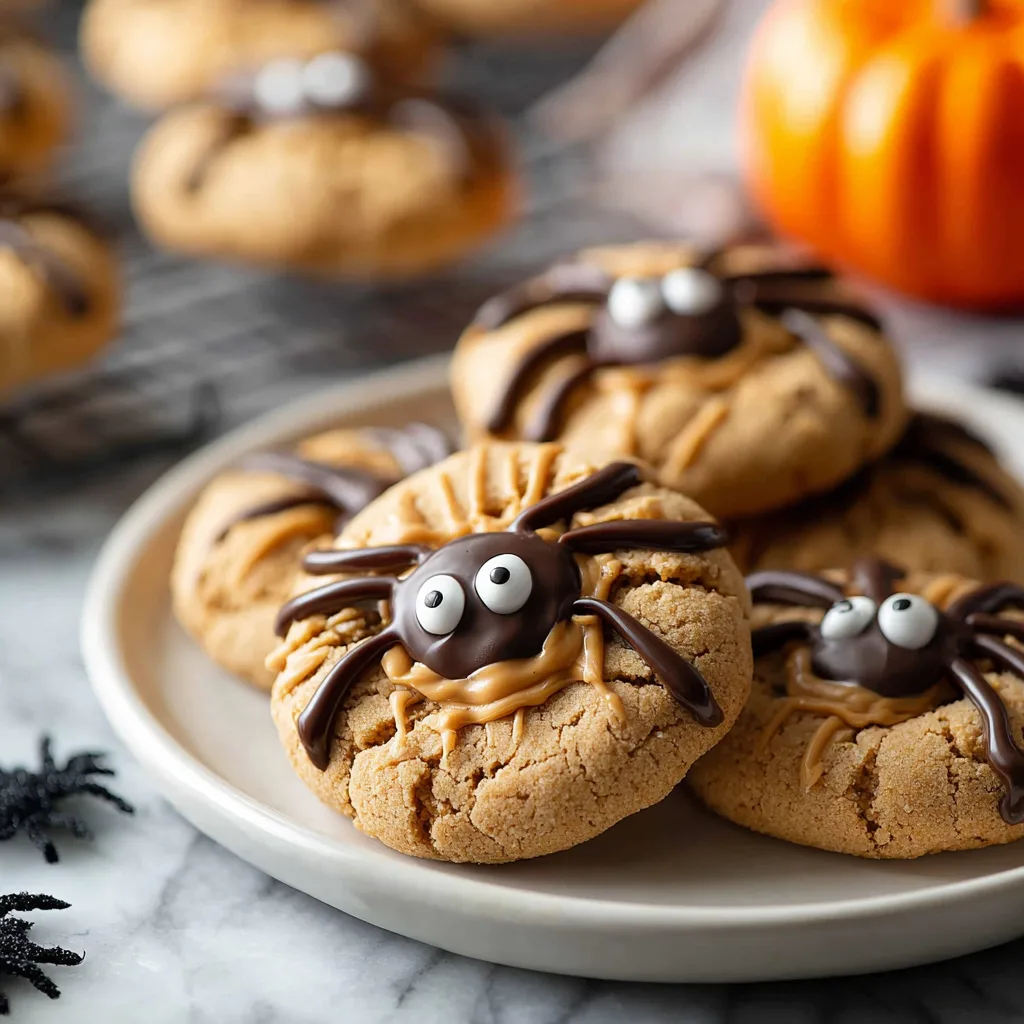
- Create spider bodies by gently pressing one large chocolate chip into the center of each cooled cookie while the cookies are still slightly warm, ensuring good adhesion.
- Add spider legs by breaking pretzel sticks in half and inserting four pieces on each side of the chocolate chip “body,” creating eight legs total per spider.
- Attach eyes by using a small dab of melted white chocolate to attach two mini chocolate chips above the body, then add tiny dots of white chocolate on top for realistic eye highlights.
- Set the decorations by allowing the cookies to rest at room temperature for 30 minutes, giving all decorative elements time to set firmly in place.
Spooktacular Halloween Peanut Butter Spider Cookies
Ingredients
Equipment
Method
- Preheat oven to 350°F (175°C) and line baking sheets with parchment paper.
- Cream peanut butter, granulated sugar, and brown sugar until light and fluffy (3–4 minutes).
- Beat in egg and vanilla extract until combined.
- In a separate bowl, whisk flour, baking soda, salt, and cinnamon.
- Gradually add dry ingredients to wet mixture, mixing just until combined. Add milk if dough is stiff.
- Roll dough into 1.5-inch balls and place 2 inches apart on baking sheets. Flatten gently with fork in crisscross pattern.
- Bake 10–12 minutes until edges are golden and centers slightly soft. Cool 5 minutes on sheet before transferring to racks.
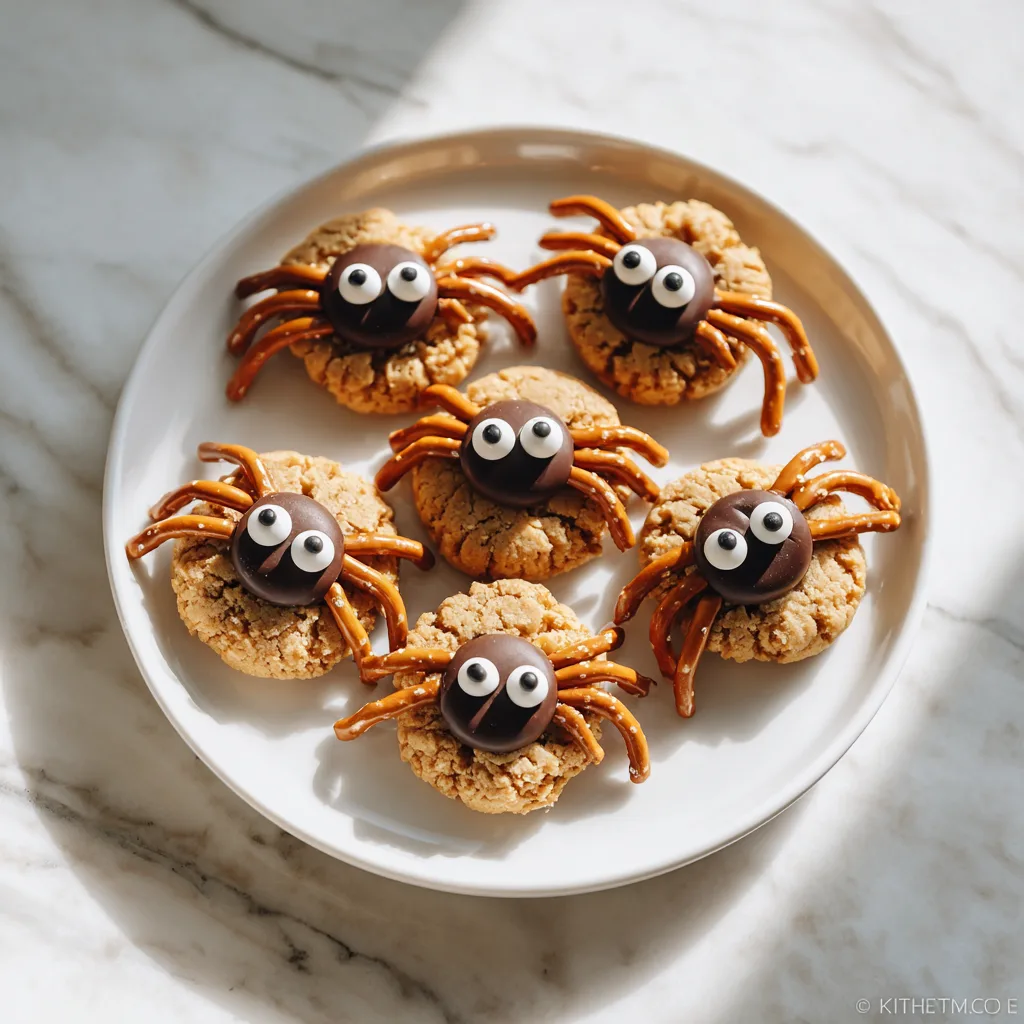
- While cookies are warm, press one large chocolate chip in the center for spider body.
- Break pretzel sticks in half and insert 4 pieces on each side for legs.
- Use melted white chocolate to attach mini chocolate chips as eyes, then add tiny white dots for highlights.
- Allow cookies to set at room temperature for 30 minutes before serving.
Notes
Creative Decorating Techniques
The key to creating convincing spider cookies lies in the positioning and attachment of decorative elements. When placing the pretzel legs, angle them slightly backward as if the spider is in a natural resting position – this small detail significantly enhances the realistic appearance. Vary the leg positions slightly between cookies to give each spider its own personality and avoid a too-uniform appearance that can look artificial.
For the eyes, experiment with different placements to create various expressions. Eyes placed closer together create a more menacing look, while wider-set eyes appear friendlier and more cartoonish – perfect for younger children who might find realistic spiders frightening. The white chocolate highlights on the eyes are crucial for bringing the spiders to life; without them, the eyes can appear flat and lifeless.
Storage and Serving Tips
These cookies maintain their best texture and appearance when stored in an airtight container at room temperature for up to one week. Layer them carefully between sheets of parchment paper to prevent the decorative elements from being damaged or dislodged. The pretzel legs may lose some crispness over time, but the cookies themselves will remain deliciously chewy.
For maximum visual impact, arrange the cookies on Halloween-themed serving platters or create a spooky display by placing them among artificial spider webs, plastic spiders, and other Halloween decorations. The cookies can also be packaged individually in clear cellophane bags tied with orange and black ribbons for perfect party favors or trick-or-treat alternatives.
Make-Ahead and Freezing Instructions
These cookies are excellent candidates for advance preparation, which is particularly helpful during busy Halloween season. The cookie dough can be prepared, shaped, and frozen on baking sheets before being transferred to freezer bags for up to three months. Bake directly from frozen, adding 1-2 extra minutes to the baking time.
Fully baked and decorated cookies can also be frozen for up to two months, though it’s best to freeze them before adding the pretzel legs and eyes, then complete the decorating after thawing. This prevents damage to the delicate decorative elements during the freezing and thawing process.
These Halloween Peanut Butter Spider Cookies represent the perfect fusion of seasonal creativity and classic baking comfort. They prove that Halloween treats don’t have to be complicated to be impressive, and that sometimes the most effective decorative techniques are also the simplest. Whether you’re an experienced baker or just starting your Halloween baking journey, these delightfully spooky cookies are sure to become a seasonal tradition that brings smiles, squeals, and satisfied appetites to all who encounter them.