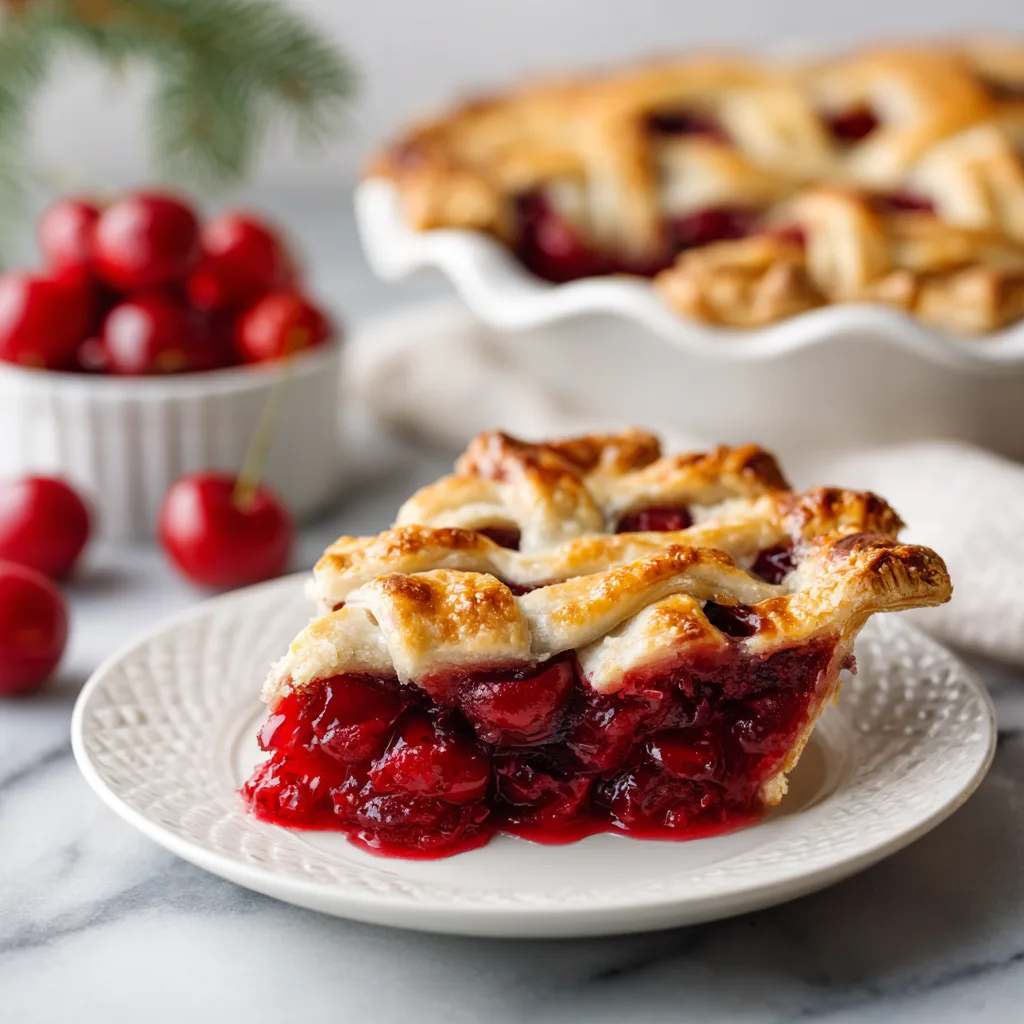
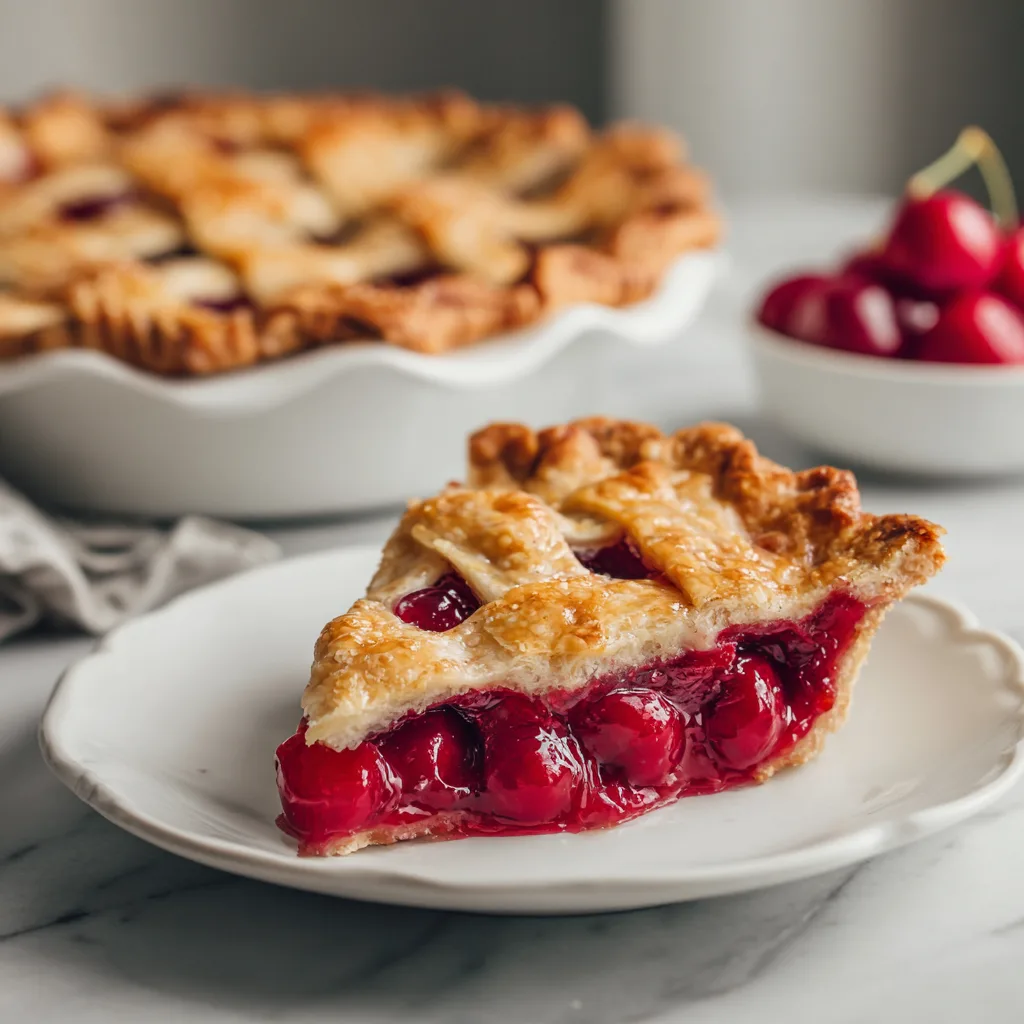
The Best Cherry Pie Recipe: A Classic Homemade Dessert Everyone Will Love
Few desserts feel as timeless and comforting as a slice of homemade cherry pie. With its golden, flaky crust and sweet-tart cherry filling, this classic treat is perfect for summer gatherings, holiday tables, or whenever you want to impress your guests with a bakery-worthy pie straight from your kitchen. If you’ve been searching for the best cherry pie recipe, this one delivers everything you love about the original — buttery crust, vibrant filling, and a touch of nostalgia in every bite.
Why You’ll Love This Recipe
- Made with fresh or frozen cherries – so you can enjoy it year-round.
- Perfectly balanced flavor – not too sweet, with just the right tartness.
- Flaky, buttery crust – a homemade crust that’s tender yet crisp.
- Customizable – works with sweet cherries, tart cherries, or a mix.
- Show-stopping dessert – perfect for celebrations, potlucks, and family dinners.
The Best Cherry Pie Recipe
Ingredients
Equipment
Method
- Preheat oven to 400°F (200°C). Place one pie crust into a 9-inch pie dish.
- In a large saucepan, combine cherries, sugar, cornstarch, lemon juice, vanilla extract, and almond extract (if using). Cook over medium heat until the mixture thickens and bubbles, about 8–10 minutes. Remove from heat and stir in butter.
- Pour the cherry filling into the prepared crust. Spread evenly.
- Top with the second crust, either whole with slits cut in or as a lattice. Seal edges and crimp decoratively.
- Brush the top crust with beaten egg and sprinkle with coarse sugar for a golden finish.
- Bake for 45–55 minutes, until the crust is golden brown and the filling is bubbling.
- Cool at room temperature for at least 2 hours before slicing. This helps the filling set properly.
Notes
Ingredients
For the Crust (makes top and bottom crusts):
- 2 ½ cups all-purpose flour
- 1 teaspoon salt
- 1 tablespoon granulated sugar
- 1 cup (2 sticks) cold unsalted butter, cubed
- 6–8 tablespoons ice water
For the Cherry Filling:
- 5 cups pitted cherries (fresh or frozen)
- ¾ cup granulated sugar (adjust based on sweetness of cherries)
- ¼ cup cornstarch (for thickening)
- 1 tablespoon lemon juice
- 1 teaspoon vanilla extract
- ¼ teaspoon almond extract (optional but adds amazing flavor)
- 1 tablespoon unsalted butter, cut into small pieces
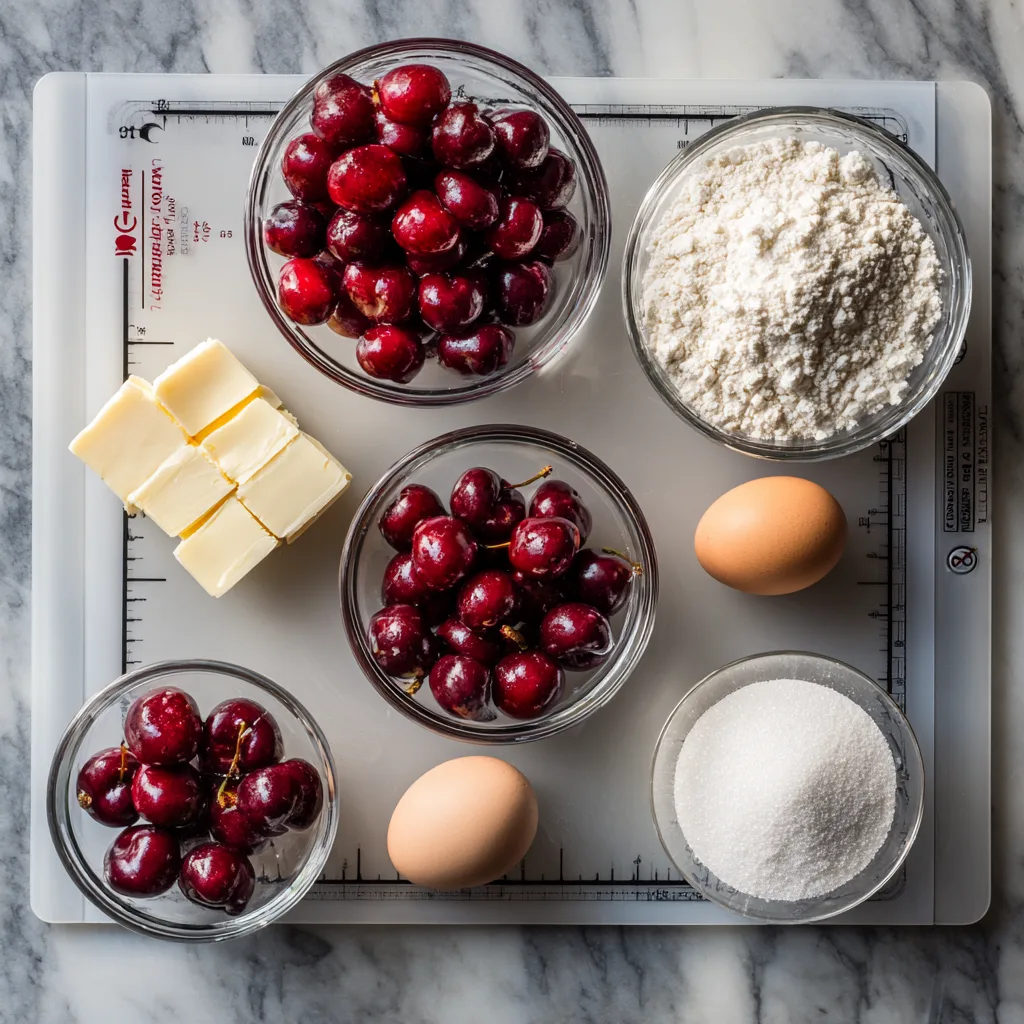
For Finishing:
- 1 egg (for egg wash)
- 1 tablespoon milk
- 1 tablespoon coarse sugar (optional, for sprinkling)
Step-by-Step Instructions
1. Make the Pie Dough
- In a large bowl, whisk together flour, salt, and sugar.
- Cut in the cold butter using a pastry cutter or food processor until the mixture resembles coarse crumbs.
- Gradually add ice water, 1 tablespoon at a time, until the dough just comes together.
- Divide into two discs, wrap in plastic wrap, and chill in the refrigerator for at least 1 hour.
2. Prepare the Filling
- In a large saucepan, combine cherries, sugar, cornstarch, lemon juice, and vanilla.
- Cook over medium heat until the mixture thickens and becomes glossy (about 8–10 minutes).
- Remove from heat and stir in butter. Let cool slightly before filling the pie.
3. Assemble the Pie
- Preheat the oven to 400°F (200°C).
- Roll out one dough disc into a 12-inch circle and fit it into a 9-inch pie dish. Trim excess edges.
- Pour in the cherry filling.
- Roll out the second disc and place it over the filling, or cut strips to make a lattice top.
- Seal and crimp edges, then brush with egg wash (egg + milk). Sprinkle with coarse sugar if desired.
4. Bake the Pie
- Bake at 400°F for 20 minutes, then reduce the temperature to 350°F (175°C) and continue baking for 30–40 minutes, until the crust is golden and the filling is bubbling.
- If edges brown too quickly, cover with foil.
- Cool for at least 2–3 hours before slicing to allow the filling to set.
Tips for Success
- Chill your dough: Cold butter = flakier crust.
- Use a mix of cherries: Combining tart and sweet cherries adds depth of flavor.
- Prevent soggy crust: Brush the bottom crust lightly with egg white before adding the filling.
- Thicken properly: Allow the filling to cook until glossy so it sets beautifully in the oven.
- Vent the top crust: If not making a lattice, cut small slits for steam to escape.
Serving Suggestions
- Serve warm with a scoop of vanilla ice cream for the ultimate comfort dessert.
- Pair with whipped cream for a lighter topping.
- Drizzle with a little chocolate sauce for a decadent twist.
- Enjoy cold the next day with your morning coffee (yes, pie for breakfast is absolutely allowed).
Make-Ahead and Storage Tips
- Make-ahead crust: Pie dough can be made up to 3 days in advance and kept refrigerated, or frozen for up to 2 months.
- Filling in advance: The cherry filling can be cooked, cooled, and refrigerated up to 2 days ahead.
- Baked pie storage: Keep covered at room temperature for 2 days or refrigerate for up to 5 days.
- Freezing: Baked cherry pie freezes beautifully. Wrap tightly in foil and plastic wrap, then freeze for up to 3 months. Thaw overnight in the fridge before reheating.
Why This Recipe Works
This recipe balances the sweet-tart flavor of cherries with just enough sugar and lemon to highlight their natural brightness. The butter-based crust creates a flaky, tender base that perfectly complements the juicy filling. Using cornstarch as a thickener ensures the pie slices neatly, while almond extract adds a bakery-style flavor that elevates it from simple to spectacular. It’s straightforward enough for beginner bakers yet impressive enough for any special occasion.
Variations to Try
- Mini Cherry Pies: Use a muffin tin to make handheld versions.
- Cherry Hand Pies: Fold dough over spoonfuls of filling and bake for a portable treat.
- Cherry & Berry Pie: Mix in blueberries or raspberries for extra flavor.
- Crumble Top Cherry Pie: Replace the top crust with a streusel topping for a rustic twist.
FAQs About Cherry Pie
Can I use frozen cherries?
Yes! Just thaw and drain them before cooking the filling to avoid excess liquid.
Do I need to pit fresh cherries?
Absolutely. A cherry pitter makes the job much easier, but you can also use a sturdy straw or chopstick.
How do I know when my pie is done?
Look for a bubbling filling and golden brown crust. That bubbling means the cornstarch has thickened the juices.
Can I make this pie gluten-free?
Yes, substitute a gluten-free all-purpose flour blend for the crust.