
Homemade Sub Rolls
Prep Time: 20 minutes,Rise Time: 2 hours (total),Bake Time: 18-20 minutes,Total Time: 2 hours 40 minutes,Yield: 8 sub rolls
Create bakery-quality homemade sub rolls in your own kitchen with this foolproof recipe that delivers perfectly crusty exteriors and tender, airy interiors. These sandwich rolls are infinitely better than store-bought versions, with that authentic artisan texture and flavor that makes every sandwich taste gourmet. Whether you’re making Italian subs, cheesesteaks, or meatball heroes, these fresh bread recipe results will transform your sandwich game forever.

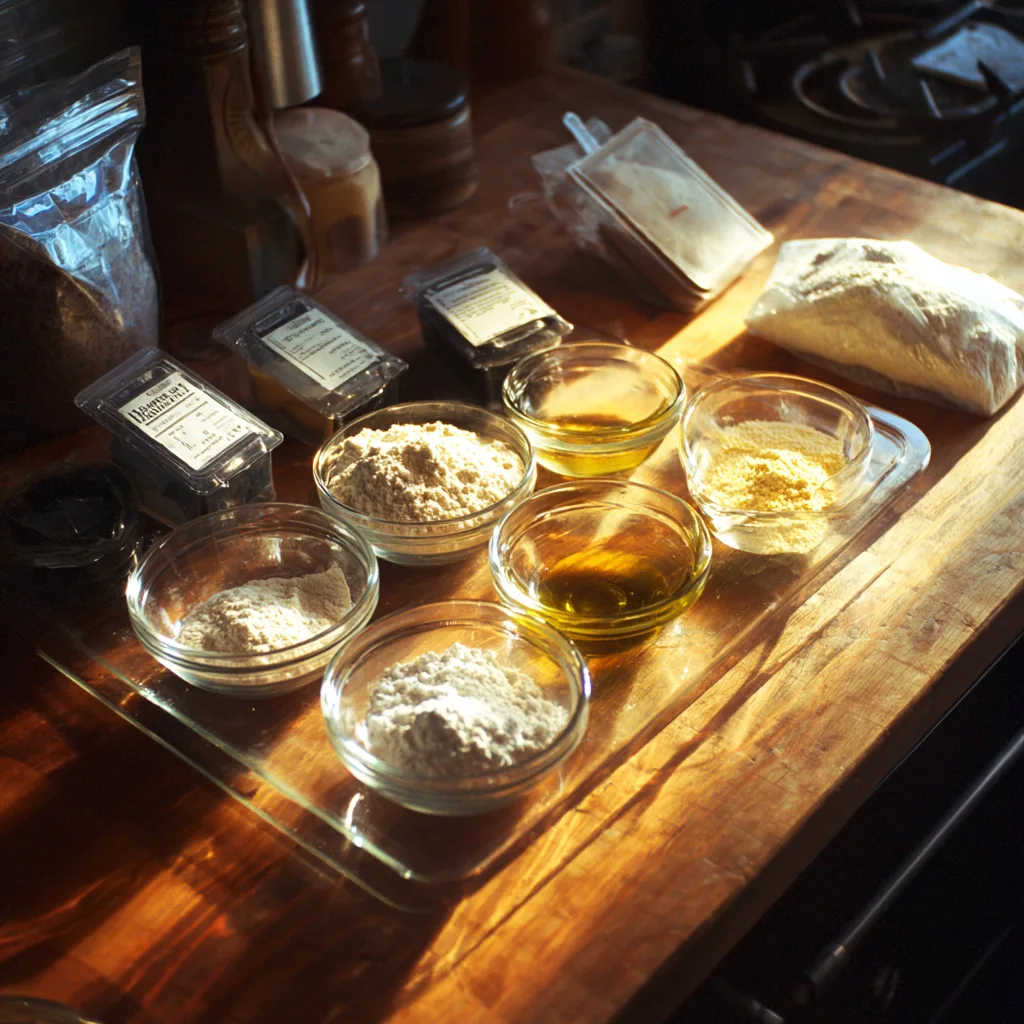
Ingredients for Homemade Sub Rolls
Main Bread Ingredients:
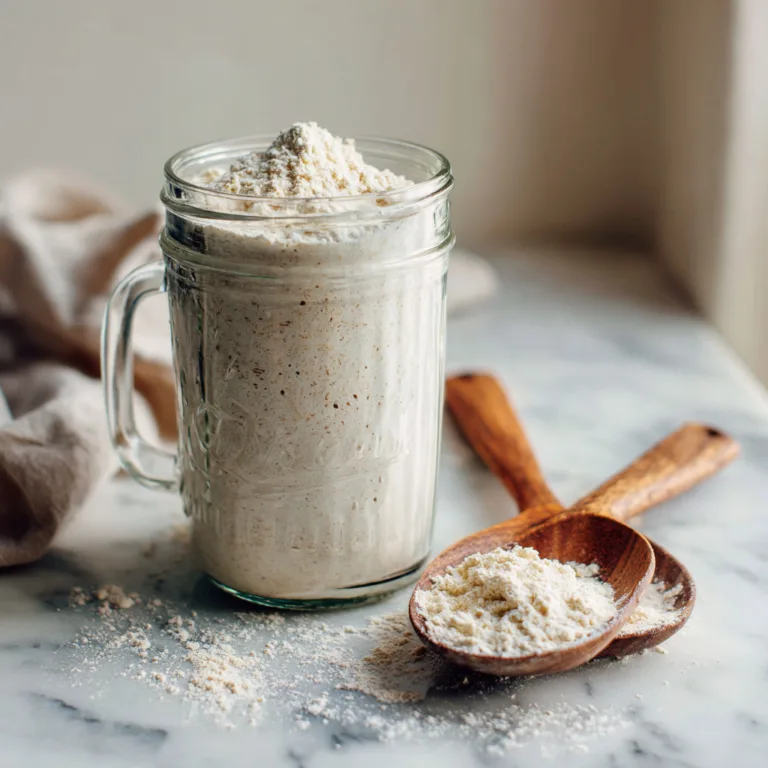
- 4 cups (480g) bread flour (or all-purpose flour)
- 1½ cups (355ml) warm water (105-110°F)
- 2¼ teaspoons (1 packet) active dry yeast
- 2 tablespoons granulated sugar
- 2 tablespoons olive oil (extra virgin preferred)
- 2 teaspoons salt
- 1 teaspoon garlic powder (optional, for extra flavor)
For Shaping and Finishing:
- 2 tablespoons cornmeal (for dusting)
- 1 egg, beaten (for egg wash)
- 2 tablespoons sesame seeds (optional)
- 1 teaspoon coarse sea salt (for sprinkling)
- Olive oil spray (for oiling bowl and pans)
Optional Flavor Additions:
- 1 tablespoon Italian seasoning
- 1 teaspoon onion powder
- 2 tablespoons grated Parmesan cheese
- 1 tablespoon dried rosemary, chopped
Why This Sub Roll Recipe Works
These homemade sub rolls succeed because they use the perfect hydration ratio and fermentation time to develop both flavor and the ideal texture. The combination of bread flour’s higher protein content with proper kneading creates the gluten structure necessary for that authentic chewy-yet-tender bite.
The bread rolls recipe incorporates a small amount of sugar that feeds the yeast for better rise while contributing to the golden-brown crust. Olive oil adds richness and helps create a tender crumb that won’t become soggy when loaded with sandwich fillings.
The two-stage rise process allows for proper flavor development while creating the light, airy texture that distinguishes homemade rolls from dense, commercial versions. This artisan sub rolls approach takes time but requires minimal hands-on work.
The Science Behind Perfect Sub Rolls
Understanding bread science ensures consistent results with homemade sandwich bread. Gluten development is crucial – the proteins in flour form elastic networks when hydrated and kneaded, creating structure that traps gas bubbles from yeast fermentation.
Proper hydration (the flour-to-water ratio) determines the final texture. Too little water creates dense, dry rolls, while too much makes sticky dough that’s difficult to handle and produces gummy interiors. This recipe’s 60% hydration provides the perfect balance.
Yeast activity depends on temperature and time. The initial proofing in warm water with sugar ensures active yeast, while the longer bulk fermentation develops complex flavors through enzymatic breakdown of starches into sugars.

Homemade Sub Rolls
Ingredients
Equipment
Method
- Activate Yeast: In a large bowl, mix warm water and sugar. Sprinkle yeast on top and let sit 5–10 minutes until foamy.
- Mix Dough: Stir in olive oil. In another bowl, whisk flour, salt, and garlic powder. Add to yeast mixture, stirring until shaggy dough forms.
- Knead Dough: Knead on a floured surface 8–10 minutes (or stand mixer 6–8 minutes) until smooth and elastic.
- First Rise: Shape into a ball, place in oiled bowl, cover, and let rise 1–1.5 hours until doubled.
- Shape Rolls: Punch down dough. Divide into 8 equal pieces (about 3.5 oz each). Shape into 6–7 inch ovals. Place on parchment-lined sheets dusted with cornmeal.
- Second Rise: Cover rolls and let rise 45–60 minutes until puffy.
- Prepare to Bake: Preheat oven to 425°F (220°C). Place pan of hot water in oven for steam. Slash each roll lengthwise about 1/4 inch deep.
- Egg Wash & Bake: Brush with beaten egg, sprinkle with sesame seeds and salt if desired. Bake 18–20 minutes until golden brown and hollow-sounding. Cool on wire racks.
Notes
Step-by-Step Instructions
Step 1: Activate the Yeast
In a large mixing bowl, combine warm water (105-110°F) with sugar, stirring to dissolve. Sprinkle the yeast over the surface and let stand for 5-10 minutes until foamy and bubbly. This proves the yeast is active and ensures proper rise. If the mixture doesn’t foam, start over with fresh yeast.
Step 2: Mix the Dough
Add the olive oil to the activated yeast mixture. In a separate bowl, whisk together the bread flour, salt, and garlic powder if using. Add the flour mixture to the liquid ingredients and stir with a wooden spoon until a shaggy dough forms. The mixture will look rough and uneven at this stage.
Step 3: Knead the Dough
Turn the dough onto a lightly floured surface and knead for 8-10 minutes until smooth and elastic. The dough should be slightly tacky but not sticky. If too sticky, add flour 1 tablespoon at a time. If too dry, add water 1 teaspoon at a time. Proper kneading develops the gluten structure essential for good texture.
Alternatively, use a stand mixer with a dough hook for 6-8 minutes on medium-low speed until the dough is smooth and pulls away from the sides of the bowl.
Step 4: First Rise
Form the dough into a ball and place in a large, oiled bowl, turning to coat all sides. Cover with a damp kitchen towel or plastic wrap and let rise in a warm, draft-free place for 1-1.5 hours, until doubled in size. The dough should spring back slowly when gently poked with a finger.
Step 5: Shape the Rolls
Punch down the dough to release gas bubbles and turn onto a lightly floured surface. Divide into 8 equal pieces (about 3.5 oz each for consistent sizing). Shape each piece into a smooth ball by tucking the edges underneath and rolling gently on the counter.
Using your hands or a rolling pin, shape each ball into an oval about 6-7 inches long and 3 inches wide. The rolls should be uniform in size for even baking. Place on two baking sheets lined with parchment paper and dusted with cornmeal.
Step 6: Second Rise
Cover the shaped rolls with a clean kitchen towel and let rise for 45-60 minutes until puffy and increased in size by about 50%. They should feel light when gently lifted. Don’t let them over-proof, or they may collapse during baking.
Step 7: Prepare for Baking
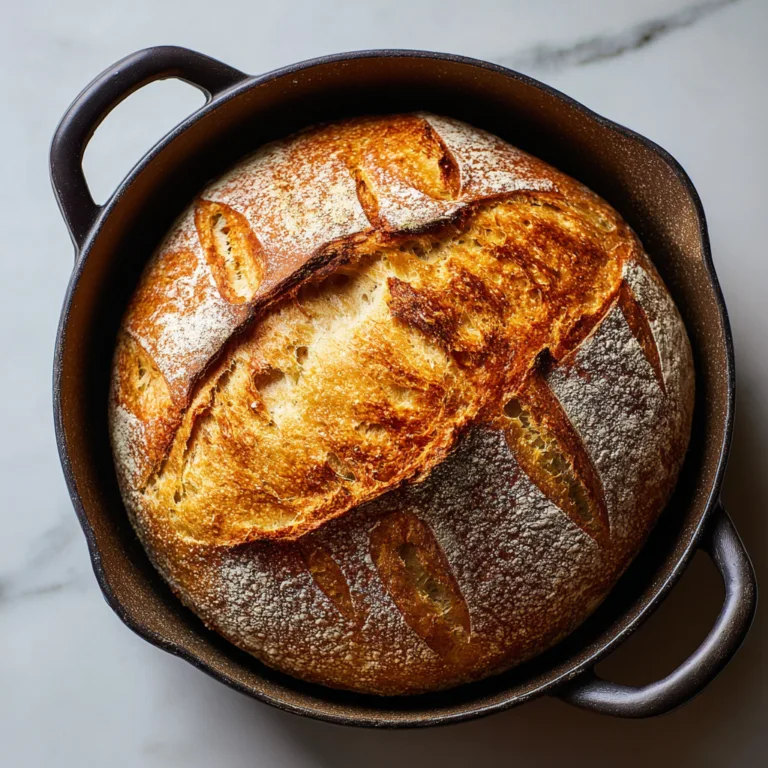
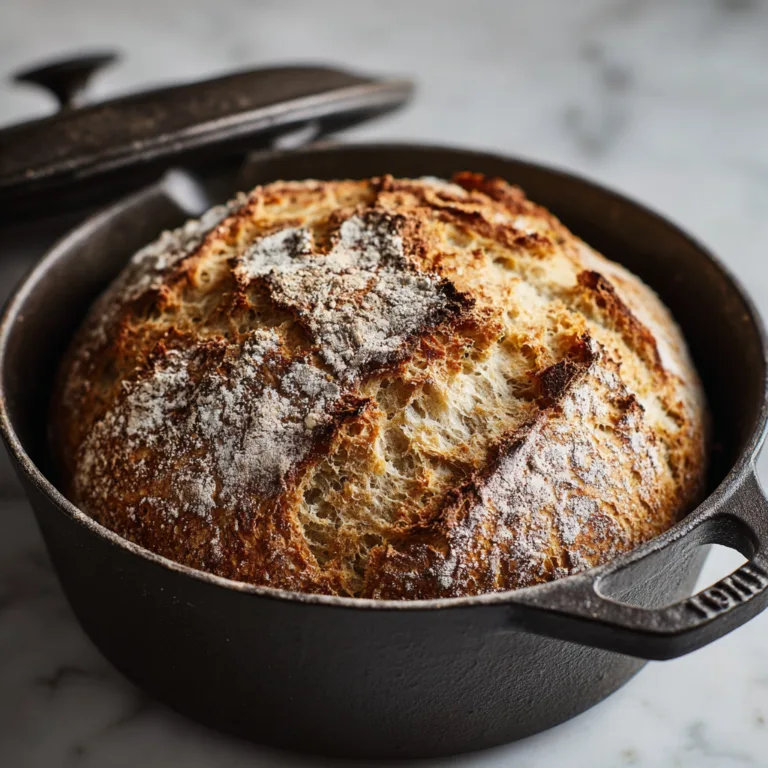
Preheat the oven to 425°F (220°C) during the last 15 minutes of the second rise. Place a shallow pan of hot water on the bottom oven rack to create steam, which helps develop a crispy crust.
Using a sharp knife or razor blade, make a shallow slash down the length of each roll, about ¼ inch deep. This allows for controlled expansion during baking and creates the classic sub roll appearance.
Step 8: Apply Egg Wash and Bake
Brush the rolls gently with beaten egg, being careful not to deflate them. Sprinkle with sesame seeds and coarse salt if desired. The egg wash creates a beautiful golden-brown, shiny crust.
Bake for 18-20 minutes until golden brown and hollow-sounding when tapped on the bottom. The internal temperature should reach 190°F (88°C) for fully baked bread. Remove from the oven and let cool on wire racks.
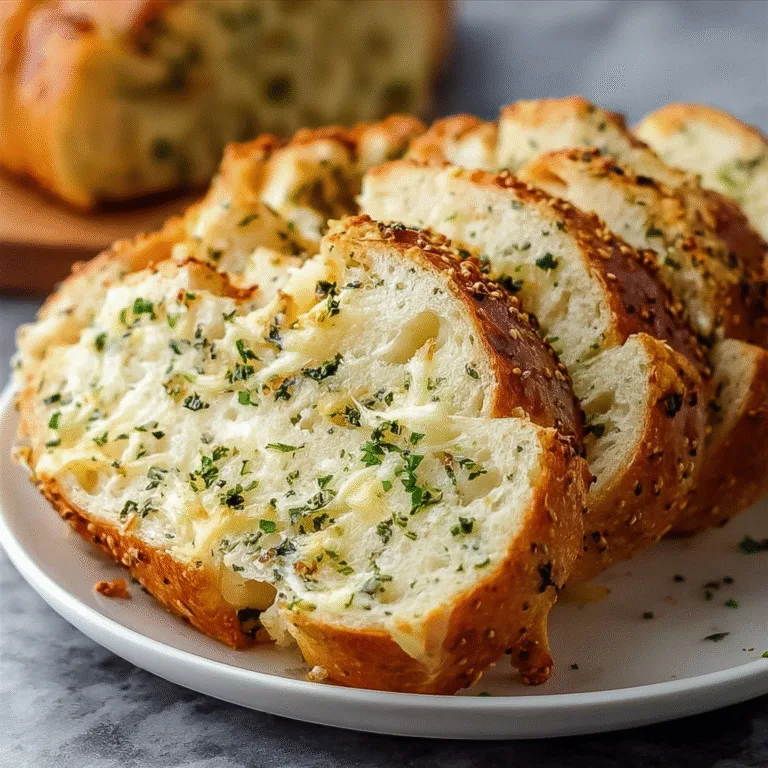
Texture and Flavor Profile
These fresh bread recipe results produce Italian bread rolls with a perfectly crispy, golden crust that gives way to a soft, airy interior with irregular holes – the hallmark of well-made artisan bread. The crumb has a slight chew without being tough or dense.
The flavor is mildly tangy from fermentation with subtle sweetness and a hint of olive oil richness. These hoagie rolls have enough character to complement bold sandwich fillings without competing for attention. The crust provides textural interest and helps contain wet ingredients.
When fresh from the oven, the rolls have an incredible aroma of yeast and toasted wheat. As they cool, the crust remains crisp while the interior develops the perfect tender texture for sandwich making.
Storage and Freshness Tips
Homemade sub rolls are best used within 2-3 days of baking for optimal texture and flavor. Store in a paper bag at room temperature to maintain crust crispness, or in plastic bags if you prefer softer crusts.
For longer storage, slice the rolls horizontally and freeze in freezer bags for up to 3 months. Toast directly from frozen, or thaw at room temperature for 30 minutes. Frozen rolls actually toast better than fresh ones for certain applications.
Day-old rolls can be refreshed by misting lightly with water and heating in a 350°F oven for 5-7 minutes. This technique revives the crust and warms the interior beautifully.
Troubleshooting Common Issues
Dense, heavy rolls usually result from insufficient kneading, inactive yeast, or too much flour. Ensure your yeast foams properly during proofing, knead until the dough is smooth and elastic, and measure flour accurately by weight if possible.
Flat rolls that don’t rise indicate over-proofed dough or dead yeast. Check yeast expiration dates and water temperature carefully. Over-proofed dough loses structure and won’t spring back when poked.
Tough, chewy texture comes from too much flour or over-kneading. The dough should be slightly tacky after kneading, and machine kneading requires less time than hand kneading to avoid overworking the gluten.
Uneven browning suggests oven hot spots or incorrect rack placement. Rotate pans halfway through baking and ensure racks are positioned in the center of the oven.
Flavor Variations and Customizations
Transform basic sandwich rolls into specialty breads with simple additions. Italian herb rolls incorporate dried oregano, basil, and thyme into the dough along with grated Parmesan cheese for authentic flavors.
Everything bagel rolls use everything bagel seasoning in place of sesame seeds and salt for a trendy twist that’s perfect for breakfast sandwiches or deli-style subs.
For whole wheat sub rolls, substitute up to half the bread flour with whole wheat flour, but add 2-3 tablespoons extra water to compensate for the increased absorption. The texture will be denser but more nutritious.
Garlic and herb variations can include fresh chopped rosemary, thyme, or sage mixed into the dough, along with minced fresh garlic for more pronounced flavors.
Sandwich Pairing Suggestions
These artisan sub rolls are perfect for classic Italian sandwiches with salami, ham, provolone, lettuce, tomatoes, onions, and Italian dressing. The sturdy structure holds up to oil-based dressings without becoming soggy.
Meatball subs benefit from the rolls’ ability to absorb some sauce while maintaining structural integrity. The slight sweetness complements tomato-based sauces beautifully.
For cheesesteaks, these rolls provide the authentic Philadelphia experience with their proper chew and ability to cradle meat and cheese without falling apart.
Vegetarian applications work wonderfully too – grilled vegetables, fresh mozzarella, and pesto create gourmet sandwiches that showcase the bread’s quality.
Make-Ahead and Meal Prep Strategies
The dough can be prepared through the first rise, then refrigerated for up to 24 hours. This slow fermentation actually improves flavor development. Let the chilled dough come to room temperature before shaping and completing the second rise.
Shaped rolls can be frozen on baking sheets until solid, then transferred to freezer bags for up to 1 month. Thaw overnight in the refrigerator, then complete the second rise and bake as directed.
For busy schedules, bake the rolls completely and freeze. They reheat beautifully in the oven or toaster, making fresh bread accessible even on weeknight dinner preparations.
Professional Techniques for Home Bakers
Steam injection during the first few minutes of baking creates the crispy crust characteristic of artisan breads. The pan of water works, but spraying the oven walls with water (avoiding the light and heating elements) provides even better results.
Scoring technique affects both appearance and texture. Use a sharp blade held at a 30-degree angle to make swift, confident cuts. Hesitant scoring can deflate the dough.
Temperature monitoring with an instant-read thermometer removes guesswork. Internal temperature of 190°F ensures fully baked bread without overbaking, which can create tough crusts.
Nutritional Benefits of Homemade Bread
Homemade sandwich bread allows complete control over ingredients, eliminating preservatives and excess sodium found in commercial versions. Using quality olive oil provides healthy monounsaturated fats.
The fermentation process breaks down some proteins and starches, potentially making the bread easier to digest than quick breads made with chemical leaveners.
Portion control is easier with homemade rolls since you determine the size. These rolls provide complex carbohydrates for sustained energy without high fructose corn syrup or artificial additives.
Equipment Recommendations
A kitchen scale dramatically improves consistency in bread making. Measuring flour by weight rather than volume eliminates the most common variable in home baking failures.
Stand mixers make kneading effortless, but hand kneading works perfectly well and provides better feel for dough texture development. Both methods produce excellent results with proper technique.
Parchment paper prevents sticking and makes cleanup easier, while wire cooling racks ensure proper air circulation around cooling bread to prevent soggy bottoms.
These homemade sub rolls represent the perfect intersection of artisan quality and home kitchen accessibility. While they require time for proper fermentation, the hands-on work is minimal, and the results far exceed anything available in stores. Whether you’re making submarine sandwiches for a crowd, preparing gourmet lunches for the week, or simply wanting to fill your home with the incomparable aroma of fresh bread, this recipe delivers consistent, professional-quality results that will make you never want to buy sub rolls again.


amazing
the main written blog recipe and the print off page recipe are totally different! different amounts of ingredients, different baking temperatures! also it has no notes like for seasonings or steam tray during baking. i’d recommend changing them to be the same recipe! it’s very confusing. i will be trying the written recipe! fingers crossed
Thanks so much for catching that! 🙏 You’re absolutely right — the blog post and the print card weren’t matching up, which caused the confusion. I’ve gone in and fixed it so both versions now use the same ingredient amounts, baking temp, and notes (including the optional seasonings + steam tray tip). I really appreciate you pointing it out, and I hope your rolls turn out amazing! 🥖✨
The dough was so incredibly sticky. Even after 5 mins of hand kneading, I could not get it to come together. Had to add at least an extra half cup of flour. What did I do wrong?
Hi! Sticky dough is totally normal in the beginning — in fact, slightly sticky dough usually makes softer bread in the end. A few things could be at play here:
Flour type & measuring: Bread flour vs. all-purpose can absorb water differently, and if the flour wasn’t measured with a scale, it’s easy to end up with less flour than intended.
Humidity: On humid days, dough often needs extra flour since it absorbs more moisture from the air.
Kneading time: It can take a full 8–10 minutes of hand kneading before dough starts pulling together smoothly. At first, it will stick, but as gluten develops, it should get more elastic.
Adding up to ½ cup more flour is perfectly fine — bread doughs often need small adjustments. Next time, try starting with 4 cups, then sprinkle in a tablespoon at a time during kneading until the dough is tacky but not unmanageable. You did the right thing adjusting as you went!
Thank you! After the addition of flour, they turned out perfect!
Thanks so much for sharing your experience , 🙌 I’m so happy they turned out great for you!