Apple Crisp Cheesecake: The Ultimate Fall Dessert Fusion
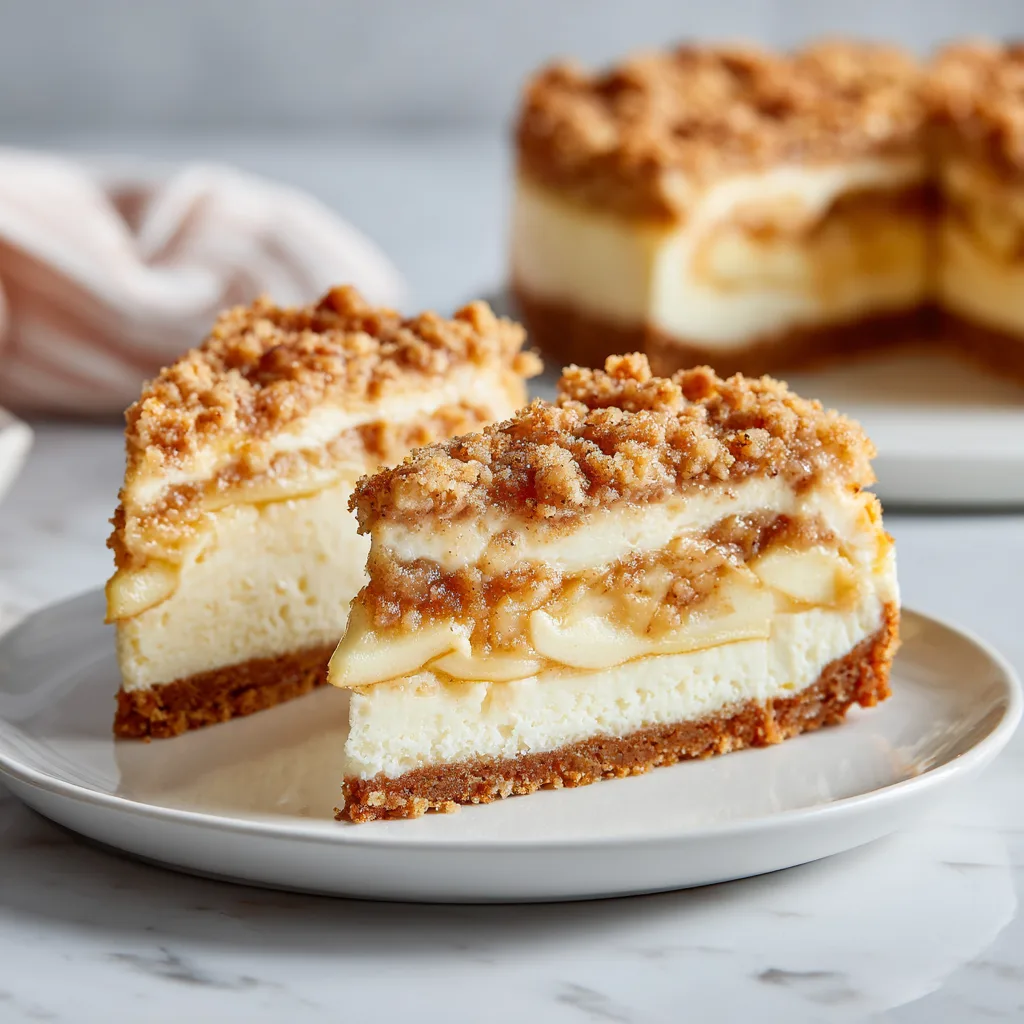
Apple Crisp Cheesecake is what happens when two iconic desserts decide to become one unforgettable showstopper. Creamy, rich baked cheesecake meets tender cinnamon-spiced apples and a buttery oat crisp topping that delivers warmth, texture, and pure autumn comfort in every bite. This dessert is indulgent without being overwhelming, nostalgic yet elevated, and impressive enough for holidays while still cozy enough for a weekend baking project.
If you love classic apple crisp and you adore New York–style cheesecake, this recipe is your dream dessert. It layers a smooth vanilla cheesecake base with a gently cooked apple filling and finishes with a golden brown crisp topping that adds crunch and contrast. The result is a bakery-worthy Apple Crisp Cheesecake that slices beautifully and tastes even better the next day.
This recipe is designed to be approachable for home bakers while still delivering professional-level results. You’ll learn how to balance textures, prevent cracks, and achieve that signature creamy cheesecake consistency—all while filling your kitchen with the irresistible aroma of baked apples and cinnamon.

Why Apple Crisp Cheesecake Is So Popular
Apple desserts have long been associated with comfort, tradition, and seasonal baking. Cheesecake, on the other hand, is known for richness and indulgence. When combined, they create a dessert that feels both familiar and special.
Apple Crisp Cheesecake is especially popular during fall and winter months because it highlights warm spices, baked fruit, and cozy flavors. It’s a favorite for Thanksgiving dessert tables, holiday gatherings, and special occasions where you want something more exciting than pie but just as comforting.
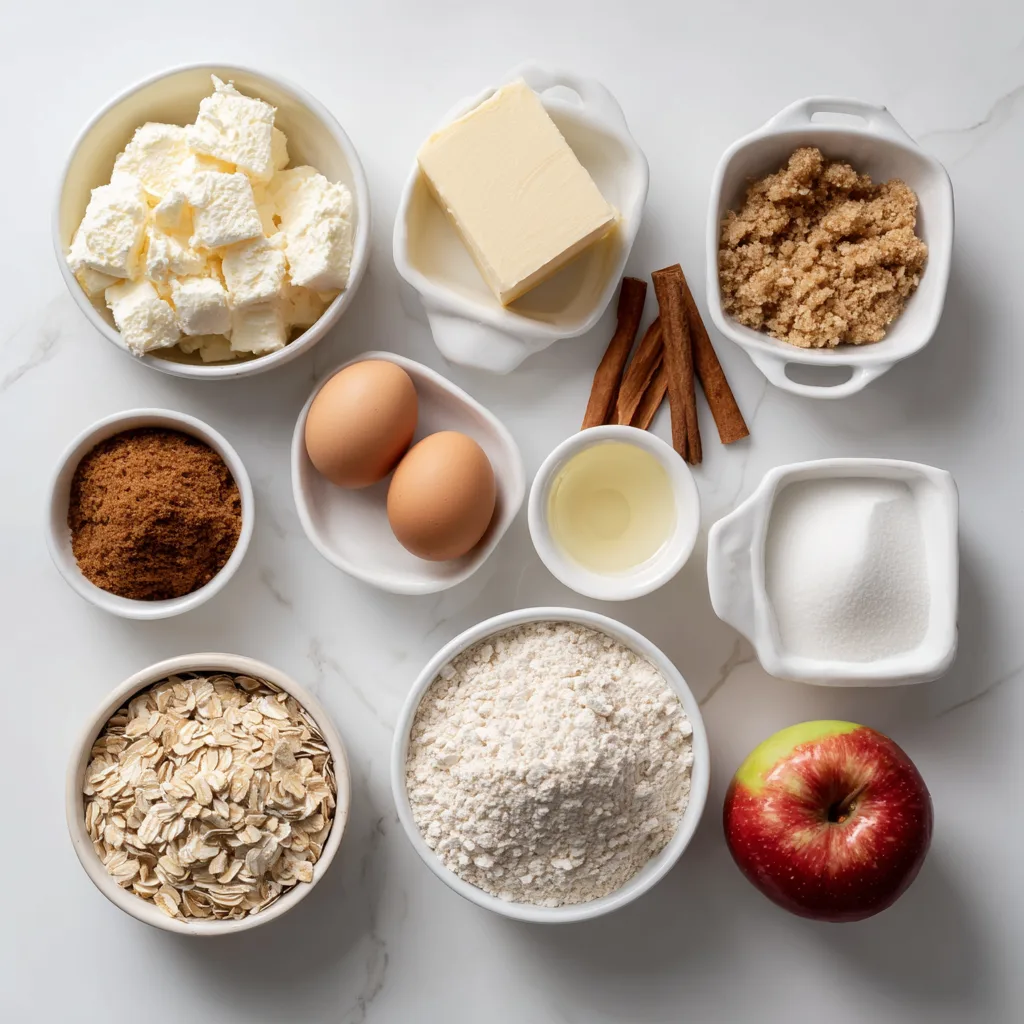
Ingredients
For the Crust:
- Graham cracker crumbs
- Melted butter
- Brown sugar
- Cinnamon
For the Cheesecake Filling:
- Cream cheese, softened
- Granulated sugar
- Brown sugar
- Eggs
- Sour cream
- Vanilla extract
- Cinnamon
- Nutmeg
For the Apple Layer:
- Apples, peeled and sliced
- Brown sugar
- Cinnamon
- Lemon juice
- Cornstarch
For the Crisp Topping:
- Old-fashioned rolled oats
- All-purpose flour
- Brown sugar
- Cinnamon
- Unsalted butter, cold and cubed
Instructions
- Preheat your oven to 350°F (175°C). Prepare a springform pan by greasing it lightly and lining the bottom with parchment paper.
- Mix graham cracker crumbs, melted butter, brown sugar, and cinnamon until evenly combined. Press firmly into the bottom of the pan and bake for 10 minutes. Set aside to cool slightly.
- In a skillet over medium heat, combine sliced apples, brown sugar, cinnamon, lemon juice, and cornstarch. Cook until apples are tender and the mixture thickens. Remove from heat and cool.
- In a large bowl, beat cream cheese until smooth. Add granulated sugar and brown sugar, mixing until creamy.
- Beat in eggs one at a time, followed by sour cream, vanilla, cinnamon, and nutmeg. Mix just until combined.
- Pour cheesecake filling over the prepared crust. Gently spoon the apple mixture evenly over the cheesecake layer.
- In another bowl, mix oats, flour, brown sugar, and cinnamon. Cut in cold butter until crumbly. Sprinkle crisp topping over apples.
- Bake for 55–65 minutes, until the center is just set. Turn off oven, crack the door, and let cheesecake cool slowly for 1 hour.
- Refrigerate for at least 4 hours or overnight before slicing and serving.
Pro Tips for Perfect Apple Crisp Cheesecake
- Use room-temperature ingredients for the cheesecake filling to ensure a smooth texture.
- Don’t overmix once the eggs are added—this helps prevent cracks.
- Choose firm apples like Granny Smith or Honeycrisp for the best texture.
- Let it chill overnight for the cleanest slices and best flavor development.
Variations to Try
- Caramel Apple Crisp Cheesecake: Drizzle caramel sauce over the apple layer before adding the crisp topping.
- Gluten-Free Version: Use gluten-free graham crackers and flour substitutes.
- Mini Cheesecakes: Bake in a muffin tin for individual servings.
- Nutty Crisp Topping: Add chopped pecans or walnuts to the oat topping.
Serving Suggestions
Serve Apple Crisp Cheesecake chilled or slightly warmed with:
- A dollop of whipped cream
- Vanilla bean ice cream
- Salted caramel drizzle
- Hot coffee or spiced chai
This dessert is perfect for holidays, birthdays, fall gatherings, or anytime you want a dessert that feels both comforting and luxurious.
Storage and Make-Ahead Tips
Apple Crisp Cheesecake stores beautifully. Keep it covered in the refrigerator for up to 5 days. You can also freeze individual slices wrapped tightly for up to 2 months. Thaw overnight in the refrigerator before serving.
Fun Fact
Apple-based desserts date back centuries, with early versions of apple crisps appearing as economical alternatives to pie during wartime rationing. Combining apples with cheesecake is a modern twist that celebrates both tradition and indulgence.
Apple Crisp Cheesecake
Ingredients
Equipment
Method
- Preheat oven to 350°F (175°C). Prepare a springform pan.
- Mix crust ingredients and press into pan. Bake briefly and cool.
- Cook apples with sugar and cinnamon until tender.
- Beat cream cheese and sugar until smooth. Add eggs and vanilla.
- Pour filling over crust, add apples, and top with crisp mixture.
- Bake until set. Cool gradually and refrigerate before serving.