Butterfinger Peanut Butter Pie: The Ultimate No-Bake Chocolate-Peanut Butter Indulgence
If you love the classic combination of chocolate and peanut butter, this Butterfinger Peanut Butter Pie is a dream come true. Smooth, creamy peanut butter filling, a crisp crust, and crunchy Butterfinger topping create a dessert that’s irresistible and decadent.
Whether you’re hosting a party, making a weeknight treat, or just craving chocolate-peanut butter heaven, this pie comes together easily with minimal prep and no baking required.
This recipe is perfect for anyone who loves creamy, indulgent desserts that feel homemade but require minimal effort.
Why You’ll Love This Pie
- No-Bake Convenience: Ready in under 20 minutes (plus chilling).
- Crunchy & Creamy Combo: Smooth peanut butter filling with crunchy Butterfinger pieces.
- Family Favorite: Loved by kids and adults alike.
- Make-Ahead Friendly: Assemble the pie a day ahead — flavors meld beautifully.
- Versatile Serving Options: Slice, scoop, or serve in mini cups for parties.
Ingredients
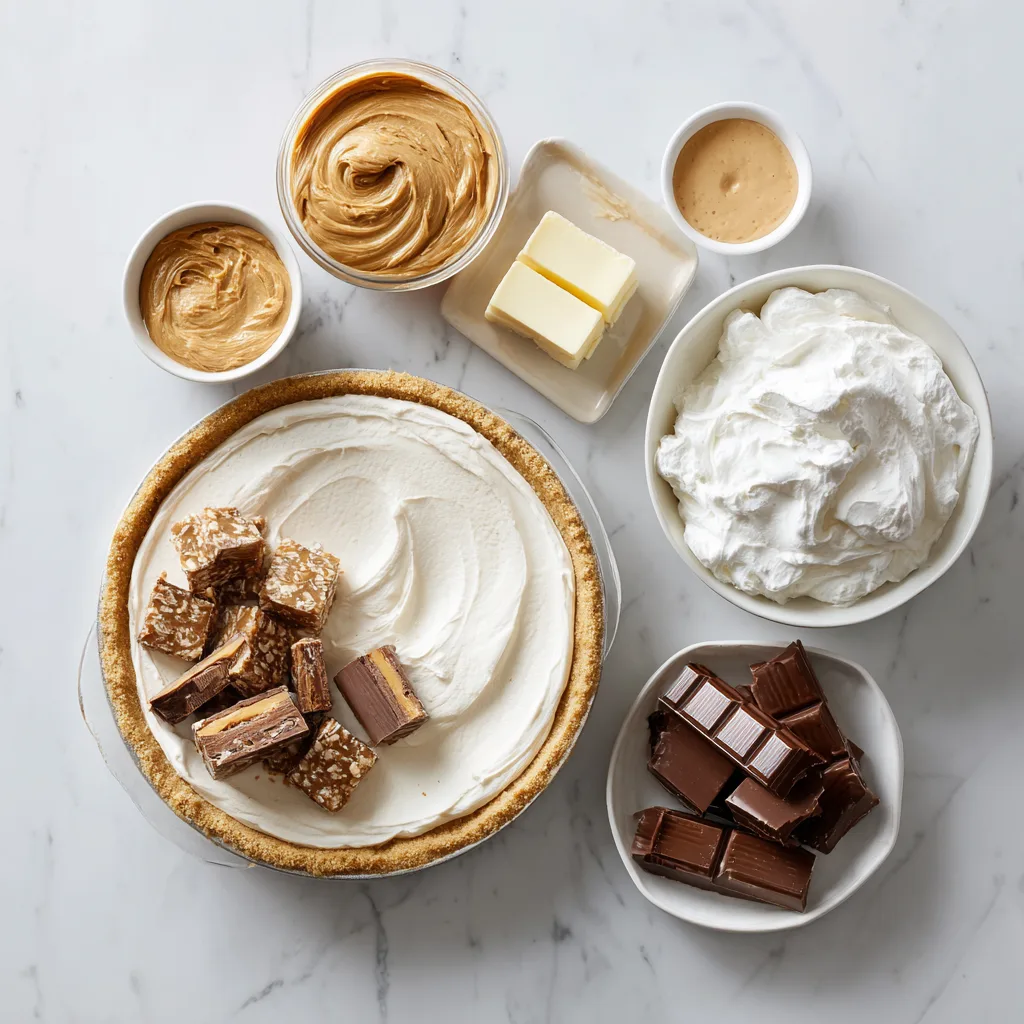
- 1 ½ cups graham cracker crumbs (or Oreo crumbs for chocolate crust)
- ¼ cup unsalted butter, melted
- 8 oz cream cheese, softened
- 1 cup creamy peanut butter
- 1 cup powdered sugar
- 1 teaspoon vanilla extract
- 1 ½ cups whipped topping (cool whip or homemade whipped cream)
- 3 Butterfinger candy bars, chopped
- ¼ cup chocolate syrup, for drizzling
Instructions
- Prepare the Crust
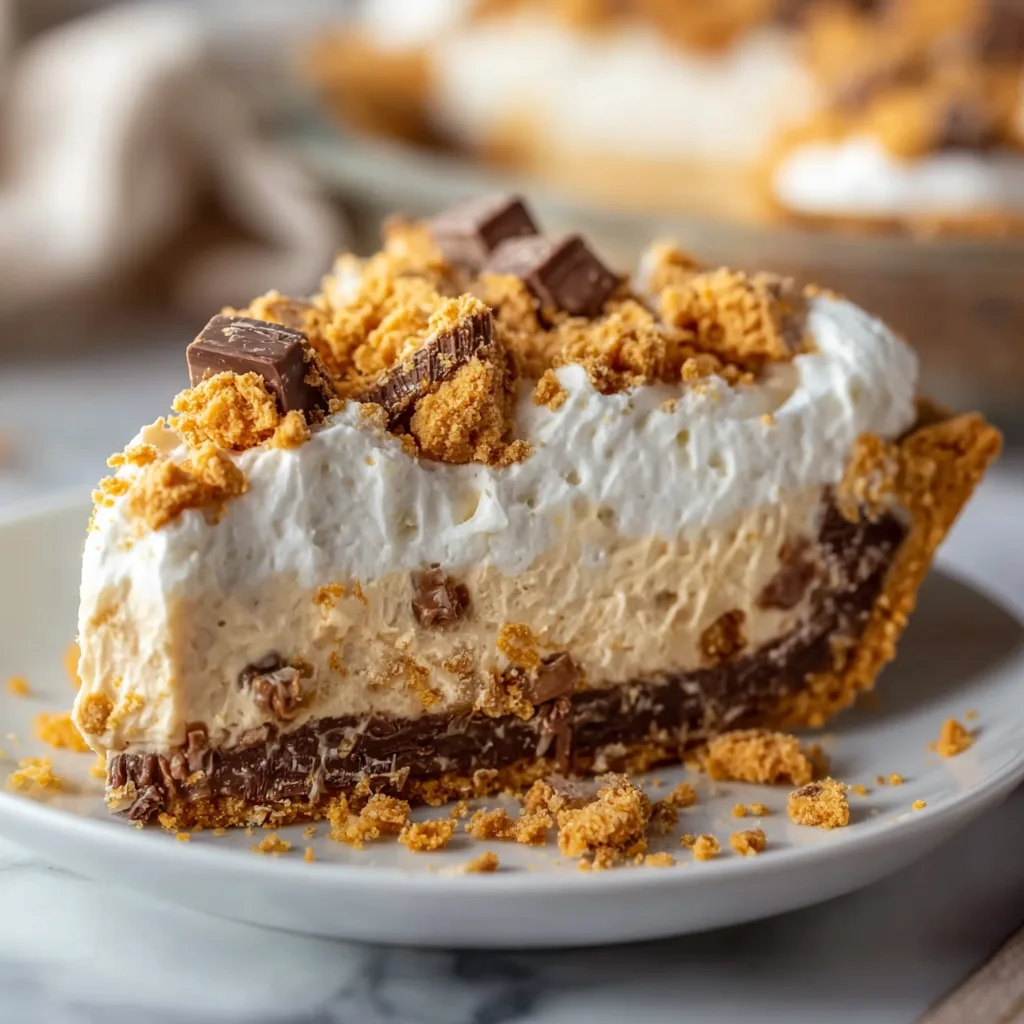
In a medium bowl, combine graham cracker crumbs and melted butter. Press firmly into a 9-inch pie pan. Chill in the fridge for 10 minutes to set. - Make the Peanut Butter Filling
In a large bowl, beat cream cheese and peanut butter together until smooth. Add powdered sugar and vanilla extract, mixing until fully incorporated. - Fold in Whipped Topping
Gently fold in 1 cup whipped topping to lighten the mixture and create a creamy texture. - Assemble the Pie
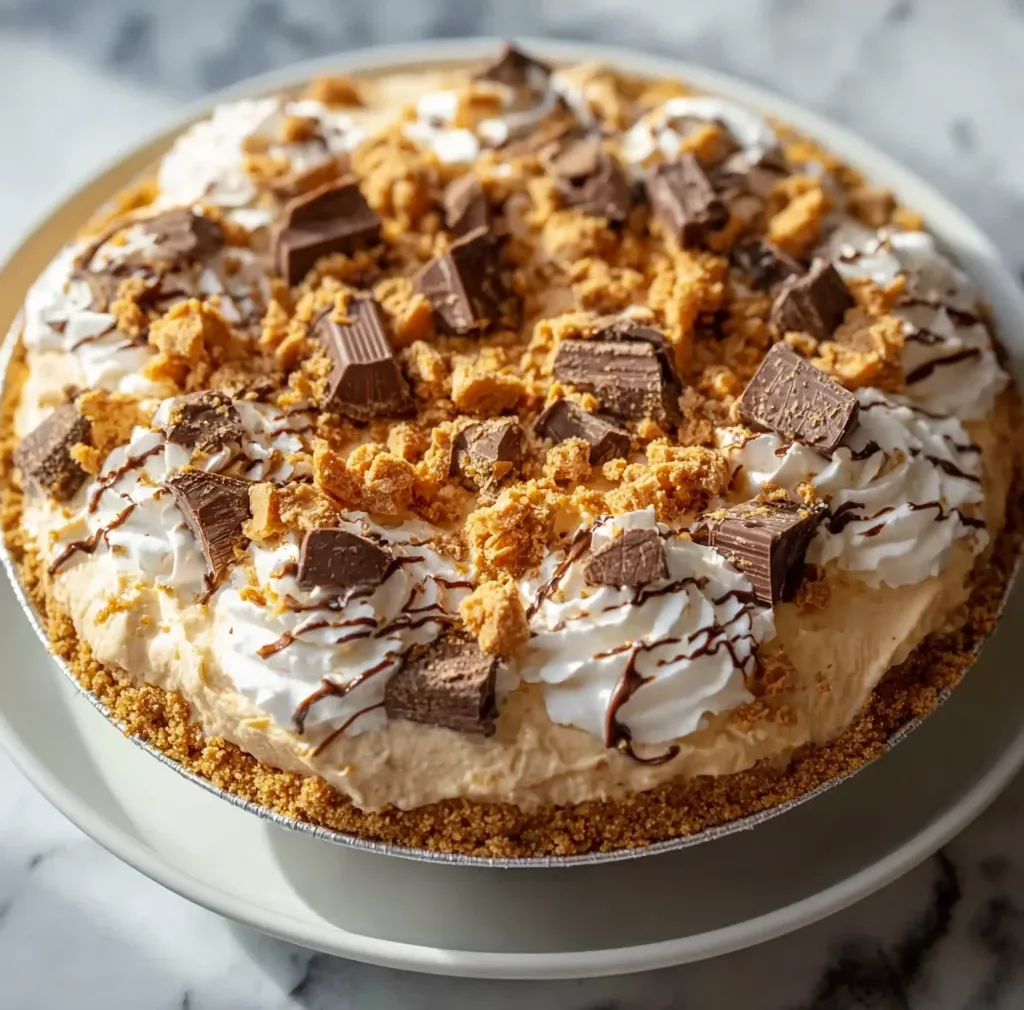
Spread the peanut butter filling evenly into the prepared crust. Smooth the top with a spatula. - Add Butterfinger Crunch
Sprinkle chopped Butterfinger pieces generously over the top. Press lightly to adhere. - Chill Until Firm
Refrigerate the pie for at least 2 hours, or until set. For best results, chill overnight. - Add Chocolate Drizzle & Serve
Drizzle chocolate syrup over the top just before serving. Optionally, add extra whipped topping swirls or Butterfinger crumbles for garnish.
Butterfinger Peanut Butter Pie
Ingredients
Equipment
Method
- Combine graham cracker crumbs and melted butter. Press into pie pan and chill 10 minutes.
- Beat cream cheese and peanut butter until smooth. Add powdered sugar and vanilla.
- Fold in whipped topping gently until creamy.
- Spread filling evenly in prepared crust.
- Top with chopped Butterfinger candy.
- Refrigerate at least 2 hours or overnight until set.
- Drizzle chocolate syrup over pie and serve.
Notes
Tips for the Perfect Butterfinger Pie
- Soften Cream Cheese: Makes the filling super smooth.
- Crunch Factor: Use fresh Butterfinger candy bars — older ones may be softer and less crunchy.
- Whipped Topping: Fold gently to maintain airiness and creaminess.
- Mini Version: Use muffin tins or dessert cups to make individual servings.
- Chocolate Crust Option: For extra chocolate flavor, swap graham crackers for chocolate cookies.
Delicious Variations
- Double Chocolate Butterfinger Pie: Use chocolate cookie crust and fold in mini chocolate chips.
- Peanut Butter Mousse Pie: Substitute half of the whipped topping with chocolate pudding.
- Nutty Twist: Add chopped peanuts or Reese’s pieces along with Butterfinger for extra texture.
- Caramel Drizzle: Add caramel sauce over the top for an indulgent touch.
Serving Suggestions
Serve slices chilled with:
- Extra whipped cream on the side
- A scoop of vanilla ice cream for ultimate indulgence
- Chocolate shavings or mini Butterfinger pieces for garnish
Perfect for birthday parties, holiday gatherings, or simple weekend treats.
Storage & Reheating
- Store: Refrigerate covered for up to 5 days.
- Freeze: Can freeze for up to 1 month; thaw in fridge before serving.
- Tip: Add Butterfinger topping just before serving if freezing to retain crunch.
Nutritional Highlights
Per Serving (1/8 pie slice approx.):
- Calories: 450
- Protein: 7g
- Carbs: 45g
- Fat: 28g
- Sugar: 32g
This dessert is indulgent, rich, and decadent — perfect as a treat or special occasion dessert.
Fun Fact: Peanut Butter & Chocolate Perfection
Butterfinger candy bars were introduced in the 1920s and became a popular chocolate-peanut butter combo. This pie elevates that classic pairing into a creamy, chilled dessert that’s as fun to serve as it is to eat.
Why This Pie Works
- Creamy peanut butter filling balances perfectly with crunchy candy
- No-bake format makes it easy for beginners or busy home cooks
- Sweet, slightly salty, and chocolatey — a dessert everyone loves
Final Thoughts
The Butterfinger Peanut Butter Pie is the ultimate no-bake dessert for peanut butter lovers. Quick to prepare, visually stunning, and packed with flavor, it’s perfect for entertaining or indulging on a quiet night. Once you try this creamy, crunchy, chocolatey pie, it will quickly become a favorite go-to dessert.