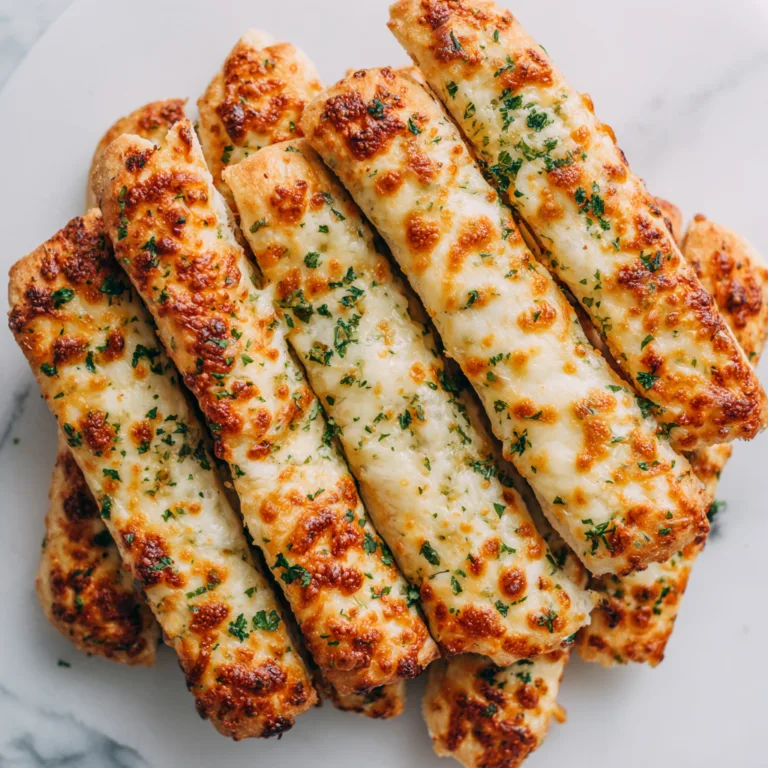
Garlic Bread Grilled Cheese: Ultimate Comfort in Every Bite
If there’s one sandwich that combines two all-time favorites—garlic bread and grilled cheese—it’s the Garlic Bread Grilled Cheese. This indulgent, crispy, and melty delight is perfect for a cozy lunch, a quick dinner, or even as a decadent snack. Its irresistible aroma will fill your kitchen and have everyone lining up for seconds.
This recipe is simple enough for beginners yet gourmet enough to impress any foodie. Using golden, buttered, garlicky bread as the base, and layering it with gooey mozzarella and Parmesan cheese, each bite delivers a perfect crunch followed by rich, savory cheese. Let’s dive into the ultimate guide for making the best Garlic Bread Grilled Cheese ever.
Ingredients
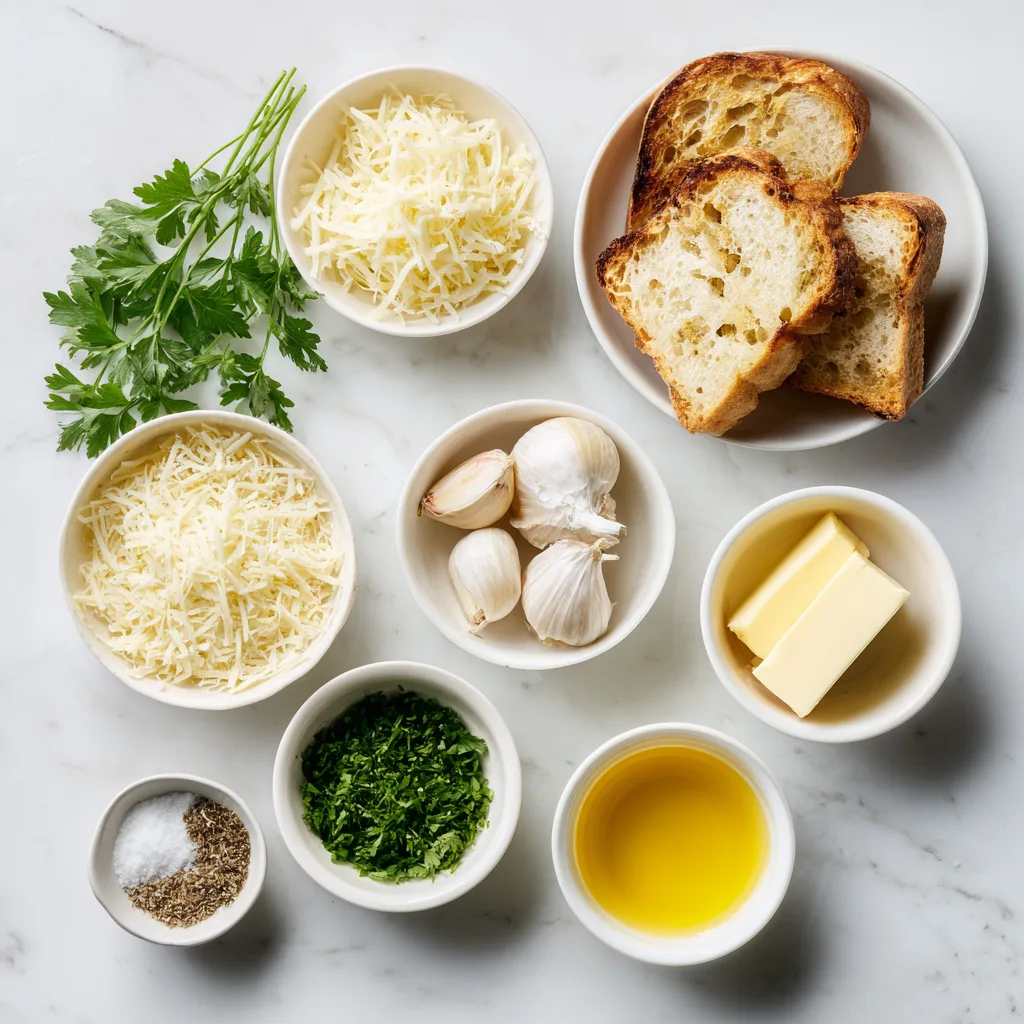
- 4 slices of thick-cut sourdough or Italian bread
- 3 tablespoons unsalted butter, softened
- 2 cloves garlic, minced
- 1 cup shredded mozzarella cheese
- ½ cup grated Parmesan cheese
- 1 teaspoon dried Italian herbs (optional)
- 1 teaspoon olive oil
- Fresh parsley, chopped, for garnish
- Salt and pepper, to taste
Instructions
- Prep the Garlic Butter:
In a small bowl, mix softened butter with minced garlic, a pinch of salt, and optional Italian herbs. Spread evenly on one side of each slice of bread. - Assemble the Sandwich:
Place two slices of bread butter-side down on a clean surface. Sprinkle a layer of mozzarella and Parmesan evenly on each slice. Top with the remaining bread slices, butter-side up. - Heat the Pan:
Place a large skillet or nonstick pan over medium-low heat. Drizzle olive oil to prevent sticking and add a rich flavor. - Grill the Sandwich:
Place the sandwich in the skillet. Cook slowly for 3–4 minutes on each side, pressing gently with a spatula, until the bread is golden brown and crispy, and the cheese is melted. Adjust heat if the bread browns too quickly before the cheese melts. - Serve:
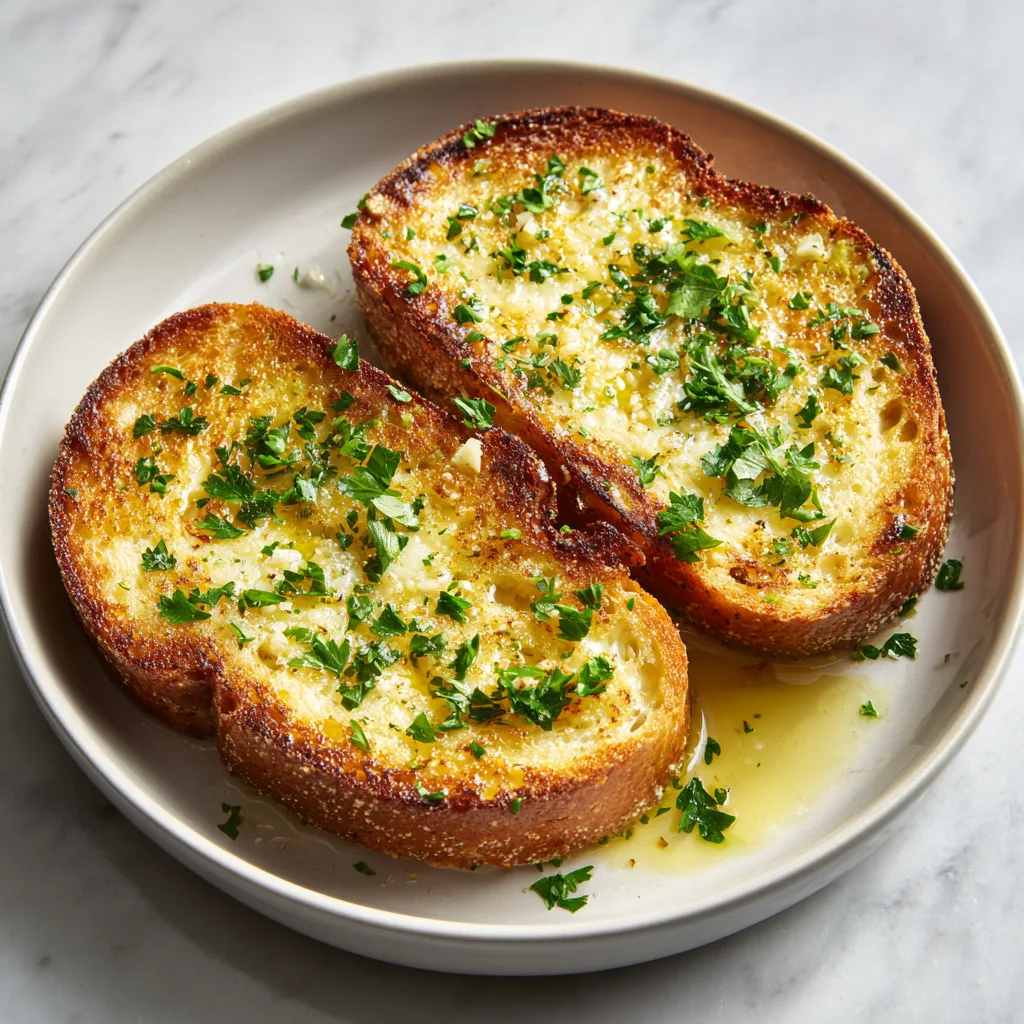
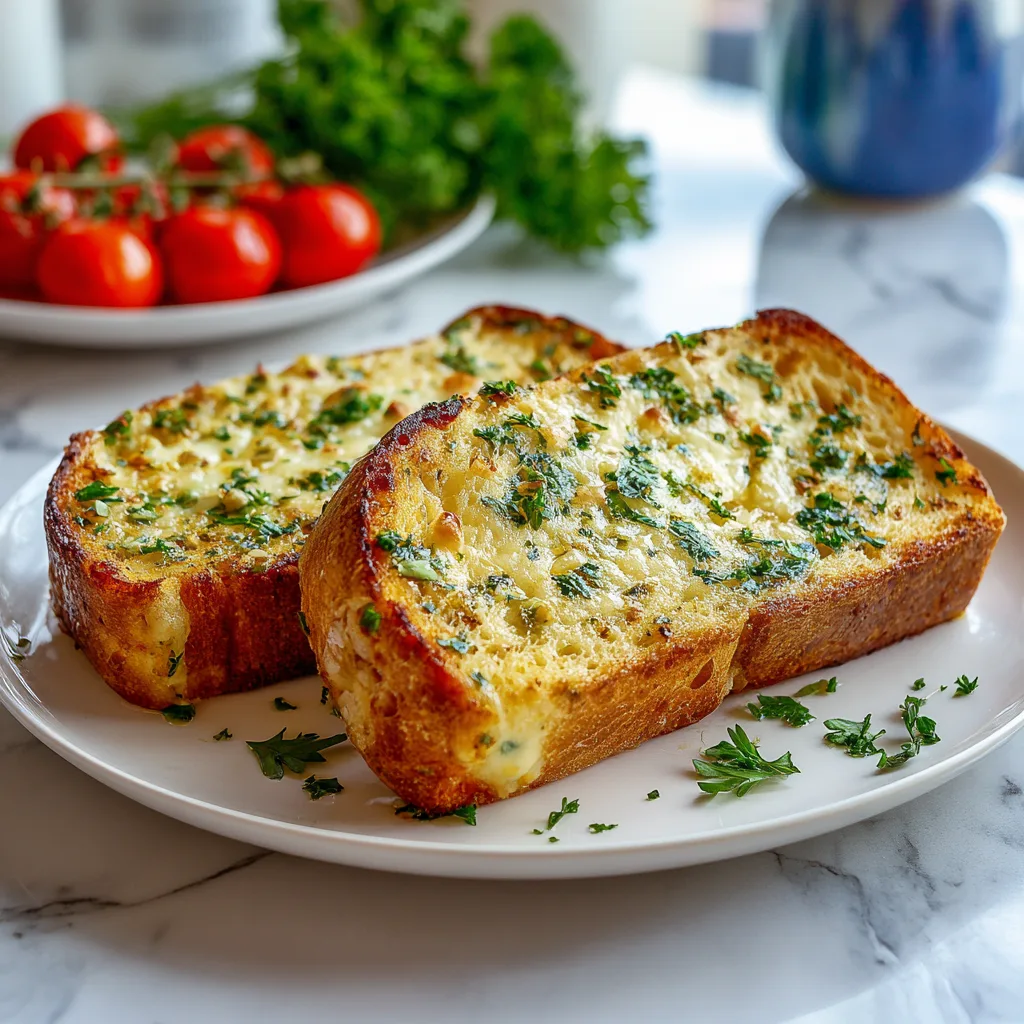
Remove from heat, slice diagonally, and garnish with fresh parsley. Serve immediately for the best gooey-cheesy experience.
Tips for Perfect Garlic Bread Grilled Cheese
- Use Quality Bread: Thick-cut sourdough or Italian bread provides a sturdy base and crispy crust. Avoid pre-sliced sandwich bread—it tends to get soggy.
- Low and Slow Cooking: Medium-low heat ensures the bread browns slowly while giving the cheese time to melt evenly.
- Mix Cheeses: Combine mozzarella with a hard cheese like Parmesan for gooey stretch and umami flavor. Gruyère or sharp cheddar also work beautifully.
- Garlic Butter Upgrade: Add a pinch of smoked paprika or chili flakes to the garlic butter for a subtle smoky kick.
Creative Variations
- Caprese Style: Add fresh basil leaves, tomato slices, and a drizzle of balsamic glaze inside for an Italian-inspired twist.
- Bacon Lover’s Version: Layer crispy cooked bacon inside for added crunch and savory flavor.
- Herb-Infused Cheese: Mix shredded cheddar with fresh chopped rosemary or thyme for an aromatic upgrade.
- Vegan Version: Use plant-based butter and vegan cheese for a fully vegan comfort sandwich.
Serving Suggestions
- Pair with a fresh green salad for a light, balanced meal.
- Serve alongside tomato soup for the classic grilled cheese experience.
- Garnish with extra parsley or chili flakes for added visual appeal and flavor.
Fun Facts & Cultural Context
Grilled cheese sandwiches date back to the 1920s in the United States, when inexpensive cheese and bread became a quick comfort food during the Great Depression. Garlic bread, with its roots in Italian cuisine, evolved as a simple way to enhance bread with olive oil, butter, and herbs. By combining these two classics, the Garlic Bread Grilled Cheese represents the best of both worlds: Italian flavor with American comfort food charm.
Interestingly, this sandwich is versatile enough to be adapted internationally. For example, swapping mozzarella for cheddar or adding spicy kimchi gives it an East-Asian fusion twist, showing just how universal and beloved melted cheese on bread can be.
Storage & Reheating
- Storage: Keep any leftover sandwiches in an airtight container in the fridge for up to 2 days.
- Reheating: For the best crunch, reheat in a skillet over medium-low heat rather than using a microwave. Covering briefly with a lid helps melt the cheese again without soggy bread.
Why You’ll Love This Recipe
- Fast and simple with minimal ingredients.
- Perfect for lunch, dinner, or indulgent snacks.
- Combines crispy garlic bread and melty cheese in every bite.
- Easy to customize with herbs, spices, and additional fillings.
No wonder this sandwich is becoming a modern classic! The combination of garlic, butter, and rich cheese makes it irresistible and comforting in every sense.
Garlic Bread Grilled Cheese
Ingredients
Equipment
Method
- In a small bowl, mix softened butter with minced garlic, salt, and optional Italian herbs.
- Spread garlic butter evenly on one side of each slice of bread.
- Place two slices butter-side down, layer with mozzarella and Parmesan, and top with remaining bread slices, butter-side up.
- Heat skillet over medium-low heat and drizzle with olive oil.
- Place sandwiches in skillet and cook 3–4 minutes per side until golden brown and cheese is melted.
- Remove from skillet, slice diagonally, garnish with fresh parsley, and serve immediately.