Jack Skellington Oreo Pops Recipe – Spooky Cute Halloween Treats
When Halloween comes around, nothing gets people more excited than themed treats that are as fun to make as they are to eat. If you’re a fan of The Nightmare Before Christmas, these Jack Skellington Oreo Pops are a must-have addition to your spooky spread.
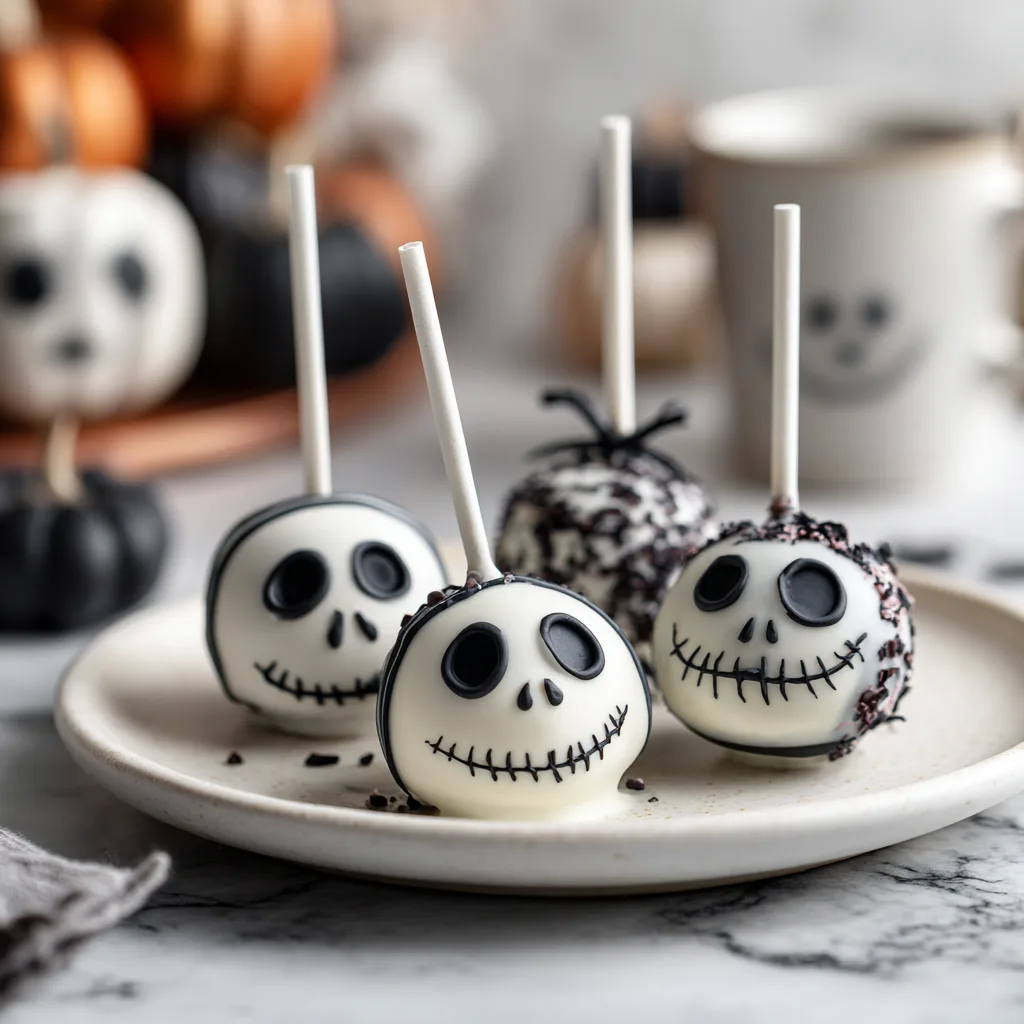
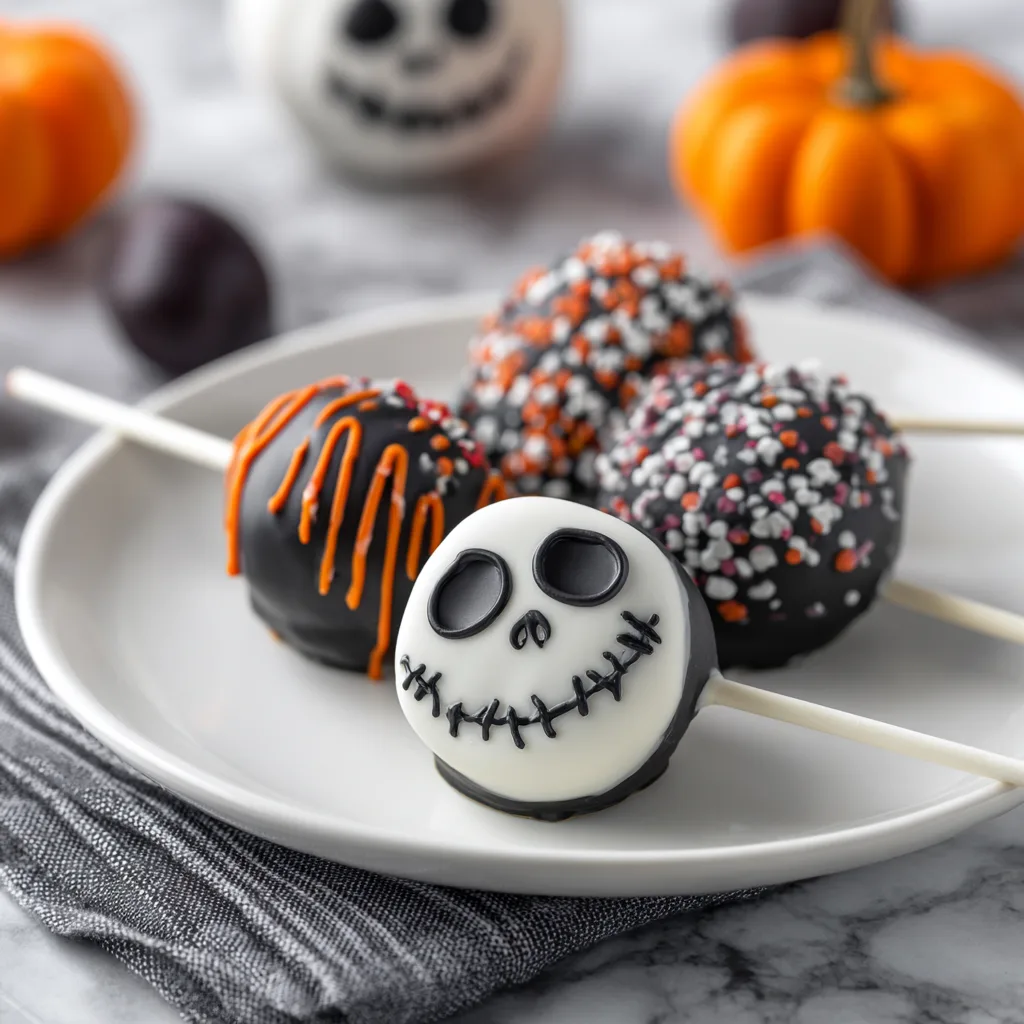
With their iconic white chocolate coating and hand-drawn Jack Skellington faces, these Oreo pops are not just delicious, they’re also an activity you can enjoy with family and friends. Kids will love helping decorate, and adults will appreciate the nostalgic charm. Best of all, they require just a few simple ingredients, making them a beginner-friendly Halloween recipe that looks like you spent hours in the kitchen.
Why You’ll Love This Recipe
- No-Bake & Easy: Just dip, decorate, and set — no oven required.
- Perfect for Halloween Parties: Themed, fun, and great as edible décor.
- Kid-Friendly: Children can help with dipping and drawing faces.
- Make Ahead Friendly: Stays fresh for days, making them ideal for party prep.
- Customizable: Try different Oreos or candy melts to add a twist.
Ingredients You’ll Need
- Oreos: Classic Oreos work best, but double-stuffed make inserting sticks easier.
- White Chocolate or Candy Melts: For coating and creating Jack’s white face.
- Black Edible Marker or Black Icing Gel: To draw the facial details.
- Lollipop Sticks: For turning Oreos into pops.
- Optional Decorations: Halloween sprinkles, ribbon for the sticks, or edible glitter for flair.

Step-By-Step Instructions
Step 1: Prep the Oreos
Carefully twist open each Oreo. Insert a lollipop stick into the cream center and press gently. Add a dab of melted chocolate inside, then close the Oreo again to secure the stick.
Step 2: Dip in White Chocolate
Melt white chocolate or candy melts until smooth. Dip each Oreo pop completely and let excess drip off. Lay them flat on parchment paper to set.
Step 3: Add Jack Skellington Faces
Once the chocolate coating is firm, use a black edible marker or black icing gel to draw Jack’s eyes, nose, and stitched smile. Keep the expressions varied for extra fun!
Step 4: Let Them Dry
Allow the decorated pops to dry fully before serving or packaging.
Pro Tips for Success
- Use Double-Stuffed Oreos: Makes it easier to secure the stick inside without breaking the cookie.
- Thin Chocolate If Needed: Add a teaspoon of coconut oil to the white chocolate if it’s too thick.
- Work in Batches: Dip a few Oreos at a time, then decorate before moving on.
- Practice Faces: Try sketching Jack’s face on paper first before drawing on the Oreos.
- Storage Tip: Store in an airtight container at room temperature for 3–4 days.
Jack Skellington Oreo Pops
Ingredients
Equipment
Method
- Twist open Oreos, insert lollipop sticks into the cream center, add a dab of melted chocolate, and close to secure.
- Dip Oreos fully in melted white chocolate and let excess drip off. Place on parchment paper.
- Allow coating to set, then draw Jack Skellington’s face with a black edible marker or icing gel.
- Let decorations dry before serving or packaging.
Notes
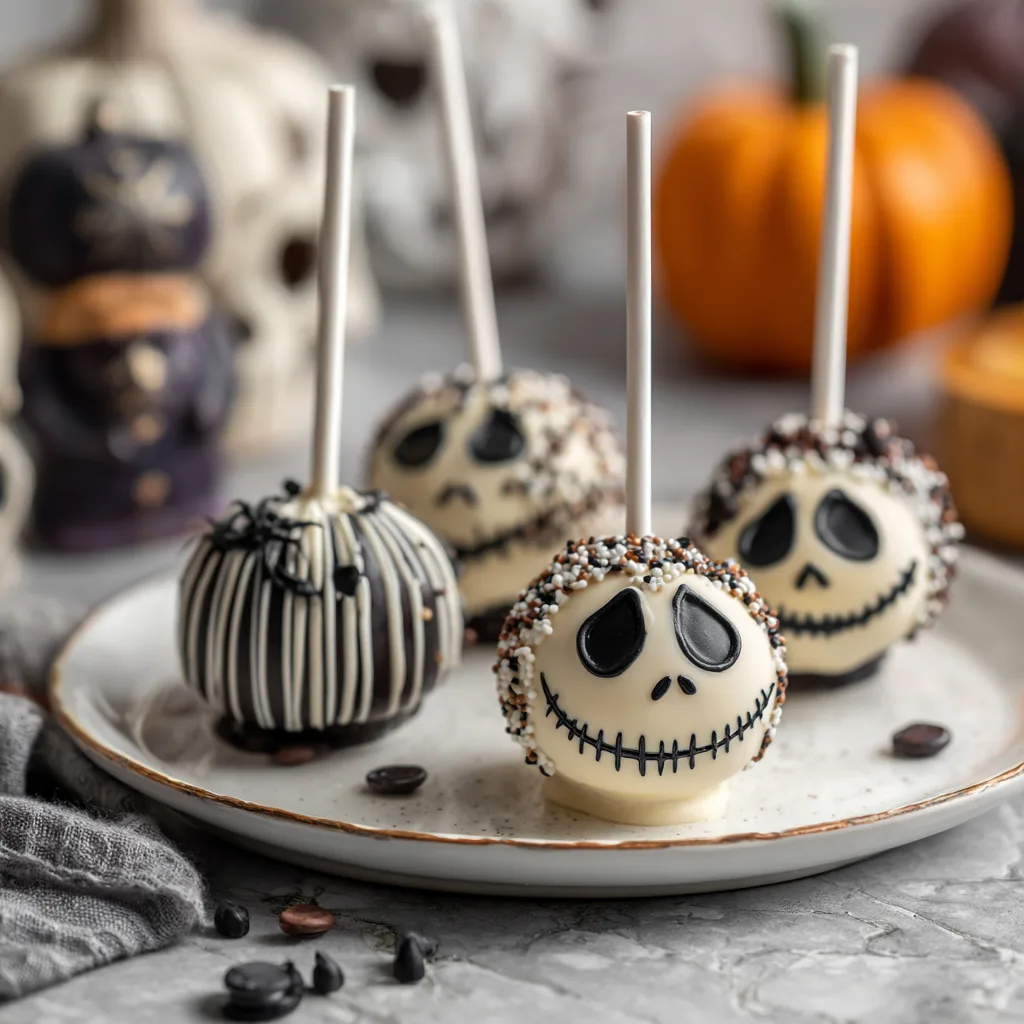
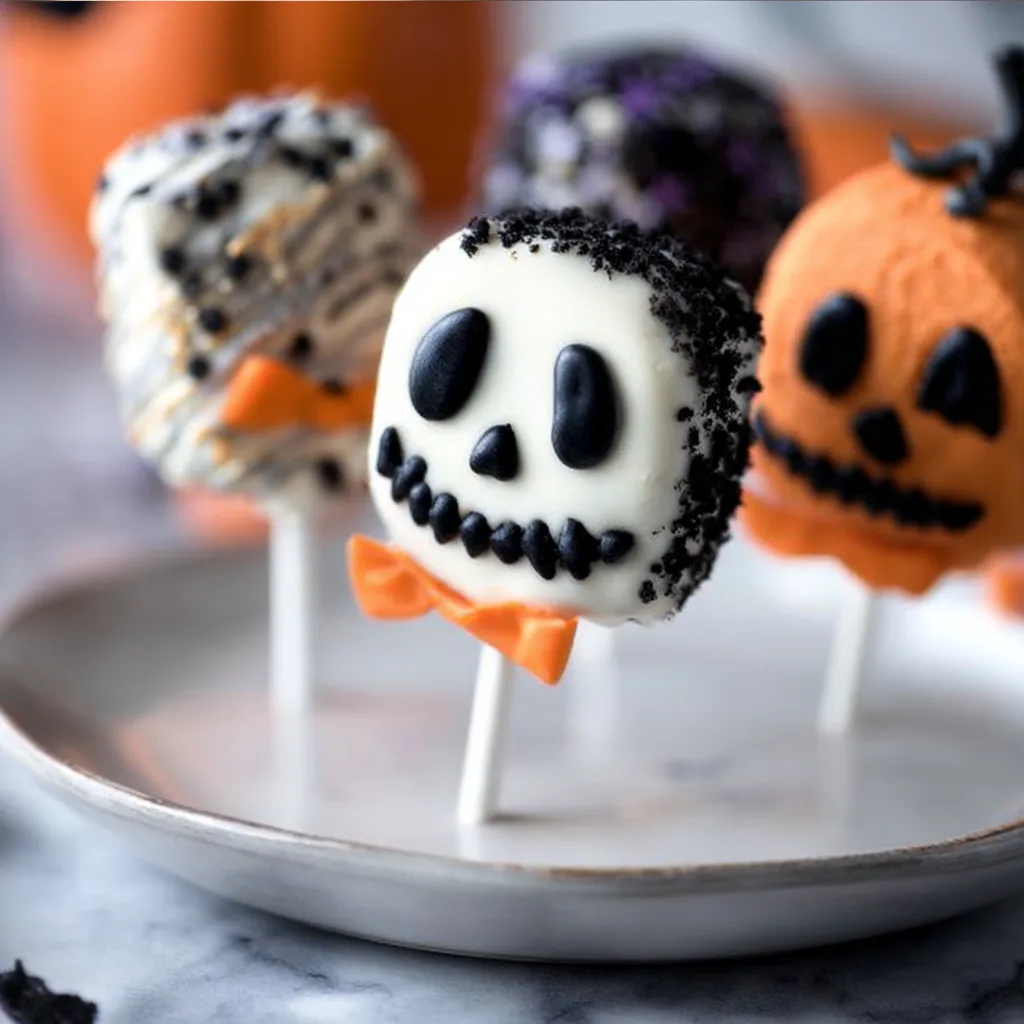
Creative Variations
- Glow-in-the-Dark Pops: Use glow-in-the-dark lollipop sticks for an extra spooky vibe.
- Pumpkin King Pops: Swap white chocolate for orange candy melts, then add Jack’s face in black.
- Spider Web Pops: Draw spider webs instead of Jack’s face for variety.
- Nightmare Pops: Make a mix of Jack, Sally, and Zero designs for a themed party platter.
Why This Recipe Works
These Oreo pops are the perfect combination of simple and impressive. The process is easy enough for beginners, but the finished treats look bakery-worthy. Plus, Oreos, chocolate, and Halloween? That’s a trio no one can resist.
They also make fantastic edible gifts. Wrap each pop in a clear bag and tie with black or orange ribbon for a spooky handout. Whether you’re hosting a Halloween party, making classroom treats, or just want to celebrate the spooky season, these pops check all the boxes.
FAQ
Q: Can I use different cookies?
A: Yes! Any sandwich cookie with a cream filling works.
Q: Can I make these ahead of time?
A: Absolutely. They can be made up to 3 days in advance.
Q: Do I need special tools for the faces?
A: A black edible marker is easiest, but black icing gel with a fine tip works just as well.