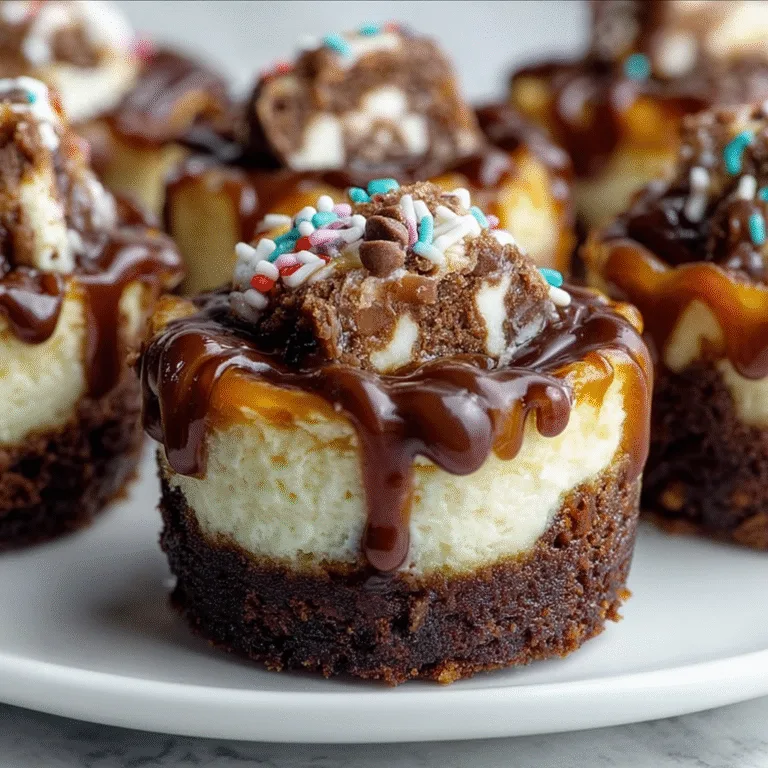
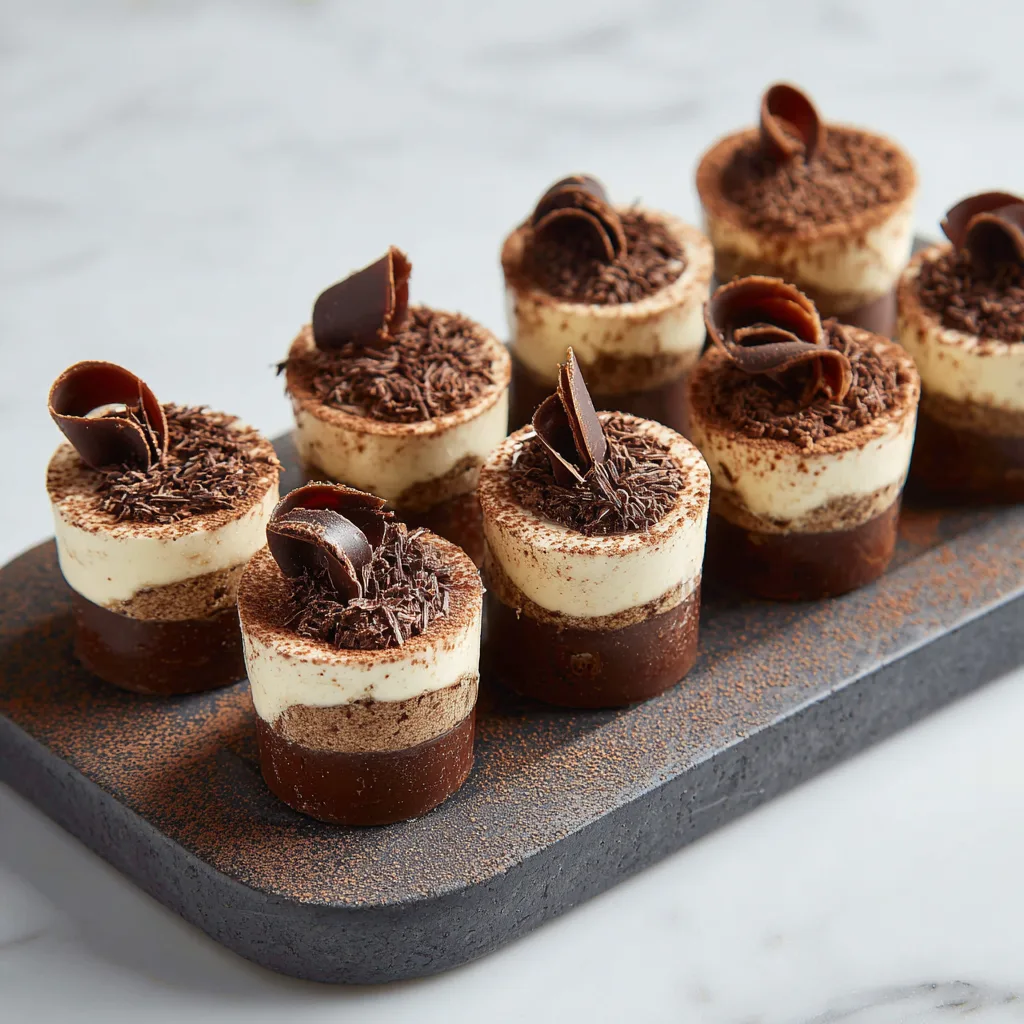
Mini Tiramisu Chocolate Cups: A Bite-Sized Twist on an Italian Classic
Few desserts inspire the same instant recognition and affection as tiramisu. Creamy, coffee-kissed, lightly sweet, and dusted with cocoa, it’s the dessert that feels elegant without being fussy. Now imagine all of that indulgence distilled into a handheld, mess-free format. Mini Tiramisu Chocolate Cups do exactly that, combining the soul of traditional tiramisu with the irresistible snap of a chocolate shell.
These little cups are proof that big flavor doesn’t require a big pan. They’re rich without being overwhelming, refined without being complicated, and perfectly portioned for entertaining, gifting, or simply treating yourself. Best of all, this recipe is no-bake, which means maximum payoff with minimal effort.
Whether you’re planning a holiday dessert table, a dinner party finale, or a make-ahead sweet for busy weeks, these mini tiramisu cups deliver classic flavor with modern charm.
Why Mini Tiramisu Chocolate Cups Work So Well
Traditional tiramisu is layered in a large dish, meant to be scooped and served. While delicious, it can be messy and imprecise. Mini tiramisu chocolate cups solve that problem beautifully.
Each cup is:
- Individually portioned, making serving effortless
- Encased in chocolate, adding texture and structure
- No-bake, perfect for warm kitchens or busy schedules
- Elegant, yet approachable for home cooks
The chocolate shell acts as both container and flavor enhancer. Dark chocolate balances the sweetness of the mascarpone cream while reinforcing the cocoa notes that tiramisu lovers crave.
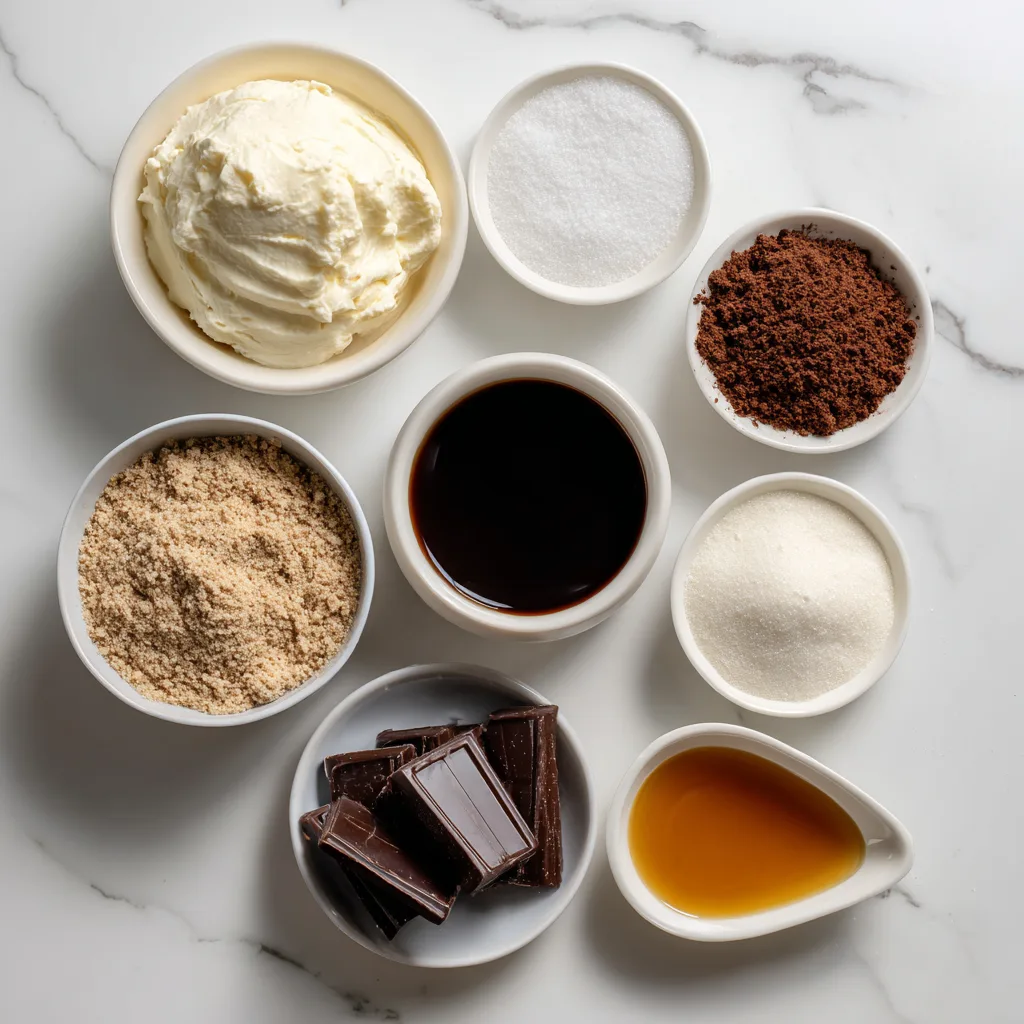
Ingredients
- Dark chocolate (for shells)
- Mascarpone cheese, room temperature
- Heavy whipping cream
- Granulated sugar
- Vanilla extract
- Strong brewed espresso or coffee, cooled
- Ladyfingers or crisp cookies, finely crushed
- Unsweetened cocoa powder
Instructions
- Melt the dark chocolate gently using a double boiler or microwave in short bursts, stirring until smooth.
- Spoon melted chocolate into silicone mini muffin molds or paper-lined mini muffin tins, coating the sides evenly. Chill until firm.
- In a mixing bowl, whip heavy cream until soft peaks form. Set aside.
- In another bowl, whisk mascarpone, sugar, and vanilla extract until smooth and creamy.
- Gently fold the whipped cream into the mascarpone mixture until light and airy.
- Combine crushed ladyfingers with cooled espresso until just moistened.
- Remove chocolate shells from molds. Add a small layer of espresso-soaked crumbs to each shell.
- Pipe or spoon mascarpone cream over the crumbs. Repeat layers if space allows, finishing with cream.
- Chill the filled cups for at least 30 minutes to set.
- Before serving, dust generously with cocoa powder and garnish as desired.
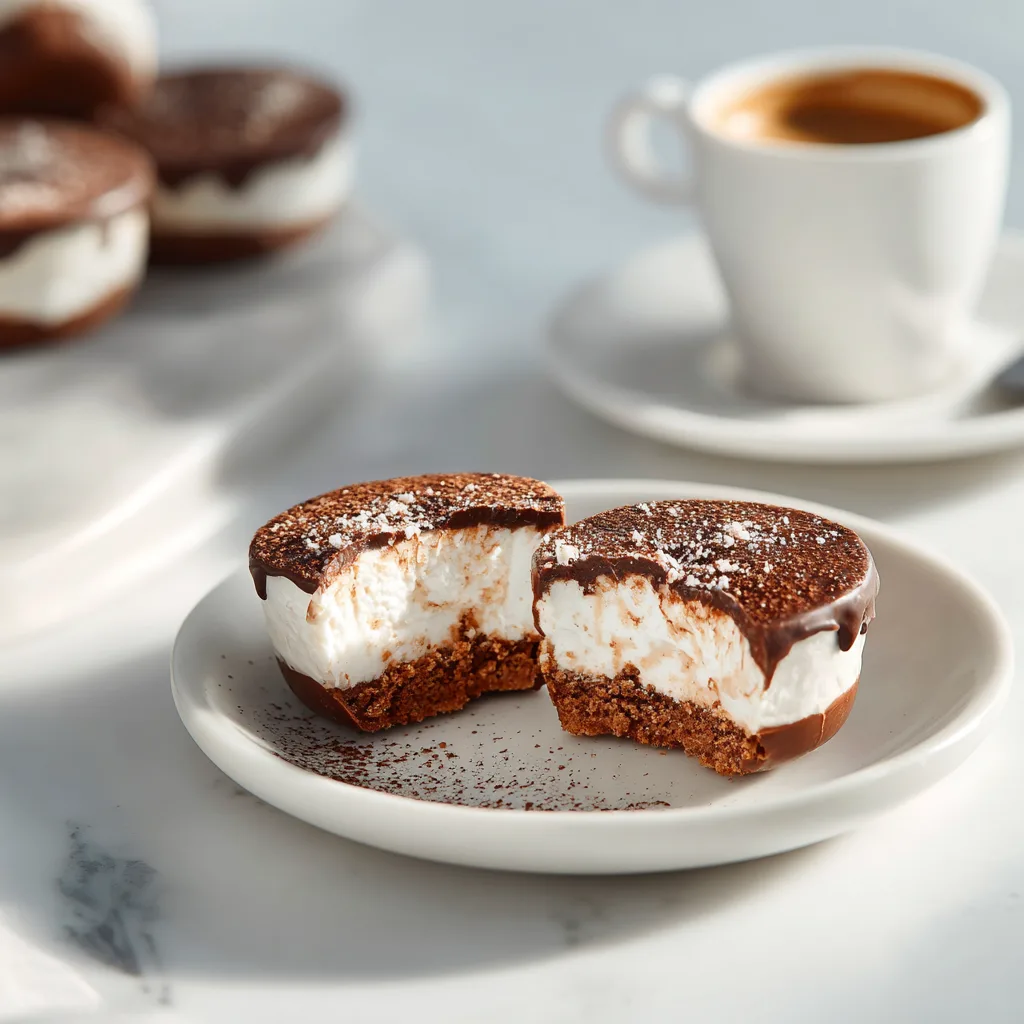
Texture, Flavor, and Balance
One bite of a mini tiramisu chocolate cup reveals multiple layers of contrast. The chocolate shell snaps cleanly, giving way to cloud-like mascarpone cream. The espresso-soaked crumbs add depth and slight bitterness, while cocoa powder finishes everything with that unmistakable tiramisu aroma.
Because these are smaller portions, the flavors feel focused and intentional. There’s no heaviness, no sogginess—just balanced indulgence in every bite.
Tips for Perfect Mini Tiramisu Cups
- Use high-quality chocolate: Since the shell is prominent, quality matters.
- Don’t over-soak crumbs: They should be moist, not wet.
- Chill thoroughly: This helps layers set and flavors meld.
- Pipe for precision: A piping bag keeps layers neat and professional.
Creative Variations
- Alcohol-Free: Stick to espresso only—classic and family-friendly.
- Chocolate Espresso: Add cocoa powder to the mascarpone mixture.
- White Chocolate Shells: For a sweeter, visually striking version.
- Hazelnut Tiramisu: Add a spoon of hazelnut spread to the cream.
Serving Suggestions
Serve mini tiramisu chocolate cups straight from the fridge for clean layers and maximum snap. They pair beautifully with espresso, cappuccino, or even a small dessert wine. Arrange them on a tiered tray for parties or box them individually for edible gifts.
Make-Ahead & Storage
These cups can be prepared up to 48 hours in advance and stored chilled in an airtight container. Add cocoa powder just before serving for the freshest appearance.
Cultural Notes: Tiramisu’s Enduring Appeal
Tiramisu originated in Italy as a dessert meant to “pick you up,” thanks to its espresso base. Over time, it became a global favorite, adapted into cakes, jars, cheesecakes, and now chocolate cups. This version honors the original flavors while embracing modern presentation and convenience.
Final Thoughts
Mini Tiramisu Chocolate Cups are proof that tradition and innovation can coexist beautifully. They’re elegant without being intimidating, indulgent without excess, and versatile enough for nearly any occasion. Once you try them, they’ll become a staple dessert in your rotation—requested often, remembered always.
Mini Tiramisu Chocolate Cups
Ingredients
Equipment
Method
- Melt dark chocolate and coat mini muffin molds to form shells. Chill until firm.
- Whip heavy cream to soft peaks and set aside.
- Mix mascarpone, sugar, and vanilla until smooth.
- Fold whipped cream gently into mascarpone mixture.
- Mix ladyfinger crumbs with espresso until lightly moistened.
- Layer crumbs and cream inside chocolate shells.
- Chill cups for at least 30 minutes to set.
- Dust with cocoa powder before serving.