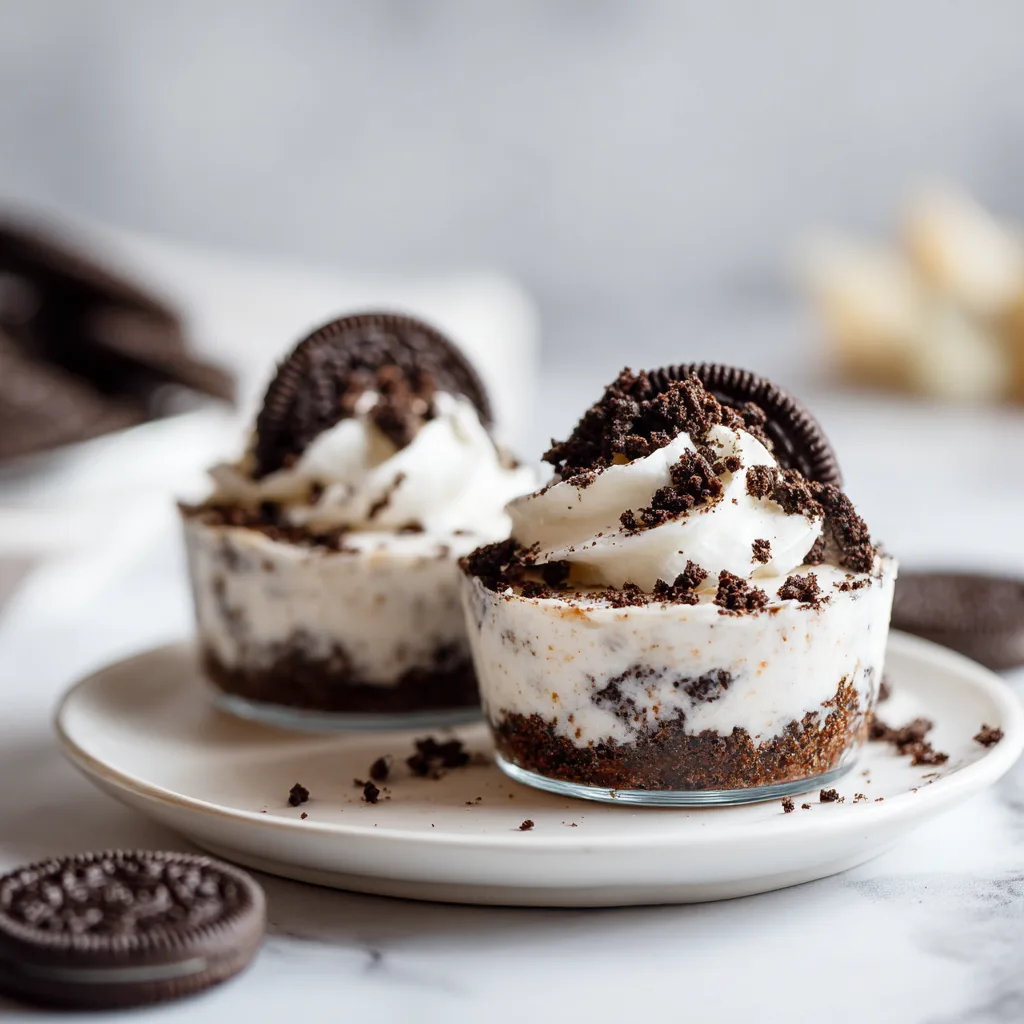
No-Bake Oreo Cheesecake Cups
Every family has a dessert that makes everyone stop mid-conversation. For some, it’s apple pie. For others, it’s brownies. But in our kitchen, it’s always been Oreos. The black-and-white cookie is nostalgic, comforting, and versatile enough to transform into something elegant while still playful.
One of the easiest and most impressive Oreo desserts you can whip up is No-Bake Oreo Cheesecake Cups. No ovens, no complicated steps, just creamy layers of cheesecake filling, crunchy cookie bits, and a final flourish of whipped cream. Whether you’re planning a party, surprising the kids after school, or simply craving something indulgent, this recipe delivers all the satisfaction with half the effort.
Why You’ll Love This Recipe
- No baking required – perfect for hot days or busy weeks.
- Portion-friendly – individual cups make serving stress-free.
- Customizable – swap Oreos for Golden Oreos, Mint Oreos, or seasonal cookie flavors.
- Kid-approved – both the making and the eating.
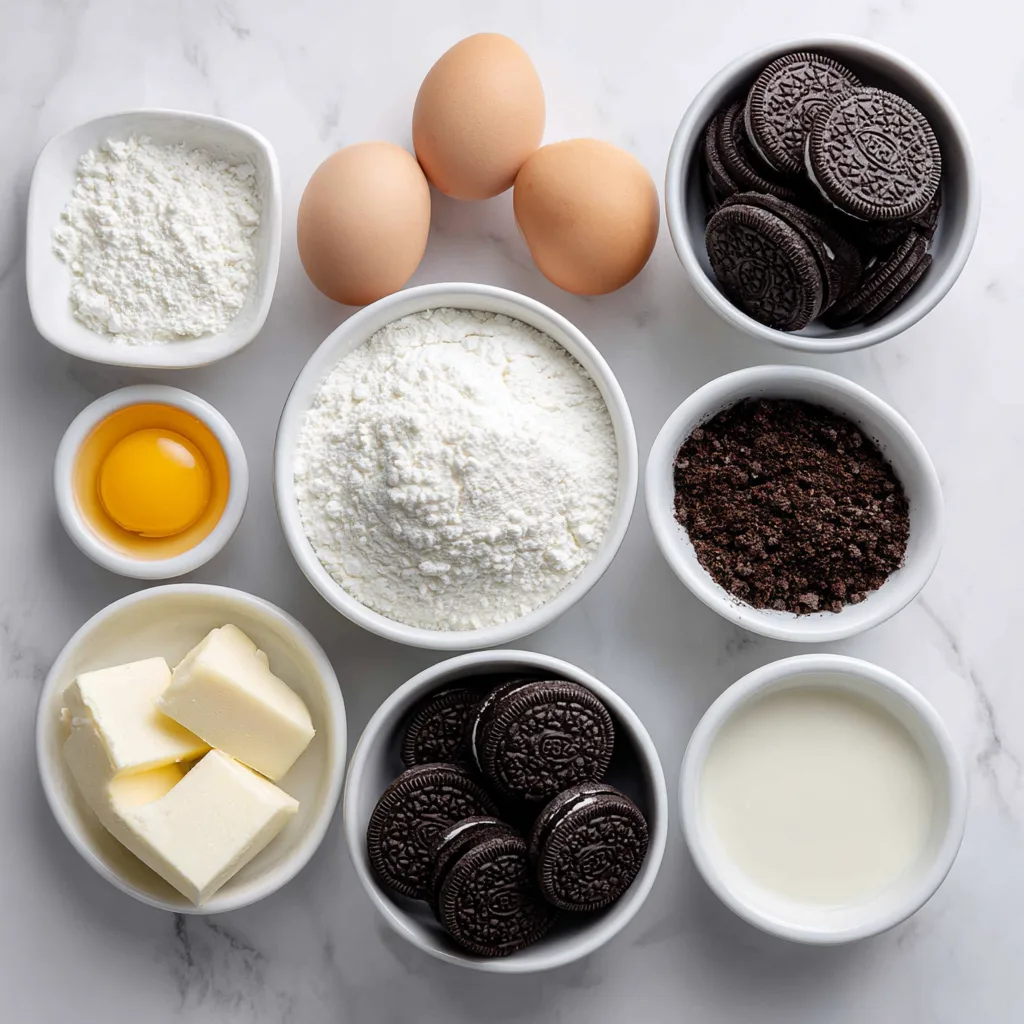
Ingredients
- 24 Oreo cookies (divided, some for crust and some for topping)
- 2 tablespoons melted unsalted butter
- 8 oz (225 g) cream cheese, softened
- 1/2 cup powdered sugar
- 1 teaspoon vanilla extract
- 1 cup heavy whipping cream (chilled)
- 2 tablespoons granulated sugar (for whipped cream)
- Extra Oreos for garnish
Instructions
- Prepare the Oreo crust base: Crush 12 Oreo cookies into fine crumbs (a food processor works best). Mix with melted butter until combined. Divide evenly among small cups or ramekins and press down gently to form the base.
- Make the cheesecake filling: In a large mixing bowl, beat softened cream cheese, powdered sugar, and vanilla until smooth and creamy.
- Whip the cream: In a separate chilled bowl, whip heavy cream with granulated sugar until stiff peaks form.
- Combine the filling: Gently fold the whipped cream into the cream cheese mixture to create a light, airy cheesecake filling.
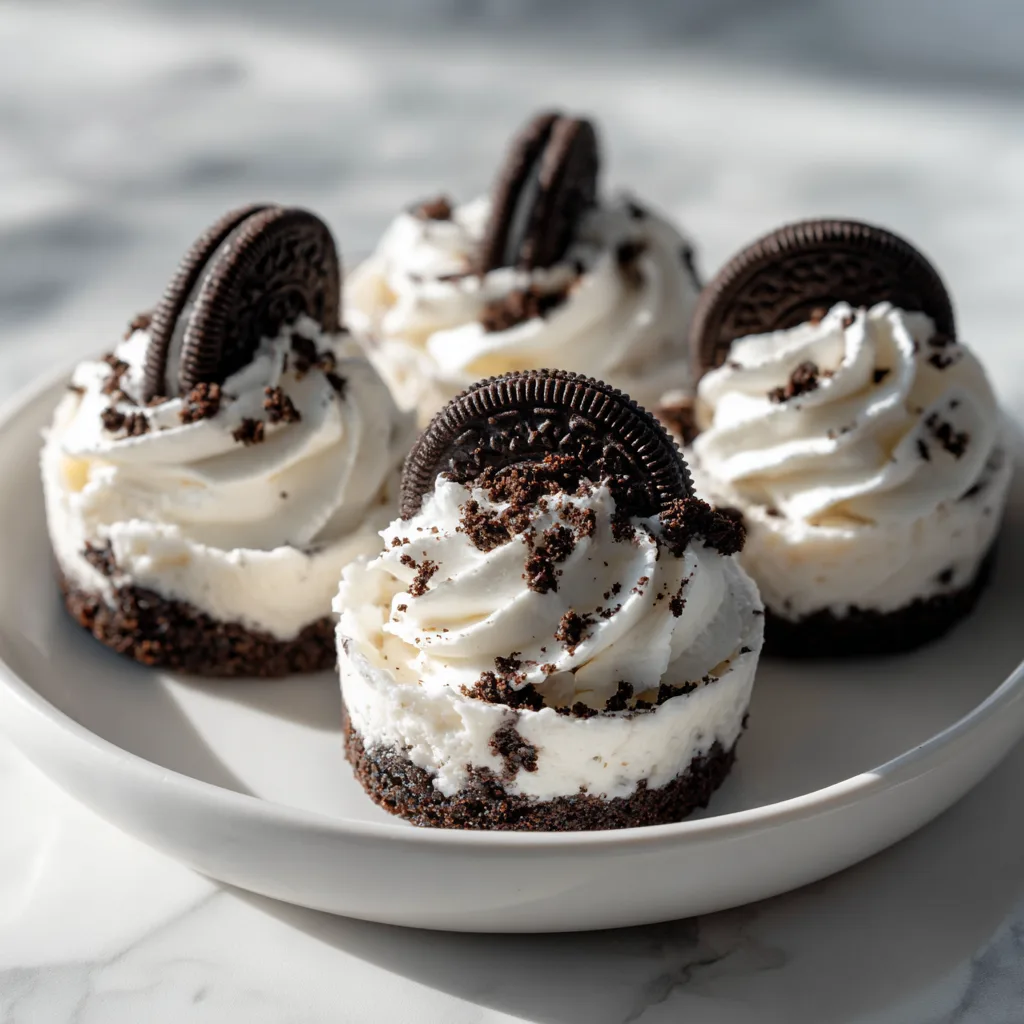
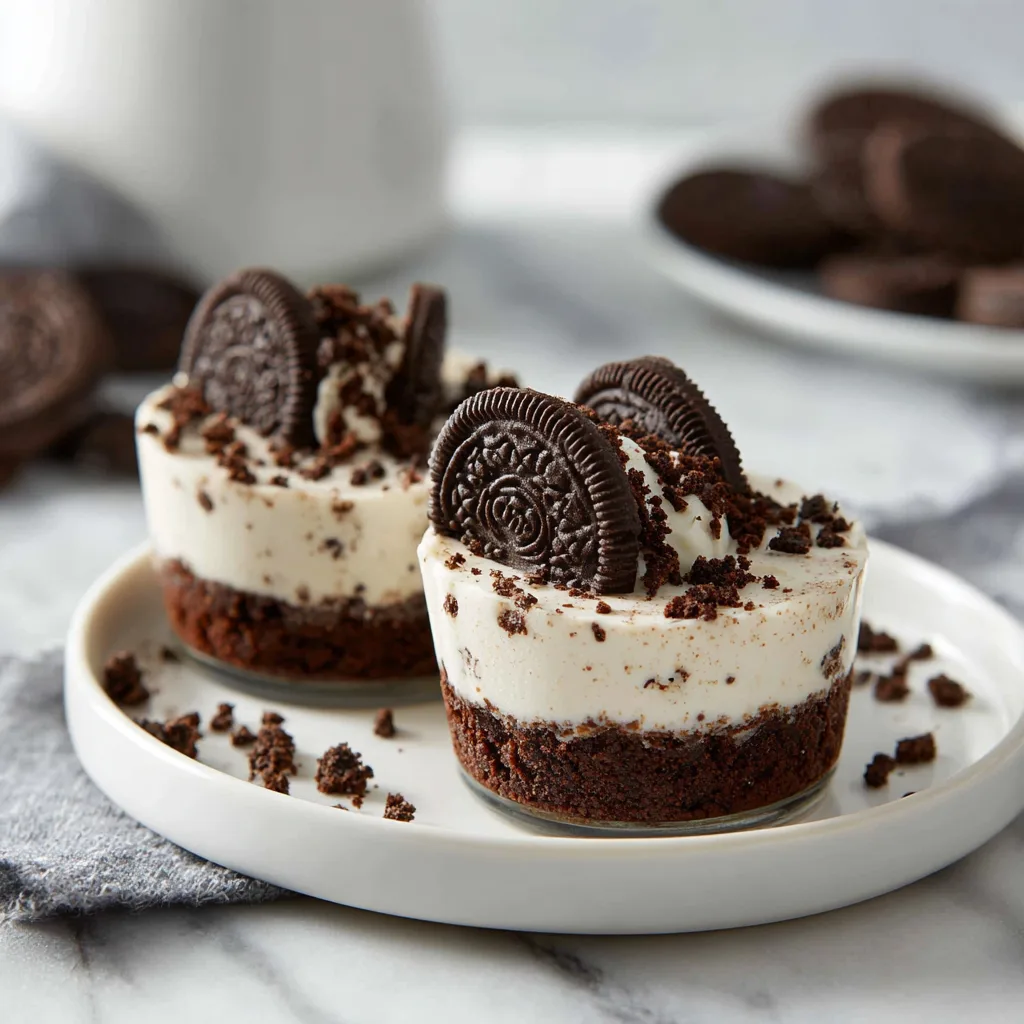
- Layer the cups: Spoon or pipe the cheesecake filling over the Oreo crust. Add crushed Oreos between layers if desired for extra crunch.
- Chill: Refrigerate for at least 2 hours (or overnight for best results) to let the flavors meld and the filling set.
- Garnish & serve: Top with whipped cream, a sprinkle of crushed Oreos, and a whole Oreo cookie for presentation.
Variations & Twists
- Mint Oreo Cheesecake Cups: Add a few drops of peppermint extract and garnish with crushed mint Oreos.
- Berry Swirl: Spoon in a layer of raspberry or strawberry sauce between cheesecake layers.
- Peanut Butter Oreo Cheesecake: Blend 2 tablespoons of peanut butter into the cream cheese mixture.
- Holiday Edition: Use red velvet Oreos and top with festive sprinkles.
No-Bake Oreo Cheesecake Cups
Ingredients
Equipment
Method
- Crush 12 Oreos into fine crumbs and mix with melted butter. Press into the bottom of serving cups.
- Beat cream cheese, powdered sugar, and vanilla until smooth.
- Whip heavy cream with granulated sugar until stiff peaks form.
- Fold whipped cream into cream cheese mixture.
- Layer filling over crust, adding crushed Oreos between layers if desired.
- Chill for at least 2 hours before serving.
- Top with whipped cream, crushed Oreos, and a whole Oreo cookie.
Notes
Serving Ideas
- Serve in mason jars for a rustic touch.
- Make mini versions in shot glasses for parties.
- Double the recipe and serve in a trifle dish for a family-style dessert.
Storage Tips
- Refrigerate covered for up to 4 days.
- Best enjoyed chilled straight from the fridge.
- Do not freeze once assembled (the texture changes), but you can freeze the crust and filling separately before combining.
FAQ
Q: Can I make this ahead of time?
Yes! These cups are perfect for prepping a day ahead.
Q: Can I lighten the recipe?
Swap heavy cream for light whipped topping and use reduced-fat cream cheese.
Q: Do I need a stand mixer?
Nope—hand mixers or even whisking by hand works, though electric tools make it faster.