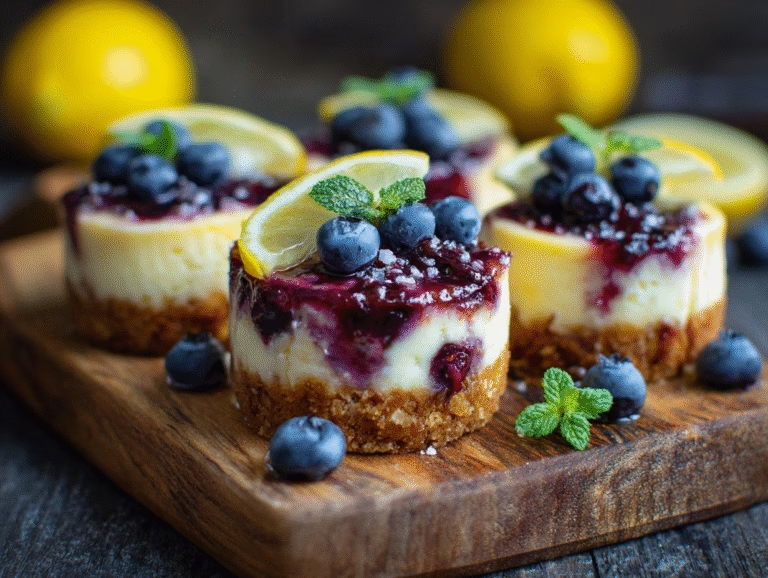
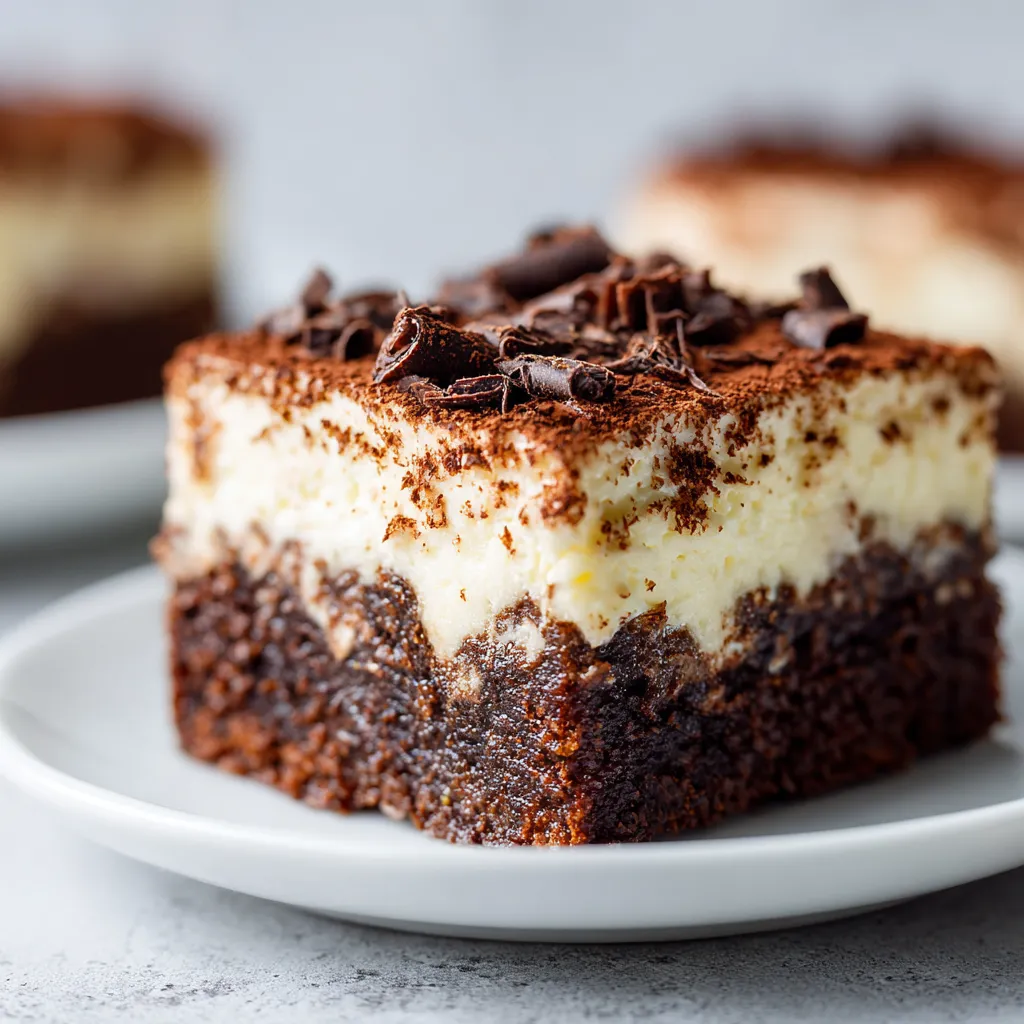
Tiramisu Brownies Recipe: Easy and Tasty Dessert
Ready to make a showstopping dessert? You’re combining the comfort of fudgy chocolate with the café charm of classic tiramisu. This easy recipe starts with a rich espresso brownie base baked in an 8×8 or 9×9 pan.
Poke small holes in the cooled base so a strong coffee soak can seep in. Then layer coffee- or espresso-soaked ladyfingers and top with whipped mascarpone cream.
Use Dutch-process cocoa or real dark chocolate for a deeper chocolate note that stands up to the espresso. Choose instant espresso powder or very strong brewed coffee for a bold coffee presence without watering things down.
Chill the assembled dessert 4–6 hours or overnight for cleaner slices and fuller flavor. Slice cold with a hot, wiped knife for neat edges and serve dusted with cocoa just before plating.
Your New Favorite Mashup: Brownies Meet Classic Tiramisu
Start with a dense, espresso-scented brownie layer and build upward. The fudgy brownie base replaces or augments the usual sponge, so you keep chew and rich chocolate depth while adding the layered elegance of classic tiramisu.
Layer soaked Savoiardi over the cooled base for authenticity. Then spread a whipped mix of mascarpone, heavy cream, and vanilla — this mimics traditional cream without raw eggs.
“A splash of amaretto, rum, Kahlua, or marsala in the coffee soak gives the mashup a café-style lift.”
- You get brownie chew and tiramisu layers in tidy, sliceable squares.
- The espresso-forward base keeps every bite coffee-forward and bold.
- A dusting of cocoa on top balances sweetness and seals the classic finish.
- Mascarpone brings gentle tang so the cream tastes like the real deal, not just whipped topping.
Why You’ll Love These Tiramisu Brownies
You’ll love how a rich chocolate layer meets bold espresso and a light mascarpone cream in every bite.
Contrast is the secret: a fudgy, dense base sits under coffee-spiked ladyfingers and a cloudlike mascarpone cream. The textures play off each other so every square feels both indulgent and airy.
Use Dutch-process cocoa to deepen the chocolate flavor. A touch of instant espresso or very strong brewed coffee cuts sweetness and lifts the chocolate notes. Chill overnight so the layers meld and slice cleanly.
- Guaranteed crowd-pleaser: fudgy, moist squares with a café-style finish.
- Mascarpone-forward cream tastes authentic, not like plain whipped cream.
- Finish with a dusting of cocoa powder as the final topping.
- Small sugar balance keeps it rich but not cloying after chilling.
Tiramisu Brownies
Ingredients
Equipment
Method
- Preheat oven to 350°F (175°C). Grease a 9×9 inch baking pan.
- Prepare brownie batter: In a bowl, combine melted butter and sugar. Beat in eggs and vanilla extract until smooth. Stir in cocoa, flour, salt, and baking powder until fully incorporated.
- Pour brownie batter into the prepared pan, smoothing the top with a spatula.
- Prepare mascarpone filling: In a separate bowl, whisk mascarpone cheese, powdered sugar, vanilla, and espresso until creamy.
- Drop spoonfuls of the mascarpone mixture over the brownie batter. Swirl gently with a knife to create a marbled effect.
- Bake for 28-32 minutes until the brownies are set but still slightly fudgy in the center. Allow to cool completely before cutting into squares.
Notes
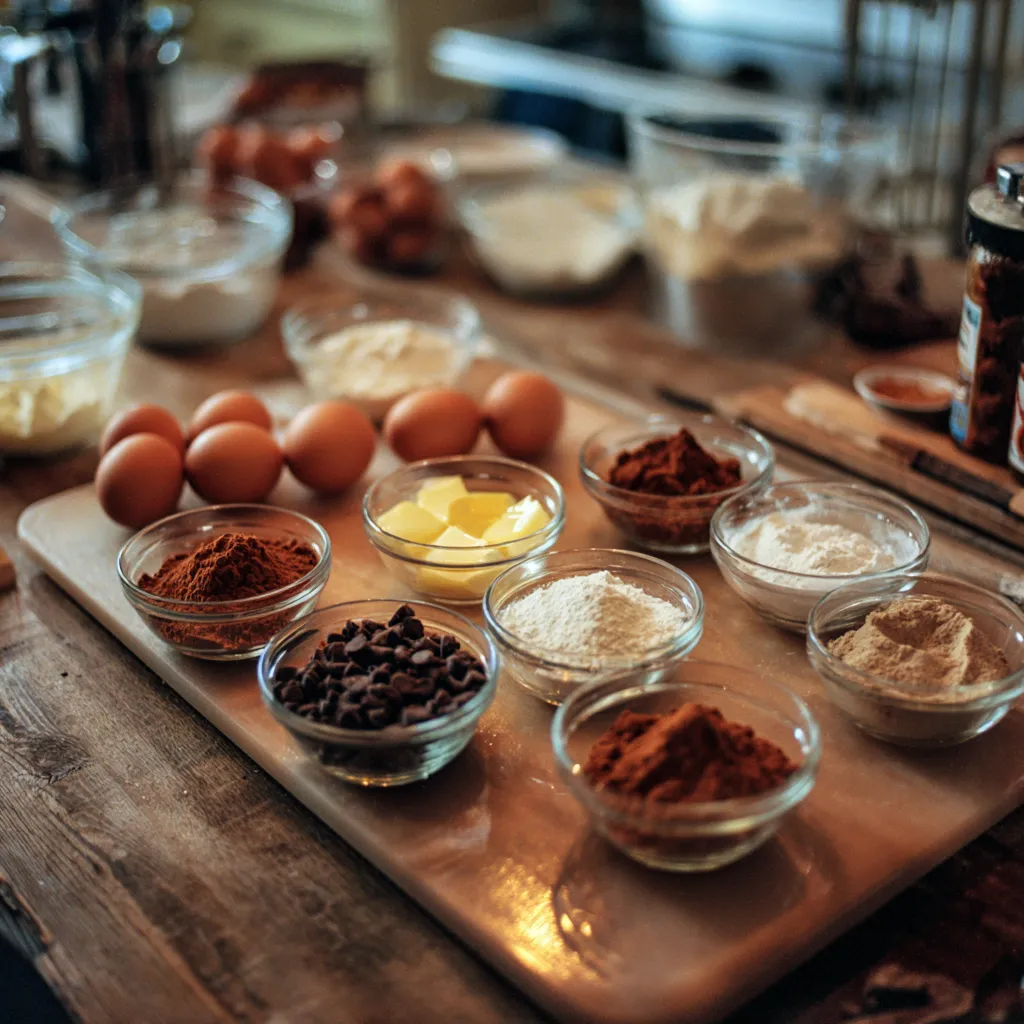
Ingredients: From Espresso to Mascarpone Cream
Quality ingredients set the stage: pick real dark chocolate, Dutch-process cocoa, and full-fat dairy so layers hold and taste bright.
For the fudgy base, gather butter, Dutch-process cocoa, flour, eggs, sugar, vanilla, and a pinch of salt. If you melt chocolate, use a high-quality bar for a smoother, richer melt.
Mascarpone matters: use authentic mascarpone or mascarpone cheese. If the tub looks watery, pour off excess liquid before you whip. Use heavy cream ≥35% fat so the mascarpone cream holds medium-stiff peaks.
For the soak, instant espresso powder gives a stronger coffee hit with minimal liquid. Brew about one cup of strong espresso or very strong coffee for dipping. Optional amaretto, rum, Kahlua, or marsala can be added to taste.
| Component | Key Items | Tip | Estimate |
|---|---|---|---|
| Brownie base | butter, cocoa powder, flour, eggs, sugar, vanilla, salt | Use Dutch-process cocoa and weigh dry ingredients | 8×8 or 9×9 pan |
| Chocolate | Real dark chocolate bar | Not chips—choose high cacao% | 2–4 oz (if used) |
| Mascarpone topping | mascarpone, heavy cream, sugar, vanilla | Drain tub if watery; whip to medium-stiff | 8–10 oz mascarpone |
| Soak & ladyfingers | espresso or strong coffee, Savoiardi (Balocco, DeLallo) | Use ~1 cup strong brew; spike with liqueur if desired | 1 cup coffee, 20–24 fingers |
Tools You’ll Need for the Best Texture
Gather the right tools so every layer sets with bakery-quality texture. Having the right gear speeds prep and helps you hit the ideal temperature and time targets for a consistent result.
Line an 8×8 or 9×9 metal pan with parchment that overhangs. This lets you lift the slab to frost and dust the top cleanly.
- An 8×8 or 9×9 square pan gives even heat for a fudgy center and set edges.
- Use a stand or hand mixer to whisk eggs and whip the mascarpone cream with control.
- Keep at least two large bowls so batter and cream stay separate and you avoid mid-recipe washing.
- A rubber spatula folds batter gently and an offset spatula levels layers to the edges.
- A fine-mesh sieve dusts cocoa or powdered sugar evenly across the top.
- Have a measuring cup and kitchen thermometer ready; preheat your oven to 350°F so the baking starts on the right foot.
- Plan for chill time: allow 4–6 hours in the fridge before slicing for neat squares.
- Use a long, sharp knife and a glass of hot water for warm, clean cuts when serving.
“Good prep and the right tools make slicing and serving feel effortless.”
| Tool | Purpose | Tip | Estimate |
|---|---|---|---|
| 8×8 or 9×9 pan | Holds brownie base and layers | Metal pan gives even heat; use parchment overhang | One pan |
| Mixers & bowls | Whisk eggs and whip cream | Stand or hand mixer speeds whipping; two bowls recommended | 1–2 bowls, 1 mixer |
| Offset spatula & rubber spatula | Level and fold layers | Offset spreads topping evenly to the edges | One of each |
| Fine-mesh sieve & knife | Dust cocoa powder and slice | Sieve creates even dusting; warm knife for clean cuts | One sieve, one long knife |
Step-by-Step: Make, Layer, and Chill
Start simply: preheat your oven to 350°F and line an 8×8 or 9×9 pan so the slab lifts out easily.
Fudgy espresso brownie base
Whisk eggs and sugar, then fold in melted chocolate or Dutch-process cocoa, vanilla, and the dry ingredients to form the brownie batter.
Bake at 350°F for about 18–30 minutes; test early. You’re looking for a dry, shiny top and moist crumbs on the tester.
Ladyfingers dipped in strong coffee
Dissolve espresso powder in a splash of hot water for a lump-free hit of coffee. Brew a strong cup, stir in a little sugar and add a teaspoon or two of liqueur if you wish.
Quickly dip or brush each ladyfinger—don’t soak—and arrange a single layer over the cooled base after poking a few holes for gentle absorption.
Whipped mascarpone cream
Chill your bowl. Beat mascarpone with cold heavy cream, sugar, and vanilla until medium to firm peaks form. Stop before the mixture turns grainy.
Finish and chill
Spread the cream edge to edge, sift cocoa over the top, and chill at least 4–6 hours for clean slices.
Pro Tips for Perfect Mascarpone and Brownie Texture
Controlling warmth in your bowl and room gives you a stable, silky topping every time. Small shifts in temperature change how mascarpone and cream behave, so plan ahead.
Room temperature vs cold: when each matters
Bring mascarpone just cool—not warm—before whipping. If the tub looks watery, drain excess liquid so your topping stays firm.
Keep heavy cream chilled (≥35% fat) and chill the bowl and whisk. This helps the cream reach stable peaks faster without overworking.
Don’t overbake; watch for visual cues
Ovens vary. Rely on a dry, shiny top and a tester that comes out with moist crumbs, not wet batter. This approach protects fudgy texture and avoids dryness.
Stop whipping at the right moment
Whip to medium or just shy of stiff peaks. If the cream looks billowy and glossy, stop—overwhipping leads to split, grainy cream.
Chill, slice, and serve
Allow adequate chill time so layers set. For clean edges, heat a long knife, wipe it dry, and repeat between cuts.
“Let slices sit briefly at room temperature before serving so the layers relax and flavors bloom.”
Flavor Notes and Ingredient Swaps
Before assembling, sample the coffee soak and tweak sugar or alcohol to suit your taste.
Espresso powder intensity: Use instant espresso powder for a true espresso punch. If you only have instant coffee, use about double the amount to match the strength.
Alcohol options: Amaretto adds almond warmth, rum gives depth, Kahlua doubles down on coffee notes, and marsala offers a classic, slightly sweet profile. Alcohol is optional — skip it or use 1/2 teaspoon almond extract for a non-boozy nod to amaretto.
Chocolate and cocoa choices: Dutch-process cocoa lends a smooth, darker cocoa character. For layered complexity, blend cocoa with melted dark chocolate so you get both bittersweet depth and silky richness.
Vanilla and mascarpone: Add pure vanilla extract or paste for warm aromatic sweetness that won’t mask the coffee. Keep mascarpone as your cream base — it preserves the authentic tiramisu note and avoids the tang you get from cream cheese.
“Taste the coffee soak before dipping: slightly sweet, clearly coffee-forward, and pleasantly aromatic.”
- Adjust espresso powder up for bold coffee flavor or down for a lighter background note.
- Record any swaps in your recipes notebook so your favorite variation is easy to repeat.
Tiramisu Brownies
Bright twists—like hazelnut swirls or extra espresso—turn this dessert into your signature. Try one variation or mix two ideas to suit your taste. These swaps keep the core layers while adding new texture and flavor.
Creative variations: Nutella, mocha, boozy, extra espresso
- Nutella swirl: Swirl 1/2 to 3/4 cup into the brownie batter for hazelnut-chocolate depth.
- Mocha topping: Fold 3–4 oz melted dark chocolate into the mascarpone cream so the topping echoes the base.
- Boozy soak: Add 1–2 tbsp Kahlua or dark rum to the coffee soak for a warm, adult note.
- Extra kick: Stir another teaspoon of espresso into the batter for barista-level intensity.
- Finish ideas: Double-dust with cocoa powder—light before chilling and fresh just before serving.
“A little salt, a little liqueur, or a bold coffee tweak can change everything.”
| Variation | Main Add-in | Effect |
|---|---|---|
| Hazelnut swirl | Nutella (1/2–3/4 cup) | Rich, nutty ribbons through the brownie |
| Mocha | Melted dark chocolate (3–4 oz) | Chocolate echo in the mascarpone cream |
| Boozy soak | Kahlua or dark rum (1–2 tbsp) | Warm, aromatic lift to the layers |
| Extra espresso | Espresso (extra 1 tsp) | Stronger coffee profile in the brownie base |
How to Serve and Style Like a Pro
Serve each square with a careful dusting of cocoa and a few simple garnishes to make the dessert sing.
Dust the top generously with cocoa powder using a small sieve just before plating. This keeps the powder velvety and stops it from absorbing moisture.
Use a bowl of warm water to heat and wipe your knife between cuts. For events, pre-slice and wipe the blade so every square looks clean and intentional.

Create texture by piping small mounds of mascarpone cream or making swoops with an offset spatula. Mascarpone holds shape when whipped correctly, so add height and contrast.
Add thin chocolate curls, a few fresh berries, or a light drizzle of chocolate sauce for color and extra chocolate flavor.
“Pair each serving with a demi cup of strong coffee or an affogato to complete the café experience.”
| Finishing Step | Tool | Why it Works |
|---|---|---|
| Even cocoa dusting | Small sieve | Creates a professional, velvety powder layer |
| Piped cream | Piping bag or spoon | Adds height and creamy contrast with mascarpone |
| Garnish | Grater or peeler | Shavings boost aroma without weighing slices down |
Storage, Make-Ahead, and Freezing Tips
Smart storage keeps the cream stable and the brownie base fudgy. Store assembled bars in an airtight container in the refrigerator for 3–5 days; flavor often peaks on day two.
Chill overnight when you can — that extra time improves slices and helps flavors meld. Before serving, bring bars to room temperature for 30–60 minutes so the fudgy base softens.
Ahead-of-time plan: bake the brownie base up to three days before and keep it at room temp wrapped tight. Add the mascarpone cheese topping the day you serve to avoid texture loss.
- Avoid freezing the mascarpone layer — high fat dairy and heavy whipping can split when frozen.
- Freeze only the unfrosted brownie base up to three months. Wrap in plastic, then foil, and thaw overnight in the fridge.
- Keep any leftover coffee soak refrigerated and discard after a couple of days; don’t re-dip.
- If your fridge is crowded, place bars on a flat tray to prevent smudging and for easy in/out access.
“Label containers with the date and portion count so you can plan servings without guesswork.”
Use high-fat heavy cream and correct sugar ratios when you finish the topping. That keeps the cream stable through the storage window and gives you neat, café-style slices.
Troubleshooting Common Issues
If a batch doesn’t turn out as expected, small fixes usually save the day. Start by checking visual cues and simple tests before changing ingredients or technique.
Dry or dense base
If the base tastes dry, bake by sight, not only by minutes. Look for a shiny, dry top and test with a toothpick—moist crumbs mean done.
Oven temperatures vary. If your oven runs hot or you use a dark pan, start checking several minutes earlier to avoid overbaking. A pinch of salt can boost chocolate, but measure carefully so salt doesn’t make dryness worse.
Runny mascarpone cream
Runny mascarpone cream often comes from a watery tub or overwhipping. Drain any clear liquid from the cheese before you whip.
Whip the cold cream to soft peaks, then fold into mascarpone gently. If the mixture loosens, chill the bowl and whisk briefly and try again.
Too-firm bars after chilling
If chilled bars feel rock-hard, temper them at room temperature for 20–40 minutes until the brownie yields slightly to pressure. This brings flavors forward and softens texture.
Use a warm, clean knife for slicing to avoid tearing layers.
- Dissolve espresso powder in hot water before adding so you don’t get streaks.
- Keep notes on your oven‘s behavior and adjust baking minutes next time.
| Issue | Likely Cause | Quick Fix |
|---|---|---|
| Dry or dense base | Overbaked; oven runs hot | Check visual cues; reduce minutes; test for moist crumbs |
| Runny mascarpone cream | Watery cheese or overwhipping | Drain tub; whip to peaks; chill bowl and whisk to re-thicken |
| Bars too firm after chilling | Fully chilled, cold serving | Let sit at room temperature until slightly soft; use warm knife |
“Small adjustments in minutes and temperature often fix the biggest problems.”
Conclusion
A short chill makes the difference between a messy square and a polished café-style slice.
Follow the winning combo: a fudgy espresso brownie base, coffee-soaked ladyfingers, and whipped mascarpone cream. Bake the brownie at 350°F until a tester shows moist crumbs, drain any watery mascarpone, and whip the topping to medium or stiff peaks.
Chill assembled bars at least 4–6 hours, or overnight for best texture. Dust with cocoa powder just before serving and slice with a hot, wiped knife for clean edges.
Store chilled for 3–5 days or freeze only the unfrosted brownie base. With these steps you can confidently make tiramisu brownies that taste luxurious and look effortless.
FAQ
How do I keep the mascarpone cream from becoming runny?
Use full-fat mascarpone cheese and cold heavy cream. Whip the cream to soft-medium peaks, then gently fold it into room-temperature mascarpone. Stop whipping once the mixture holds shape; overwhipping makes it grainy, while underwhipping leaves it loose. Chill for at least 1 hour to set.
Can I use instant espresso powder instead of brewed coffee for the soak?
Yes. Dissolve 1–2 teaspoons of espresso powder in 1/2 cup hot water for a concentrated soak. Brush or dip quickly so the cake layer soaks evenly without becoming soggy. You can also add a splash of amaretto, rum, or Kahlúa for extra flavor.
What’s the best way to get a fudgy base instead of cakey?
Use a higher fat-to-flour ratio: more butter or oil and less flour. Fold melted dark chocolate into the batter, avoid overmixing once you add flour, and bake until moist crumbs cling to a toothpick. Remove from oven a couple minutes early since carryover heat finishes the set.
How do I dust the top with cocoa without ruining the look?
Use a fine-mesh sieve and sift a thin, even layer of Dutch-process cocoa shortly before serving. Hold the sieve a few inches above the surface and tap gently for a delicate finish. If transporting, wait to dust until just before plating.
Can I make the layered dessert a day or two ahead?
Absolutely. You can assemble up to 24–48 hours ahead and refrigerate covered. The flavors meld nicely, but the base can soften a bit. For best texture, chill for at least 4 hours and bring to cool-room temperature 20–30 minutes before serving.
Is it okay to use store-bought ladyfingers or should I make my own?
Store-bought ladyfingers work well and save time. Choose sturdy, slightly dry ones so they absorb coffee without disintegrating. Homemade fingers offer a lighter, fresher texture but require more effort.
How do I prevent the cream from separating when folding mascarpone and whipped cream?
Ensure mascarpone is at room temperature so it blends smoothly. Fold gently using a spatula in a slow figure-eight motion to preserve air. If the mascarpone is too cold, it can clump; too warm and it may loosen the whipped cream.
Can I freeze the dessert, and which part freezes best?
You can freeze the brownie layer tightly wrapped for up to 3 months. Fully assembled with cream freezes less well because the texture changes. If freezing a whole assembly, freeze before dusting cocoa and thaw overnight in the fridge.
Why did my base become dry even though I followed the recipe?
Overbaking is the usual culprit. Ovens vary—check a few minutes early and look for moist crumbs on a toothpick. Also verify your measuring: too much flour or too little fat can dry the batter. Use room-temperature eggs and avoid substituting low-fat ingredients.
How warm should ingredients be for best results?
Bring eggs and mascarpone to room temperature for smooth blending. Butter or melted chocolate should be warm but not hot when mixed with eggs to avoid scrambling. Heavy cream for whipping should be very cold to reach firm peaks.
Can I swap vanilla extract for something bolder?
Yes. Try a splash of amaretto or a teaspoon of espresso extract for a mocha lift. Vanilla balances sweetness, but nutty or coffee liqueurs pair beautifully with chocolate and mascarpone flavors.
How do I slice neat squares without smudging the layers?
Chill the assembled dessert until firm. Warm a sharp knife under hot water, wipe dry, and make clean vertical cuts in one motion. Repeat warming between slices for smooth edges.
Any tips for reducing sugar without losing texture?
Reduce granulated sugar slightly and replace some sweetness with dark chocolate of good quality. Mascarpone and whipped cream cushion texture, but avoid large sugar cuts that alter batter structure or the cream’s stability.
What cocoa powder should I use for best flavor?
Dutch-process cocoa gives a mellow, deep chocolate note and blends well with espresso. Natural cocoa offers brighter acidity. Choose based on your preferred chocolate profile and the intensity of the coffee component.